Set up project templates in Design Collaboration - Exercise
Within a project template, you can set up the settings for Design Collaboration. This involves setting up the shared folder location, organizing team structures, assigning roles and permissions, and enabling DWG file compatibility.
How to set up the project template in Design Collaboration
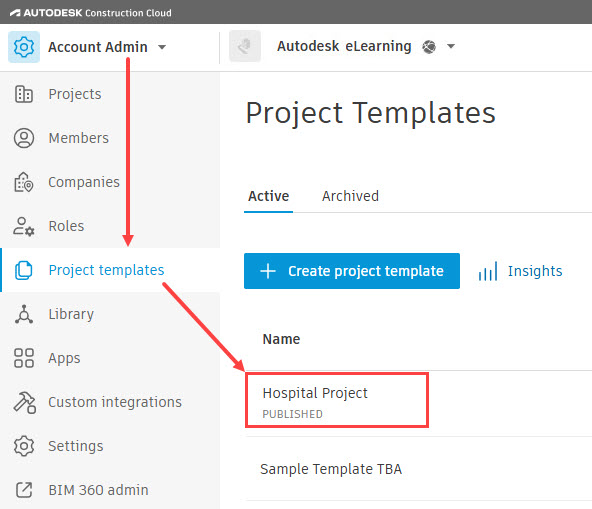
- In the Account Admin product, select the Project templates tool, then select the project template from this list.
- In the product selector, select Design Collaboration.
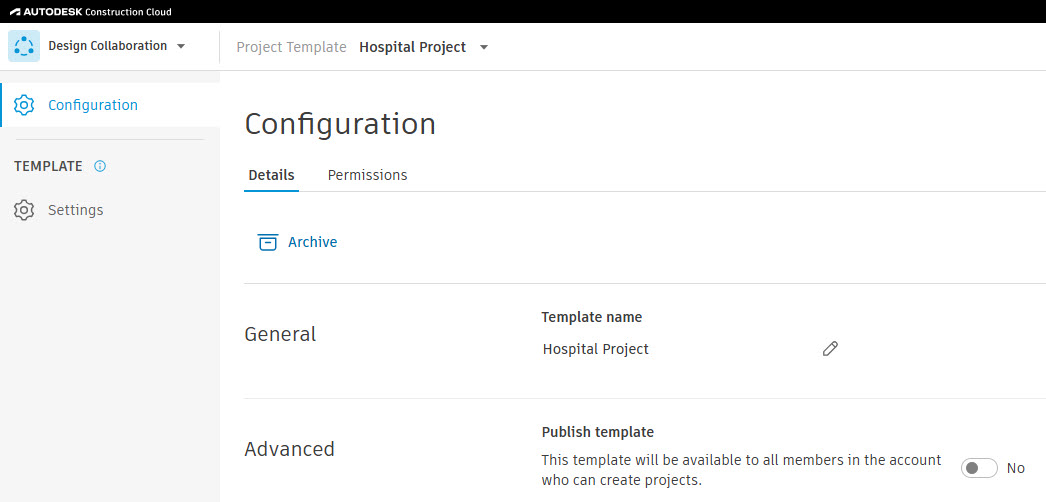
- You will be sent by default to the Configuration page, where you will have access to the Details and Permissions tabs. You will also see both the Configuration and Settings tools along the left side.
Details tab
The Details tab allows members to archive the project template, rename the project template, and publish the project template for anyone in the hub to use the project template to create new projects.
How to archive the project template
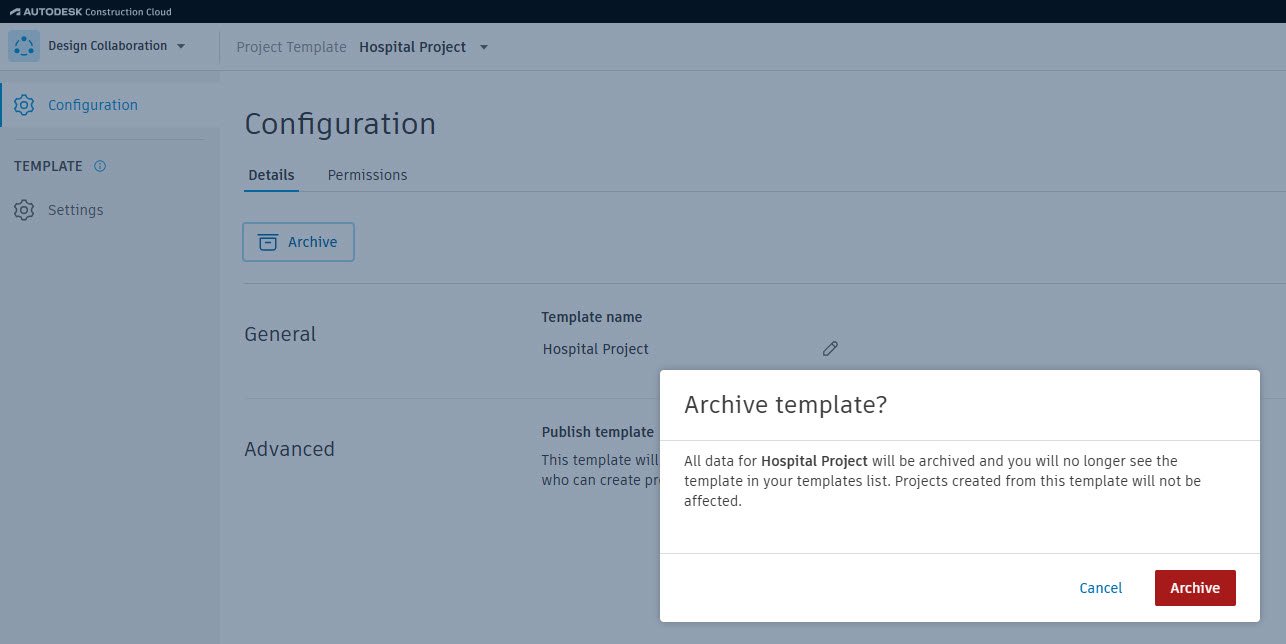
- On the Details tab, verify that the correct project template is selected at the top of the page.
- Click Archive.
- In the Archive template? dialog box, click Archive.
How to restore a project template
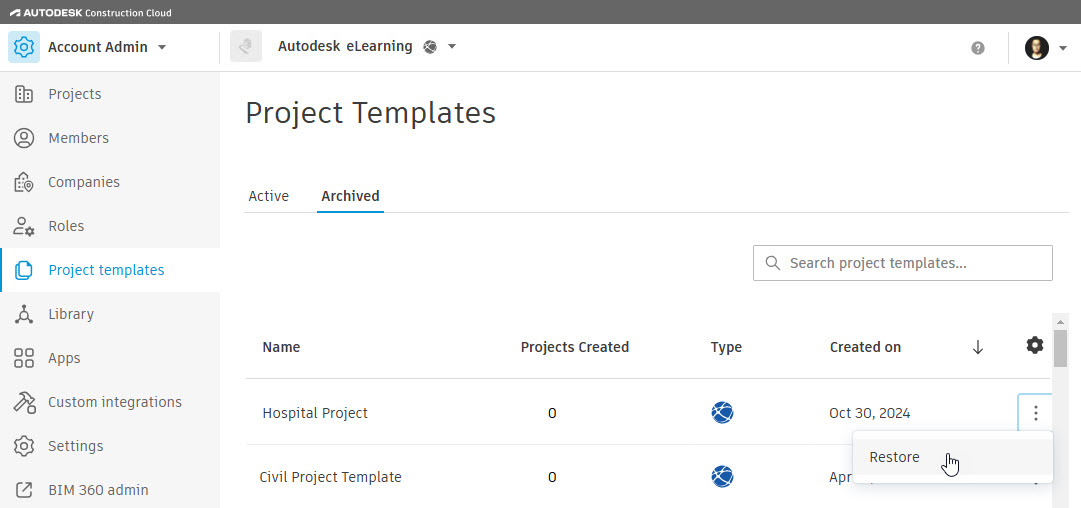
- In the Account Admin product, select the Project templates tool.
- On the Project Templates page, select the Archived tab.
- Click the ellipsis next to the project template you would like to restore and click Restore.
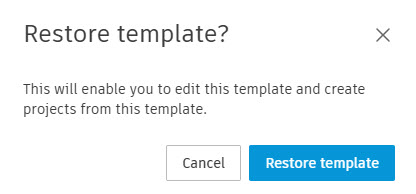
- In the Restore template? dialog box, click Restore template.
How to edit the project template name
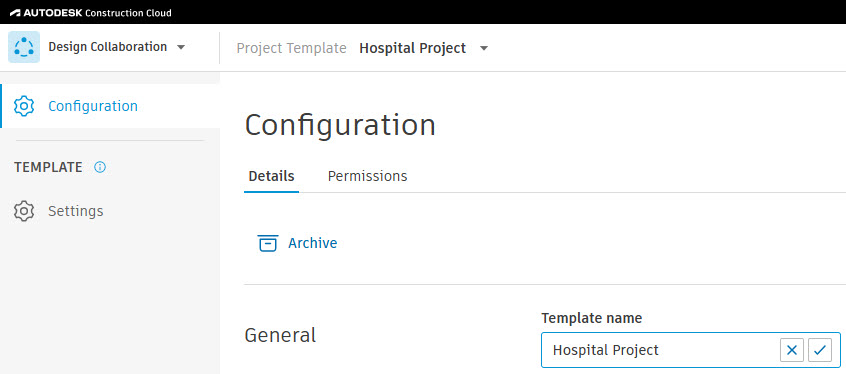
- On the Details tab, in the General section, click the pencil icon next to the template name.
- Edit the template name and click the checkmark icon when finished.
How to publish the project template
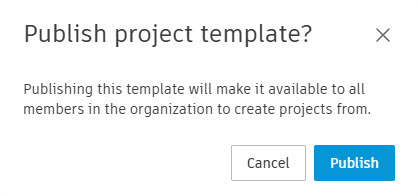
- On the Details tab, in the Advanced section, click the Publish template toggle to change it to Yes. By default, this is toggled to No.
- In the Publish project template? dialog box, click Publish.
Permissions tab
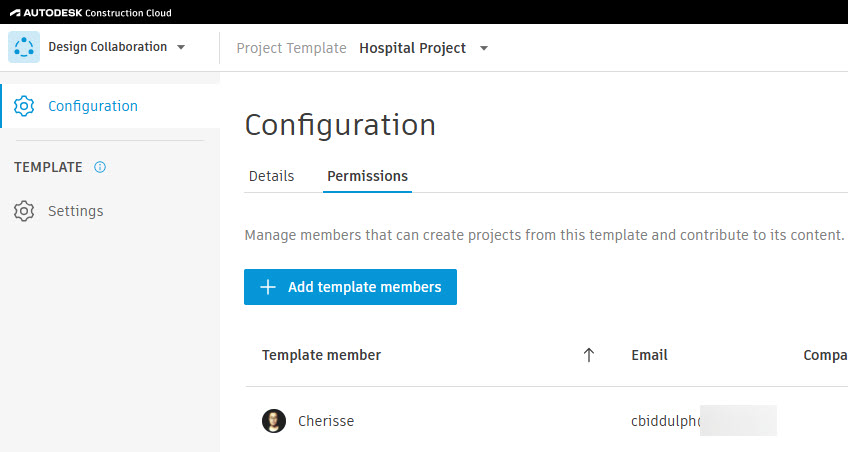
The Permissions tab allows you to add, edit, or remove template members who can create a project using this template.
How to add template members to a project template
- On the Permissions tab, click Add template members.
- In the Add template members dialog box, enter members’ email addresses, then select the Company, Role, Access level, and Project access.
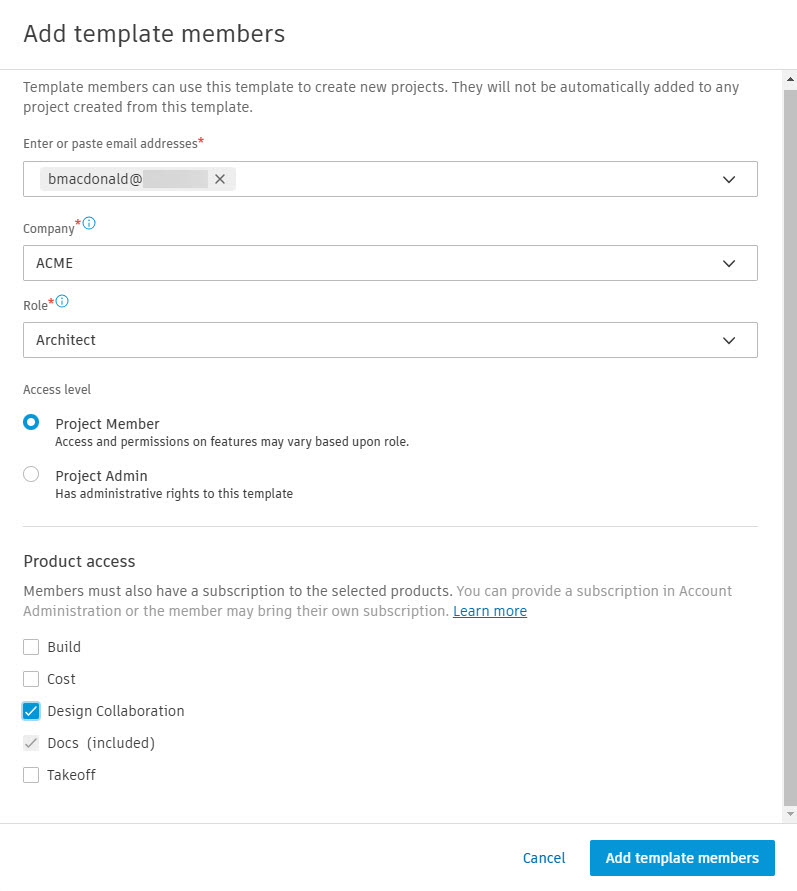
- When finished, click Add template members.
How to remove template members from a project template
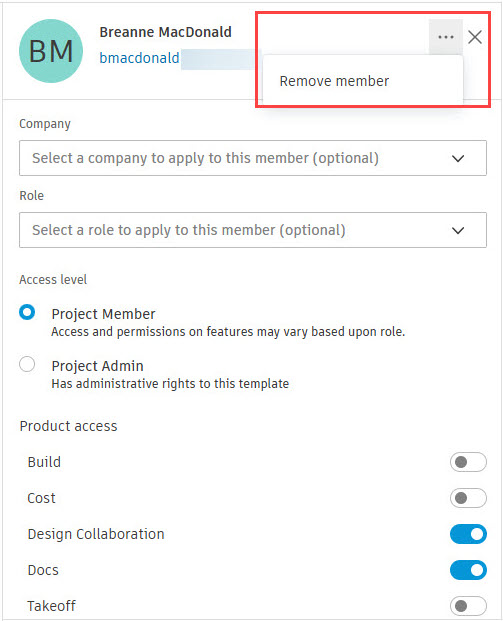
- On the Permissions tab, click on the template member’s name.
- In the template member’s flyout, click the ellipsis in the upper-right corner and select Remove member.
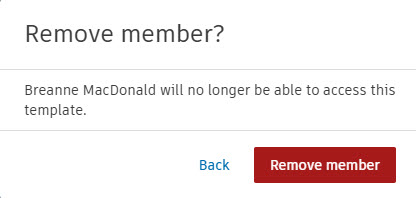
- In the Remove member? dialog box, click Remove member.
Settings tool
The Settings tool allows you to specify folder structure, roles, and team settings for a project template.
How to set the shared folder for a project template
- Select the Settings tool. In the Welcome to Design Collaboration Templates dialog box that displays, click Get started.

- Under Select Shared folder location, you can accept the default location, which is the Project Files/Shared folder, or you can specify a different folder by clicking on the pencil icon to edit the location.
- In the Select existing folder to use as Shared folder dialog box, you can either expand the Project Files folder to navigate to the folder you want to use as the shared folder for the project or click Go to Docs to create a new folder to use. Once you select the folder, click Select.
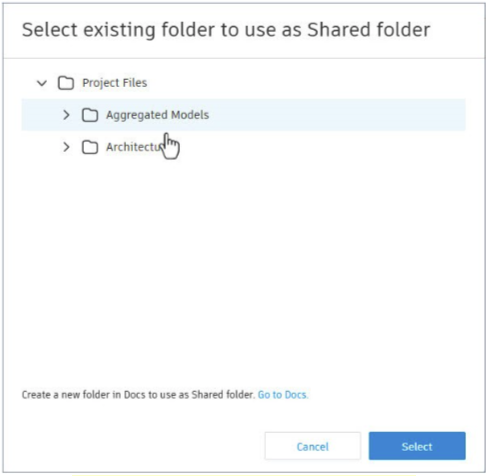
- If you want to revert to using the default folder after selecting a different folder, click Use default location under Select Shared folder location.

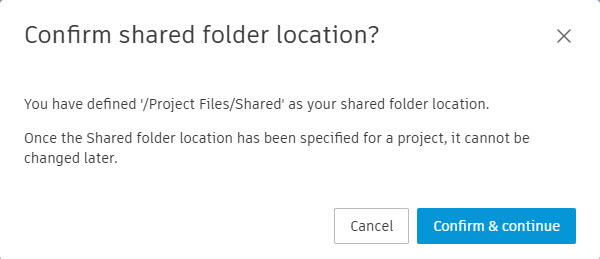
- Click Next in the lower-right corner of the Shared Folder tab, then in the Confirm shared folder location? dialog box, click Confirm & continue. It is important to understand that you cannot change the shared folder location once you complete this step.
How to configure teams for a project template
The following are the ways that you can configure teams.
Method 1: Set up Project Files subfolders when creating teams
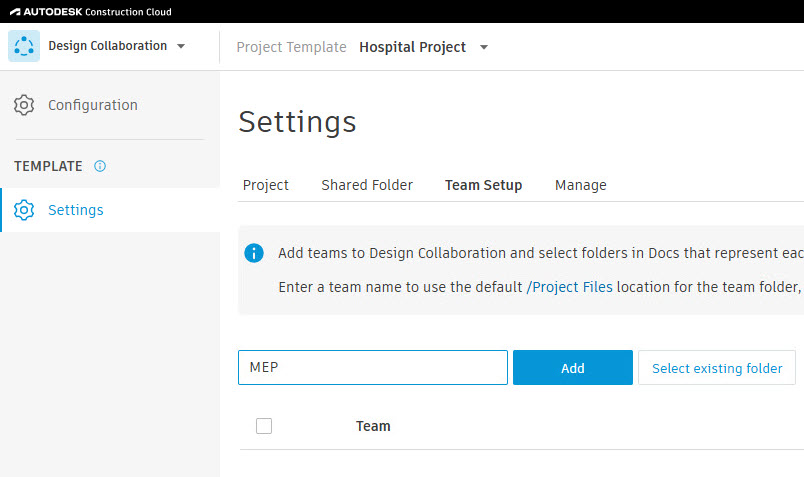
- In the Settings tool, select the Team Setup tab.
- Click in the box that says Enter a team name, enter a name, and click Add.
Method 2: Create teams from existing folders
- In the Settings tool, select the Team Setup tab.
- Click Select existing folder.
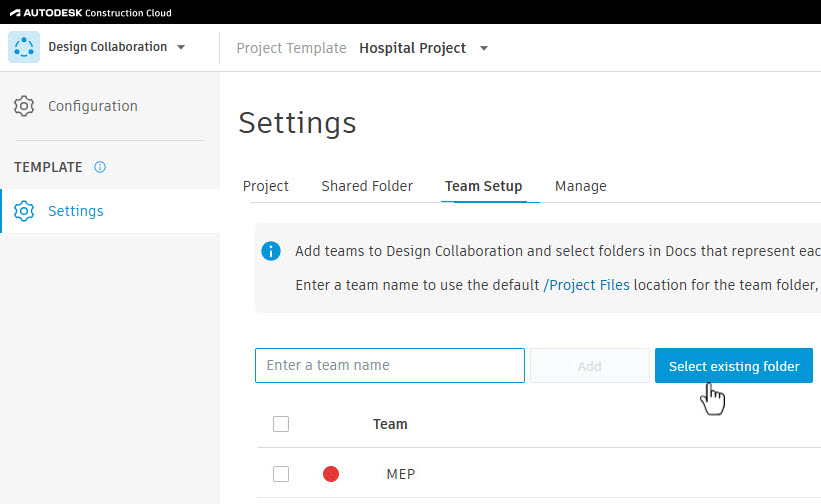
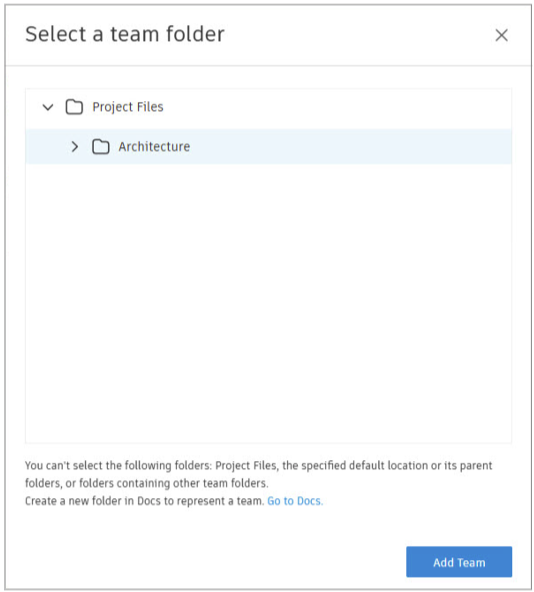
- In the Select a team folder dialog box, expand Project Files and select the folder you want to use to create the team. Note: The folder you select cannot already be associated with a team.
- Click Add Team.
How to verify the shared and consumed folders were created
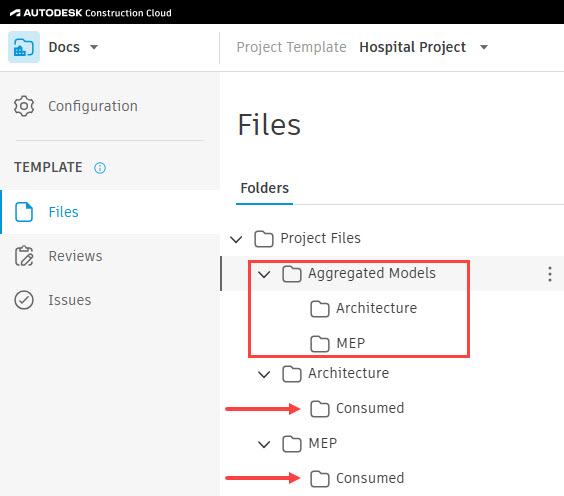
- To verify the Consumed and Shared folders were created for the added teams, switch to the Docs product and select the Files tool.
- Expand the Project Files folder and you will see the new folders created during team setup. Expand each team folder to see a new subfolder called Consumed. Expand the Shared folder to see the new team subfolders.
How to add team members and assign permissions for a project template
Before adding team members through the Team Setup tab, the roles, companies, and members must already be established in the project.
- In the Settings tool, select the Team Setup tab.
- In the Members column, click on the number for the team name you want to add members to.
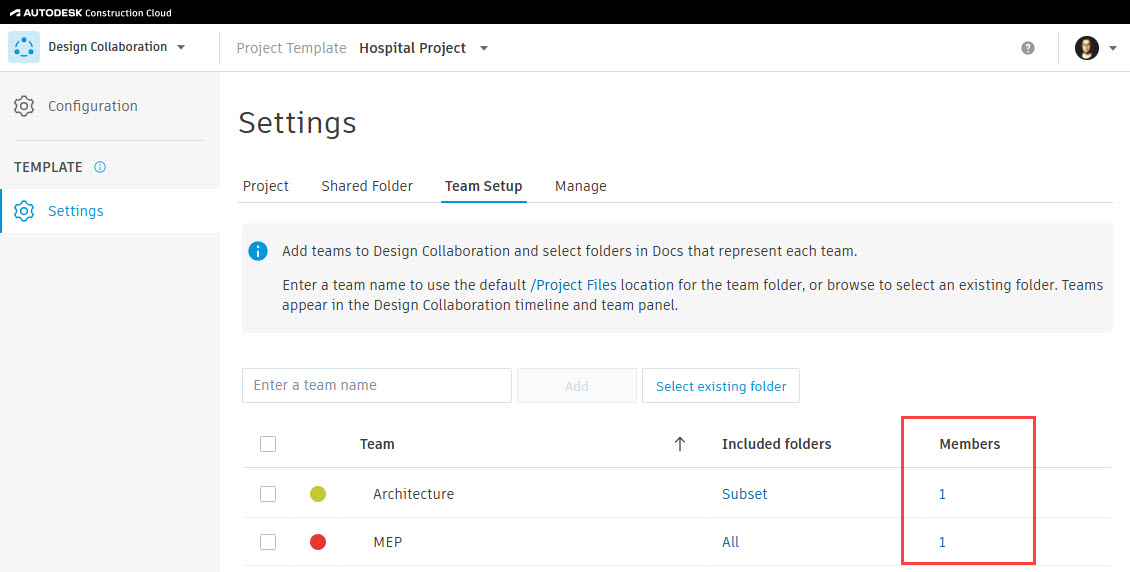
- Alternatively, you can check the checkbox next to the team name and click Manage team members at the bottom of the teams list.
- In the Manage members of <folder name> dialog box, you can enter a name, company, or role, then click on Permission level to expand the options. Select a level of permission and click Add.
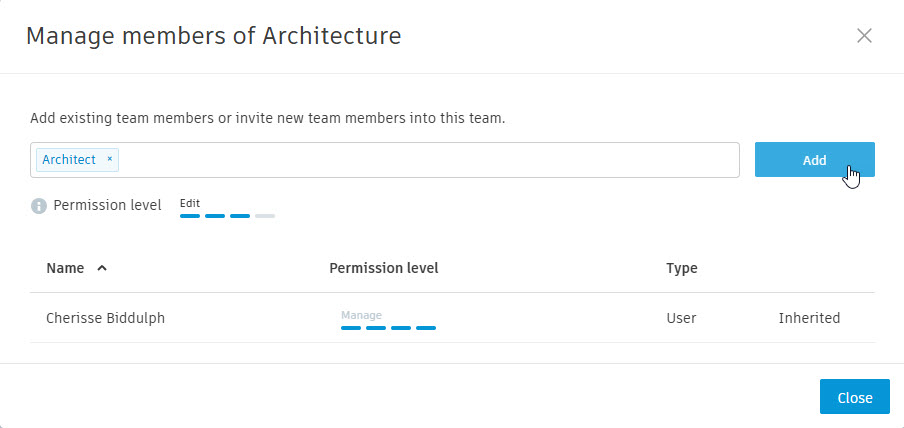
Note: Project administrators will automatically be added to each team and will display as Inherited in the Manage members dialog box. Anyone whose permissions were added in the Docs>Project Files folder will also display as Inherited. This permission setup gives the user inherited permissions for any subfolder under the Project Files folder. Adding users and permissions to the Project Files folder can only be done within the Docs product and not through the Team Setup tab in Design Collaboration.
- After members are added in the Manage members dialog box, you can edit their permissions or remove them by clicking Remove.
- Click Close when you are finished adding members.
How to manage DWG support for a project template
- In the Settings tool, select the Manage tab.
- In the DWG file support section, toggle DWG support on or off.

When DWG support is turned on, DWG files can be viewed in the team space and used in package workflows and change analysis. However, if a large number of DWG files exist in one team space, you may experience performance issues. If DWG support is turned off, DWG files cannot be used within the Design Collaboration team space. By default, DWG support is turned on.
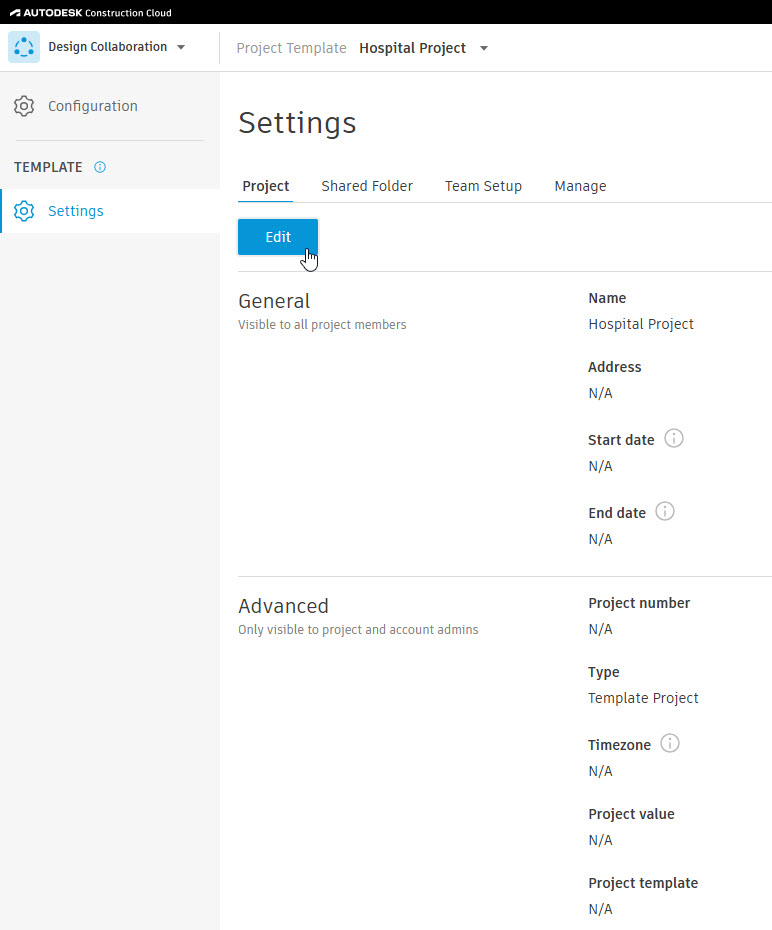
Project tab
The Project tab contains the General and Advanced project template information. This will be used when creating a new project. You can click Edit to edit each category or leave it as is and let the project administrator who creates a project using this template fill it out themselves.
