Create Teams and Move Subscriptions
When you purchase a contract or subscription for the first time, a new team is automatically created using the account admin’s name. It is the job of the primary admin to manage subscriptions and user organization, as well as delegate admin tasks. With larger companies, it may be necessary to group your users and subscriptions into multiple teams in order to manage them more efficiently.
Teams is a tool within Autodesk Account that allows admins to keep subscriptions and users in separate lists. Teams can help you organize subscriptions and users according to company divisions, projects, work, or any other organizational need. You can also use teams to organize your usage data across larger organizations, delegate admins to manage specific teams of users, track renewals back to teams, and analyze product usage by team.
- All subscriptions and users will automatically be placed in the account’s default team.
- You can rename the initial team or create a new team at any time and move subscriptions and users as needed.
- There can only be one primary admin per team, but the same person can be the primary admin for more than one team.
- Because users can belong to more than one team, you must always be aware of which team you are working in.
- Currently, it is not possible for any admins to delete a team from your account using team settings. The primary admin should move all subscriptions to a different team, then contact Autodesk support to have the team deleted.
Creating Teams
How to Create a New Team
Note: You cannot delete newly created teams so it is important to decide how you want to separate users and subscriptions before beginning.
- Sign in to Autodesk Account at manage.autodesk.com.
- In the navigation panel>User Management section, select By User.
- Click
 (Team settings) in the upper-right corner.
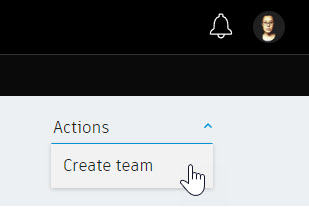
- In the upper-right corner of the team settings page, expand Actions and select Create team.
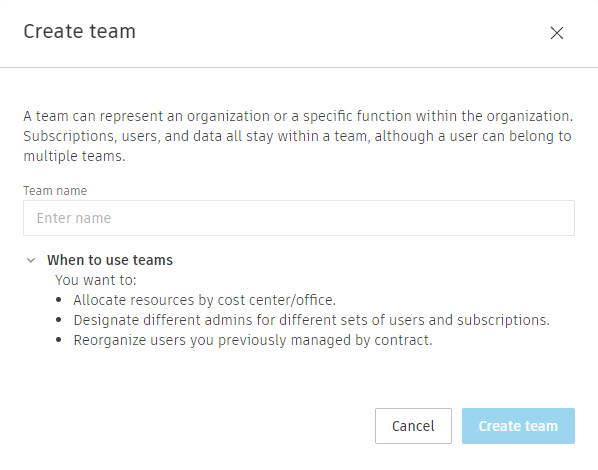
- In the Create team dialog box, enter a name for the team and click Create team.
- A dialog displays that your new team is ready. You can choose to Invite users or Move subscriptions, or click Do this later to come back to this.
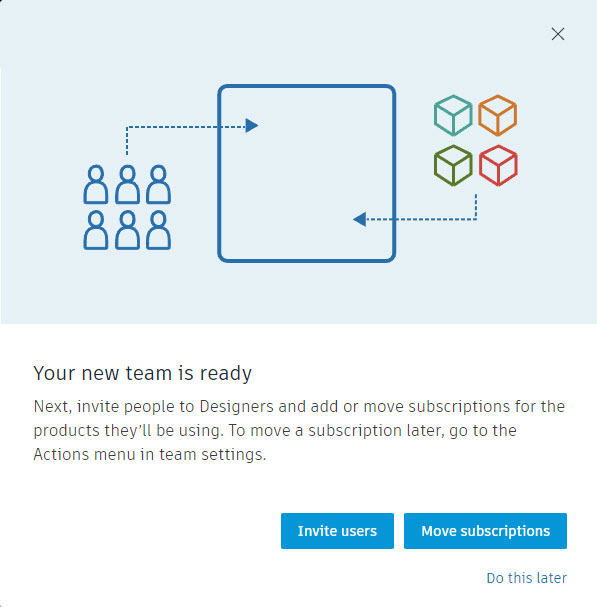
- Clicking Invite users will take you to the User Management by User page, where you can verify the created team is displaying at the top, then click Invite users to begin the process of adding users to the team (this will be detailed in the next unit).
- Clicking Move subscriptions displays a Move Subscription to team <Team name> page with a list of all the available contracts. You will then select a subscription to move, review the selection, and submit (this is detailed in a later section). If successful, you will get a confirmation that the subscription has been moved.
- Clicking Do this later takes you back to the team settings page.
How to Rename a Team
- In the navigation panel>User Management section, select By User.
- Verify that the team you want to rename is selected in the Team drop-down menu.
- Click (Team settings) in the upper-right corner.
- The settings for the selected team will display. Click Rename to rename the team.

Moving a Subscription to a Different Team
Only the subscription owner can move a subscription to a different team. Moving a subscription doesn’t move the users or assignments. Users who were assigned to the product in the previous team aren’t moved automatically with the subscription. For more information about assigning and unassigning users, refer to Autodesk Account user management.
Note: Only unassigned seats can be moved to a different team. Refer to Unassign users by product for steps on how to make seats available before moving them.
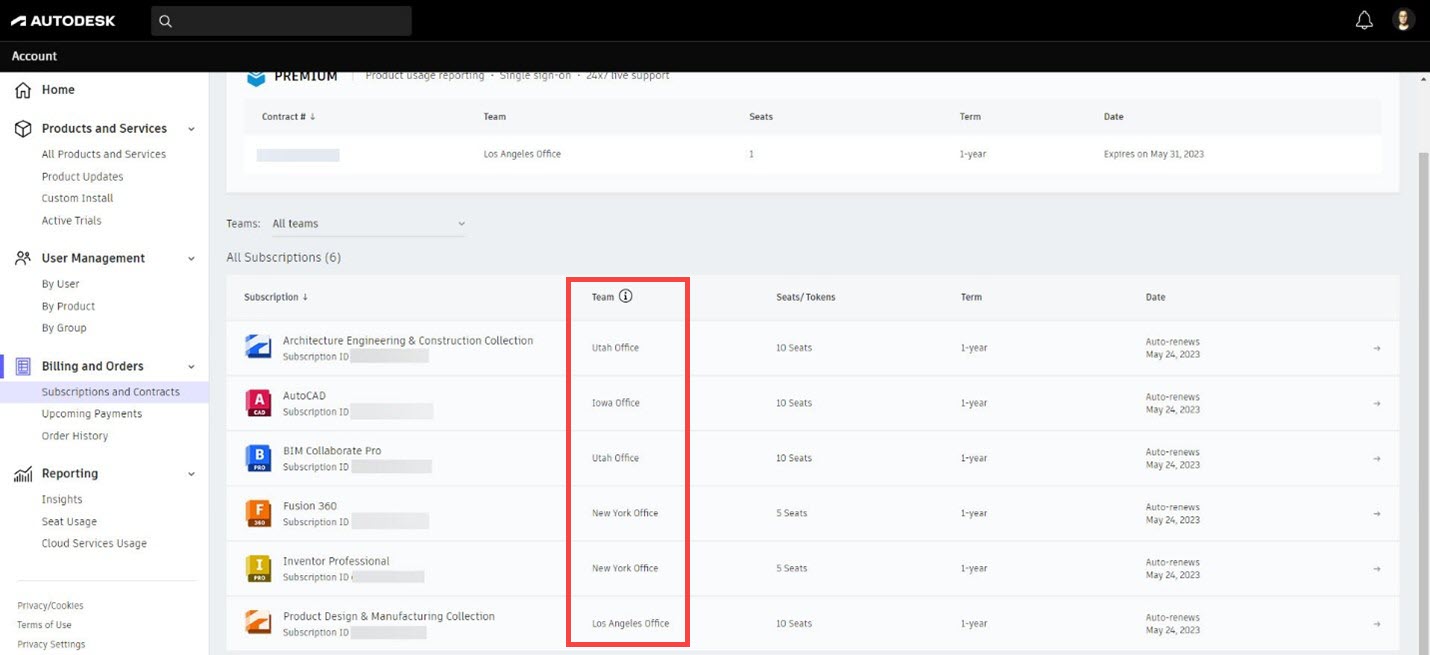
To determine which team a subscription belongs to, go to the Subscription and Contracts page. In the All Subscriptions list, the Team column indicates which team each subscription belongs to.
How to Move a Subscription
- In the navigation panel>User Management section, select By User.
- At the top of the page, verify you are in the correct team. If not, expand the Team drop-down menu and select the correct team.
- Click (Team settings) in the upper-right corner.
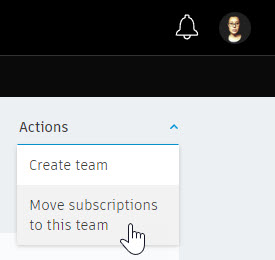
- In the upper-right corner of the team settings page, expand Actions and select Move subscriptions to this team.
- Find the subscription you want to move and click Select.
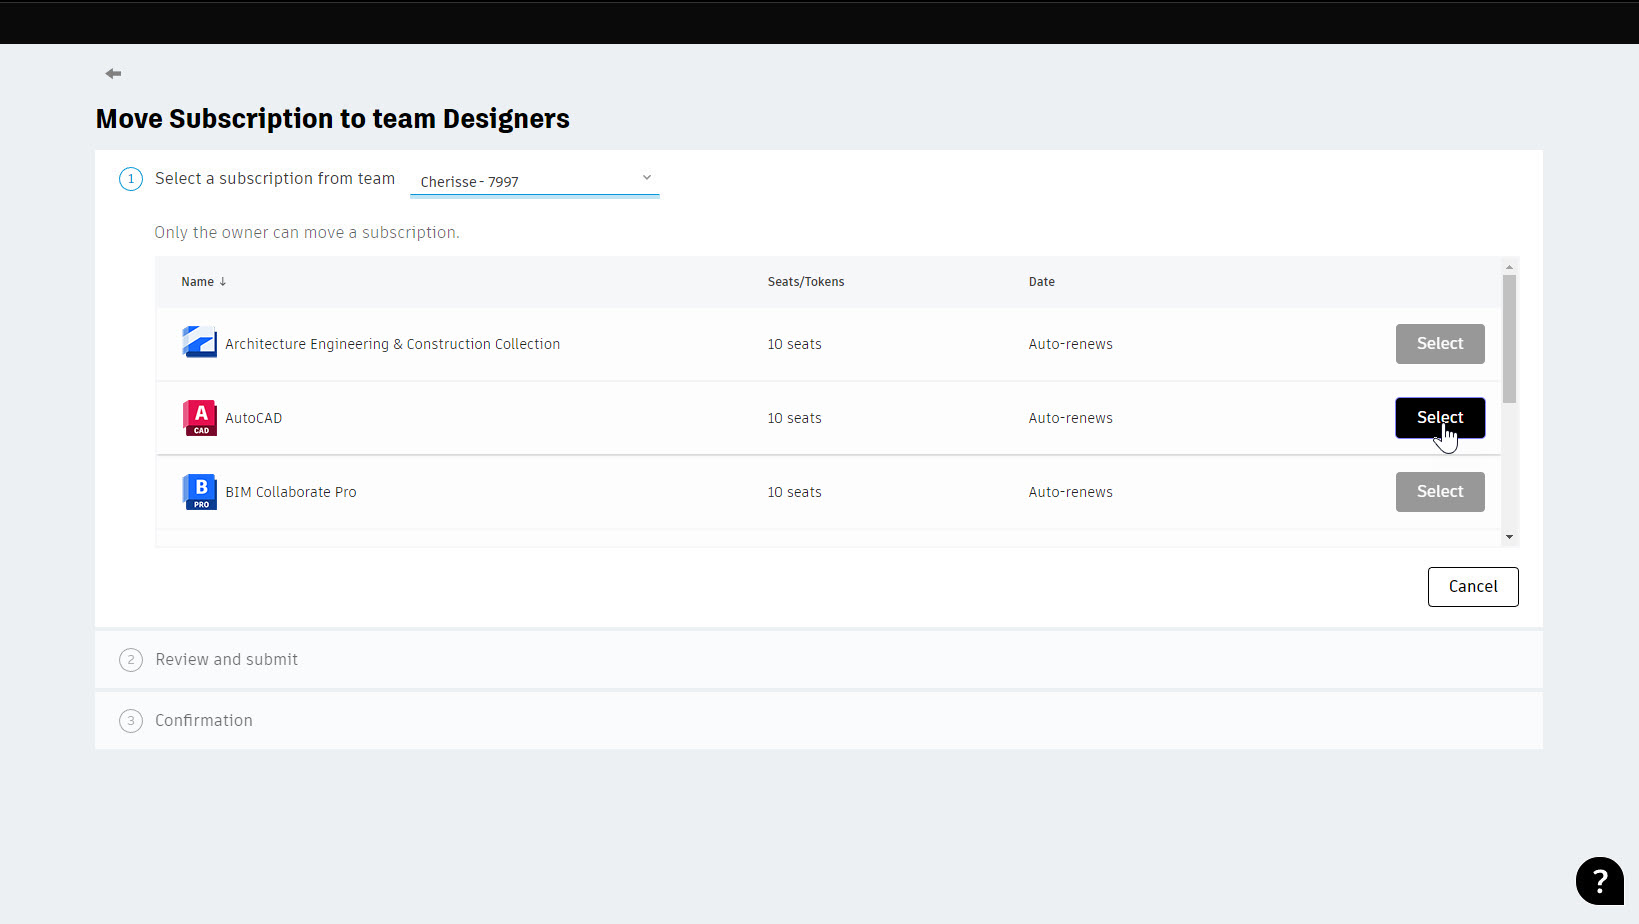
- Note: If moving the subscription will result in over-assigned seats, the Select button is dimmed. Hover over the button to see how many seats you need to unassign, then unassign those seats.
- If there is a BIM 360 site, Autodesk Construction Cloud (ACC) site, or PlanGrid site associated with the subscription, you will need to request that Autodesk support move the contract for you.

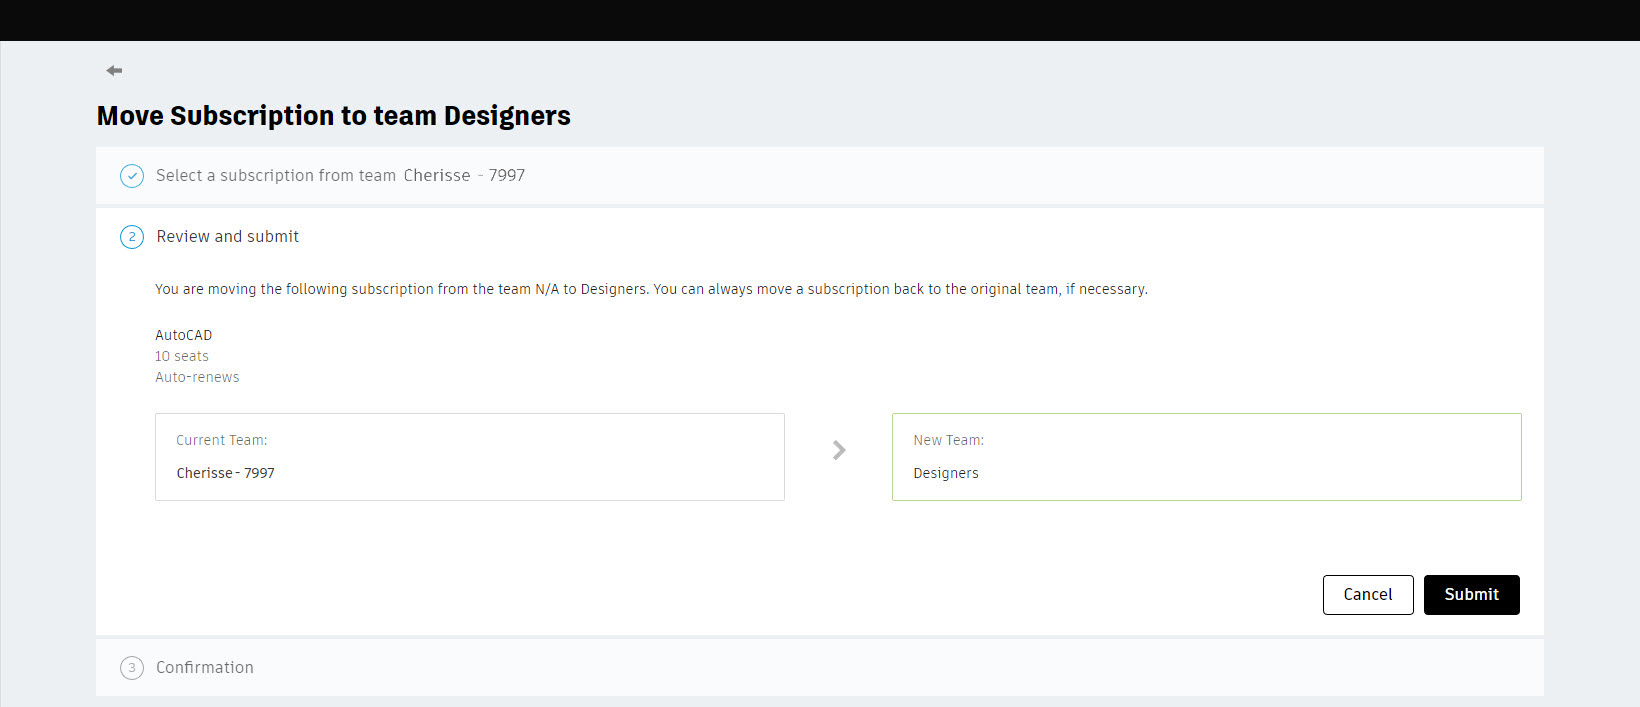
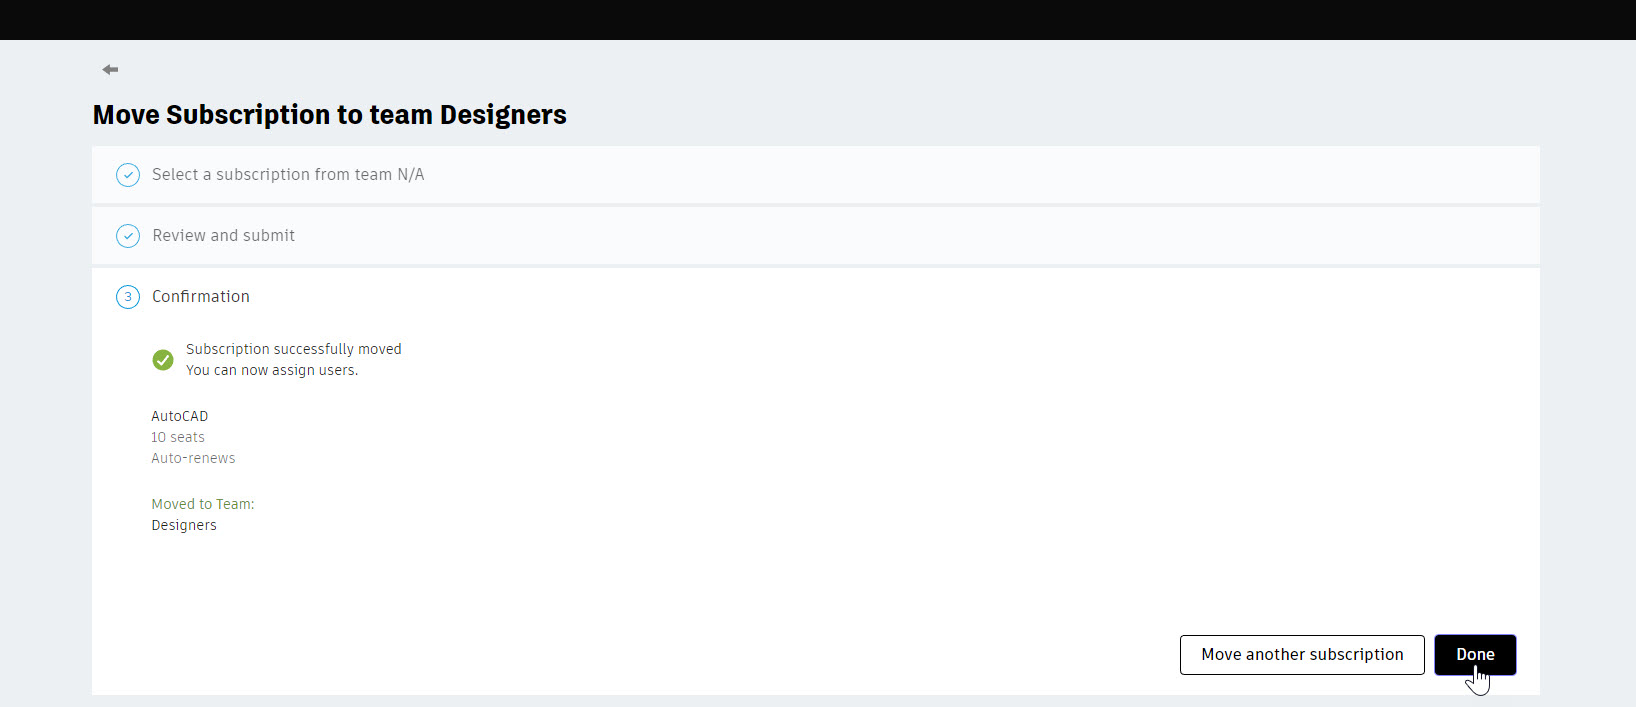
- Review the selection and click Submit.
- Click Done to close the window.
When to Contact Support to Move a Subscription
If any of the following cases apply to your subscription, you will need to contact Autodesk support to move the subscription to a different team:
- You are not the contract manager (subscription owner).
- You have a Pay Per Use subscription.
- You have a Premium plan and SSO is enabled.
- The subscription is associated with a BIM 360 site, Autodesk Construction Cloud (ACC) site, or PlanGrid site.
Flex Tokens and Teams
Like any subscription, when you purchase Flex, a new subscription is added to the default team and tokens from the purchase are added to the team’s token balance. Flex tokens closest to expiration are consumed first.
If you manage multiple teams, check that the Flex subscription has been added to the correct team after each purchase. If it is not, move the Flex subscription to the desired team. When moving a Flex subscription, all remaining tokens with the same subscription ID are moved to the new team.
For more information on Flex, refer to How to set up Flex.
Getting Support for Managing Team Subscriptions
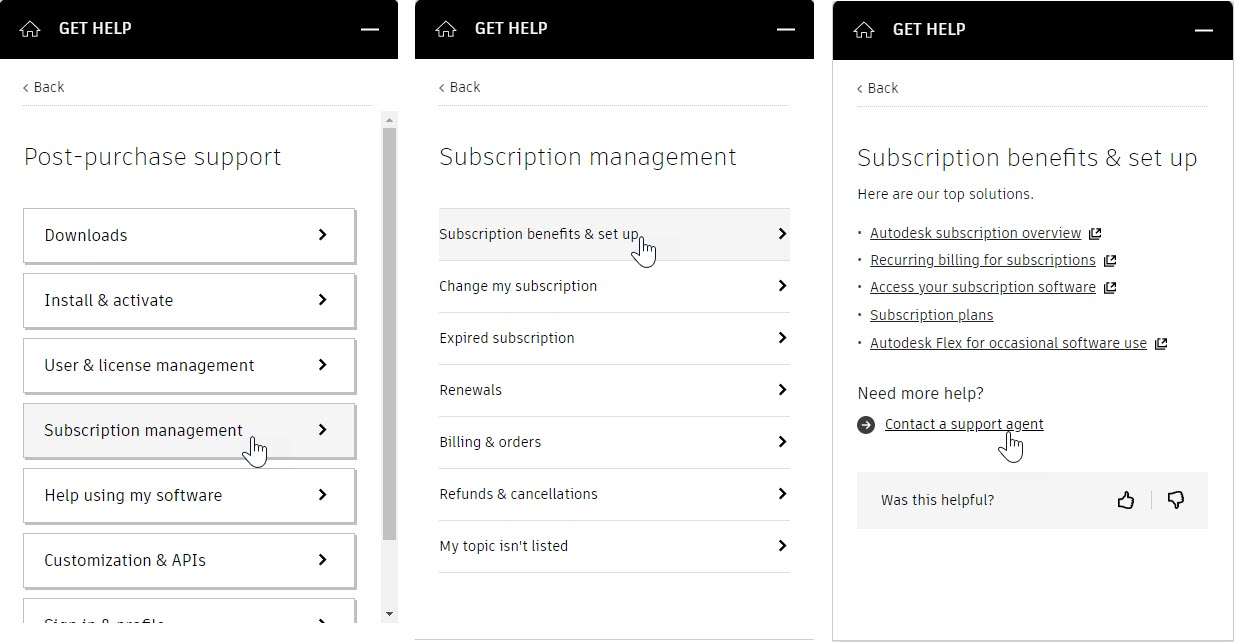
If you have any issues or questions about your teams, you can click the  icon in the lower-right corner to access the Get Help menu. Select Post-purchase support > Subscription management > Subscription benefits & set up. You can review the Knowledge Network articles or click Contact a support agent for further help.