00:00
MARTHA HOLLOWELL ORCUTT: Developing
00:02
the Analytical Model in Revit, Checking Member Releases.
00:06
When you are preparing a Revit model
00:07
to be transferred to Robot or other structural analysis
00:10
programs, you need to review the structural member releases
00:14
to verify that they are correct.
00:16
Default releases can cause problems
00:19
with the stability of the model and should
00:21
be specified directly depending on the structural behavior
00:24
of the specific member.
00:26
In this video, we will review how you check
00:29
the analytical member releases.
00:32
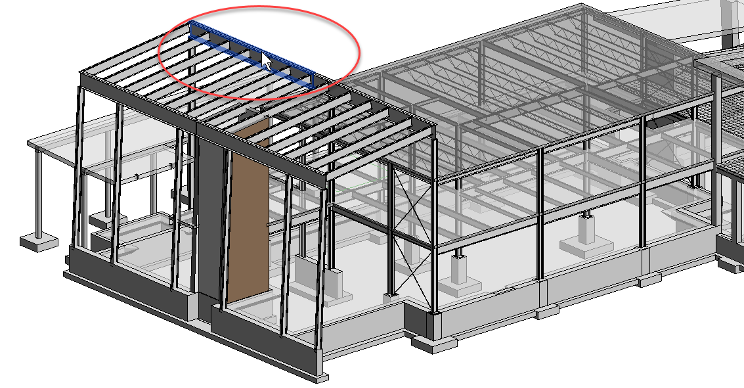
I'm working in the small medical center project,
00:35
and in the 3D view, I'm going to zoom in and select
00:38
a structural framing member.
00:40
You can choose multiple elements,
00:41
but they have to be the same type--
00:43
all beams, for example, not beams and braces.
00:47
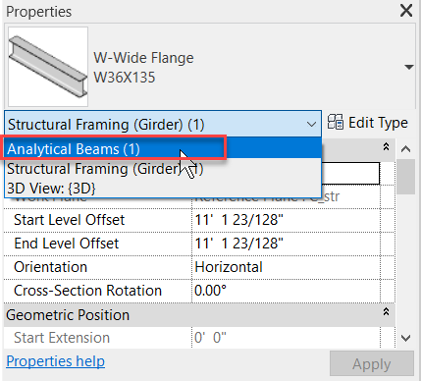
Now, in Properties, I'm going to expand the list
00:51
and specify specifically the analytical beam part.
00:55
This is one way to verify you're working
00:57
with the analytical elements in a model.
01:00
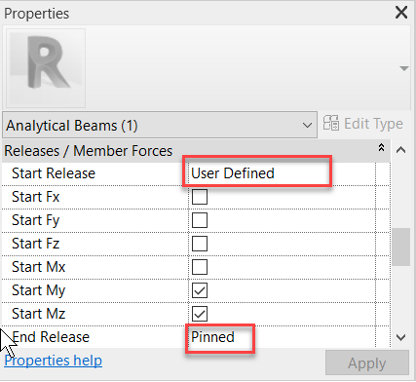
Next, I'm going to scroll down to the Releases Member Forces
01:04
area, and you can see that I can modify
01:07
the specific forces to release their degree of freedom.
01:12
My end release is set to pend in this example.
01:17
Now I want to open the analytical model
01:19
and select that same beam you can see here.
01:25
I have the same information that's showing up here
01:28
in my Properties, as well.
01:32
Now, let me zoom in on this beam,
01:34
and I'm going to change so that I
01:36
have my thin lines off so I can see
01:39
the colors a little bit better.
01:41
And now you can see, here's this beam,
01:43
and I have the end of my beam and the start
01:46
of my beam color coded.
01:50
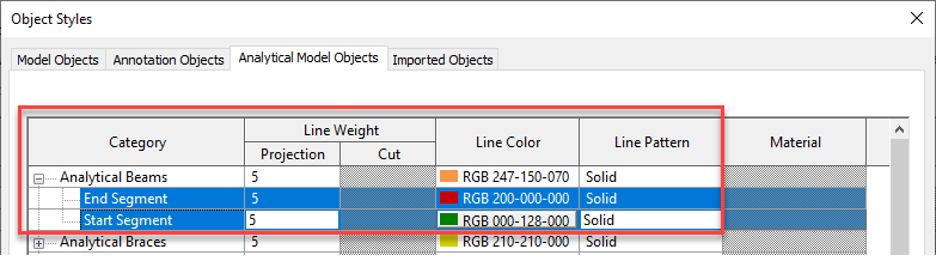
This color coding is set up in visibility graphics,
01:53
so I'm going to type VV to open the Visibility Graphic dialog
01:59
box, and on the Analytical Model Categories tab,
02:03
I can expand Analytical Beams and see the end segments.
02:08
I'm going to click on Object Properties,
02:11
and now I can see that the colors for the end
02:13
is set to red and the start is set to green.
02:22
You want to work through each of the elements
02:24
and verify that the start and end releases match
02:27
the need of the model before you export
02:30
the file to Robot or other structural analysis programs.


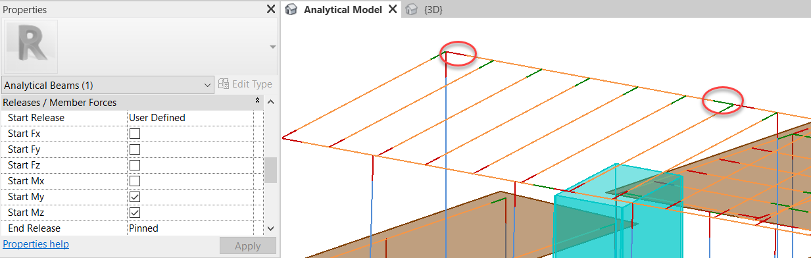
 Segment and Start Segment are options, as shown below