| |
| |
Completion Time: 30 Minutes
|
Completion of the Panel Layout Annotation and Reports Lesson.
| |
Objective: In this exercise, you add balloon labels to panel footprints and create a panel report. You complete the following steps:
> Insert a balloon for a component.
> Add a second balloon, without a leader, for the component nameplate.
> Insert a balloon, assigning item numbers where needed.
> Extract a panel Bill of Material report and place the table in the drawing.
|
| |
1: If the Project Manager is not displayed, on the Project tab, Project Tools panel, click Manager.

|
| |
2: If Panel_Layouts_NFPA is the active project, skip to step 5. If it is open but not active in the Project Manager, do the following:
■ Right-click Panel_Layouts_NFPA.
■ Click Activate.
■ Skip to step 5.
|
| |
3: In the Project Manager, click Open Project.
|
| |
4: Browse to where you installed the exercise files and select Panel_Layouts_NFPA.wdp. Click Open.
|
| |
5: From the Projects list, click the expansion node next to Panel_Layouts_NFPA to expand the drawing list.
|
| |
6: Right-click Panel_Layouts_NFPA_10.dwg. Click Open.
|
| |
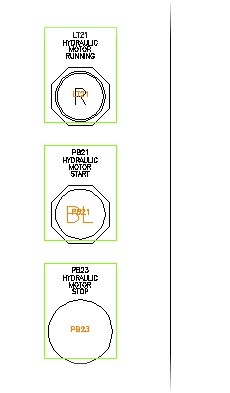
7: Zoom in to the operator station front layout.
|
| |
8: On the Panel tab, Insert Component Footprints panel, click Balloon.

|
| |
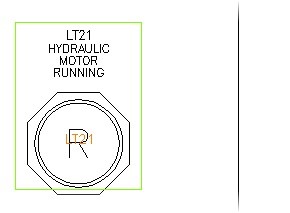
9: Select the LT21 light footprint.
|
| |
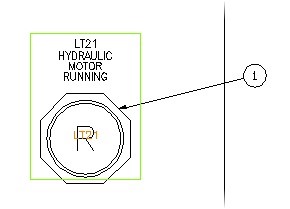
10: Click in the upper-right corner of the LT21 footprint to set the leader start.
|
| |
11: Click to create a second point to the right of the footprint and to continue the leader.
|
| |
12: Press ENTER to insert the balloon.
|
| |
13: Insert a Balloon Without a Leader:
On the Panel tab, Insert Component Footprints panel, click Balloon.

|
| |
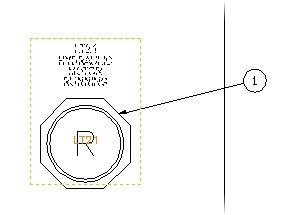
14: Select the nameplate footprint for LT21.
|
| |
15: Click to create an insertion point for the second balloon to the right of the first balloon that you inserted.
|
| |
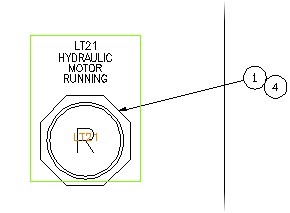
16: At the [Enter]=balloon only, no leader prompt, press ENTER.
|
| |
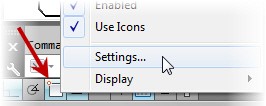
17: On the status bar, right-click Object Snap. Click Settings.
|
| |
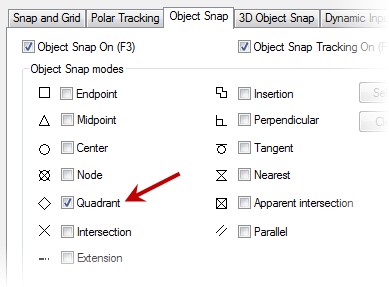
18: In the Drafting Settings dialog box, do the following:
■ Select Object Snap On (F3).
■ Select Quadrant.
■ Clear all other Object Snap mode check boxes.
■ Click OK.
|
| |
19: On the Home tab, Modify panel, click Move.

|
| |
20: Select the item 4 balloon. Press ENTER.
|
| |
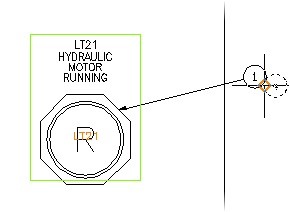
21: At the Specify Base Point prompt, click the left quadrant of the item 4 balloon.
|
| |
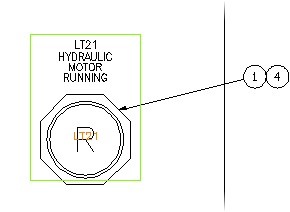
22: At the Specify Second Point prompt, click in the right quadrant of the item 1 balloon.
|
| |
23: On the status bar, click Object Snap to turn it off.
|
| |
24: Insert a Balloon and Assign an Item:
On the Panel tab, Insert Component Footprints panel, click Balloon.

|
| |
25: Select the PB21 push button footprint.
|
| |
26: Click in the upper-right corner of the PB21 footprint to create the leader insertion point.
|
| |
27: Click to create a second point to the right of the footprint. Press ENTER.
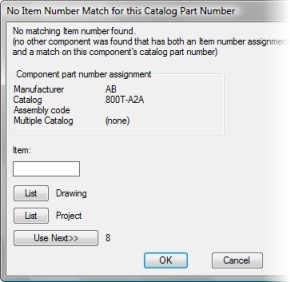
Because an item number is not assigned to this footprint, the No Item Number Match for This Catalog Part Number dialog box is displayed.
|
| |
28: For Drawing, click List.
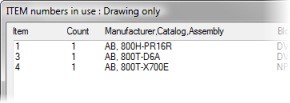
A list of footprints in the drawing and assigned item numbers is displayed.
|
| |
29: In the Item Numbers in Use: Drawing Only dialog box, click Cancel.
|
| |
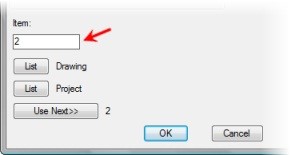
30: In the No Item Number Match dialog box, for Item, enter 2
|
| |
31: Click OK.
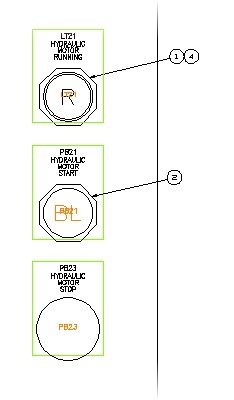
|
| |
32: On the Panel tab, Insert Component panel, click Balloon.

|
| |
33: Select the PB23 push button footprint.
|
| |
34: Click in the upper-right corner of the PB23 footprint to set the leader start.
|
| |
35: Click to select a second point to the right of the footprint to continue the leader.
|
| |
36: Press ENTER to insert the balloon.
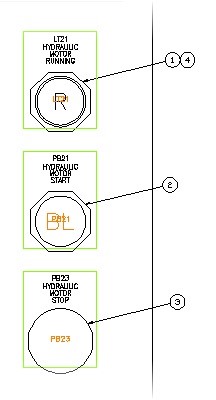
|
| |
37: Create and Insert a Panel Report:
On the Reports tab, Panel panel, click Reports.

|
| |
38: In the Panel Reports dialog box, do the following:
■ Under Report Name, select Bill of Material.
■ Click Active Drawing.
■ Click OK.
|
| |
39: If requested, in the Qsave dialog box, click OK.
|
| |
40: In the Report Generator dialog box, click Put on Drawing.
|
| |
41: In the Table Generation Setup dialog box, click OK.
|
| |
42: Place the Bill of Material table in an empty area in the lower-right area of drawing.
|
| |
43: In the Report Generator dialog box, click Close.
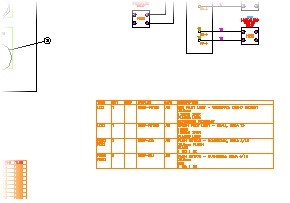
|
|

