00:03
So for this session, we're going to look
00:05
at bringing a point cloud into Civil 3D
00:07
and utilizing that point cloud to create things like a surface
00:12
brake lines and points to be used with inside civil 3D.
00:18
So there's a couple of different methods for doing so.
00:21
You can create a 10 surface from your points
00:22
within the RCMP or RCMP format.
00:26
You can create a surface from several point clouds
00:29
you can select and define an area.
00:30
And you can filter out non ground points
00:32
to create that surface from you can also
00:35
start extracting geometry.
00:37
It's more of a manual process.
00:38
You can use feature extraction, you can use the Cogle points
00:43
and draw create your cargo points.
00:45
And you can draw and create feature lines 3D polish lines.
00:47
And so forth from that point club.
00:50
So let's move over to several 3D.
00:52
And look how easy it is to work with point clouds
00:54
within Autodesk civil 3D.
00:57
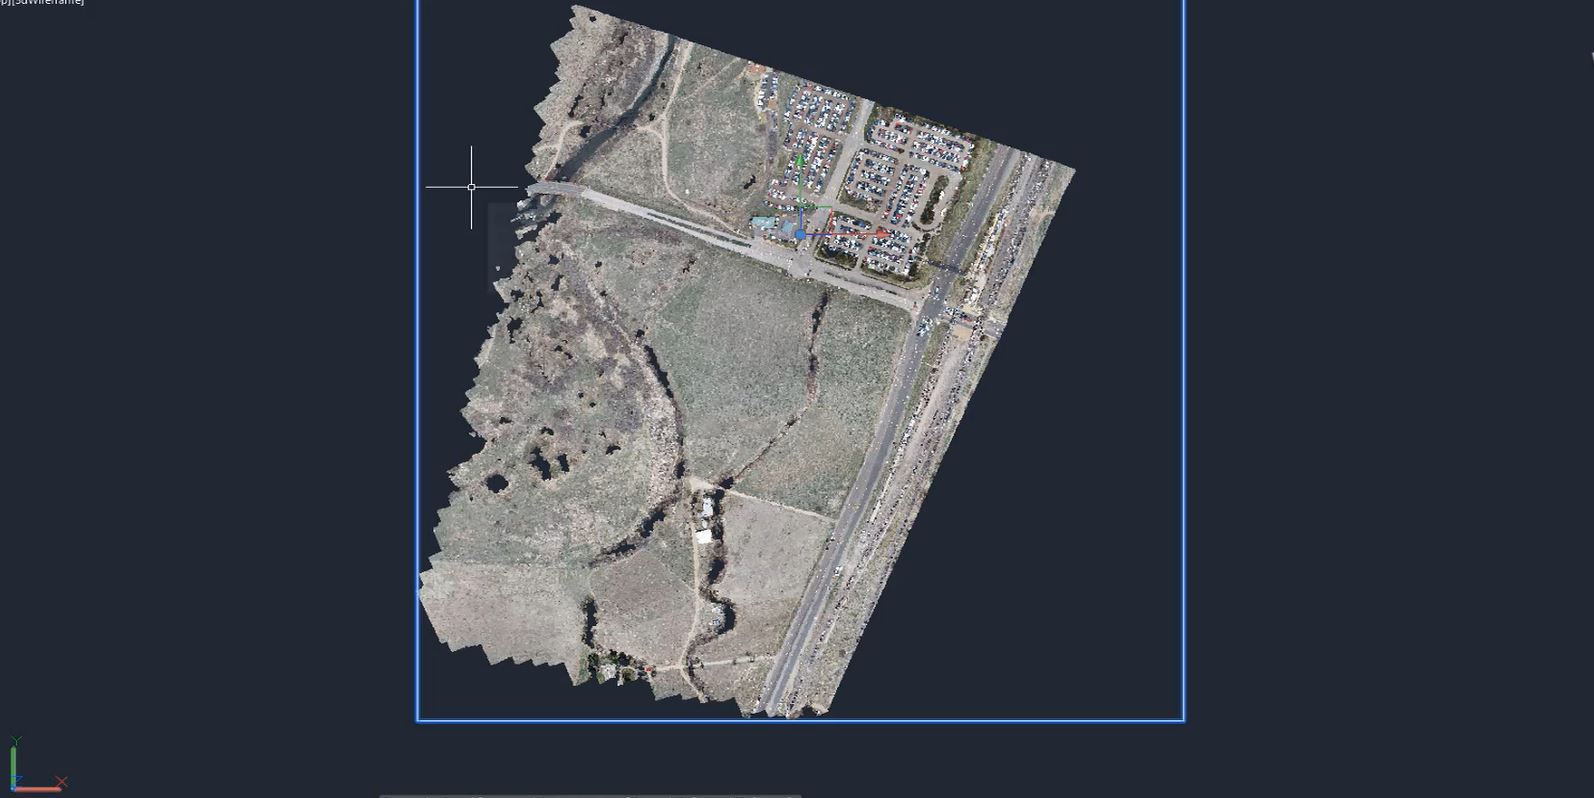
So we have our point cloud within civil 3D.
00:60
We first inserted it from the Insert tab point cloud
01:03
panel and the attach and we want to first create a surface
01:07
from this point cloud.
01:08
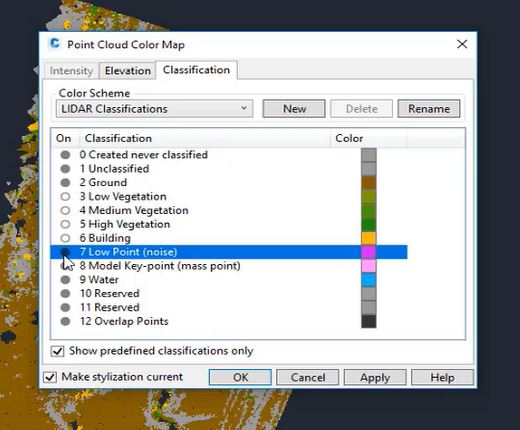
So I'm going to select my point cloud if your point
01:12
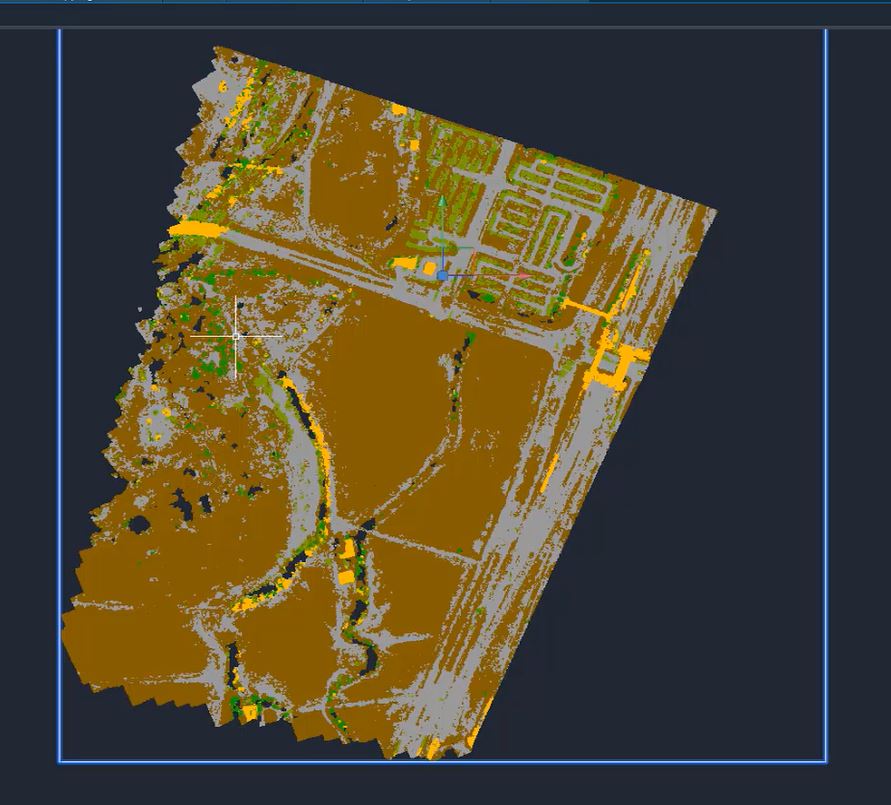
cloud is clarified You can turn on and off the classification.
01:17
So if we can look at this point cloud.
01:18
You can see that it is clarified We
01:20
have our ground shots our non ground shots some vegetation
01:25
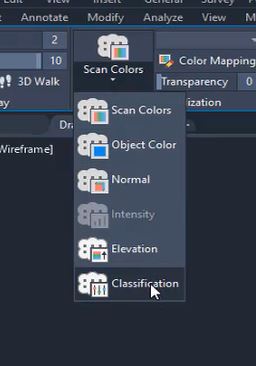
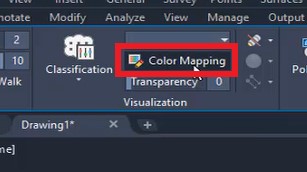
We can use the color mapping option
01:27
to take off or turn off some of these things.
01:30
So if I want to get rid of low vegetation buildings
01:34
and a few of these points here.
01:36
I can simply turn them off and select OK.
01:40
That way, when I create my surface that point cloud
01:43
does not have some of those points.
01:45
I don't want in that surface.
01:49
So with that point cloud selected.
01:51
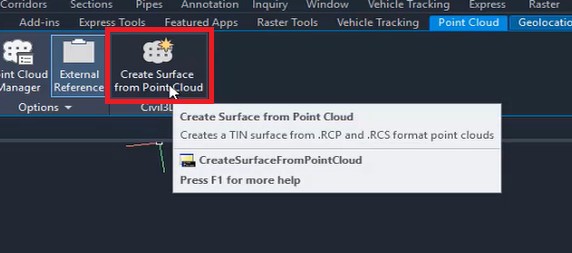
I'm then going to go to the ribbon
01:52
and from the civil 3D panel to create surface
01:59
We're going to name this.
02:00
I'm going to call it existing ground
02:06
our style we're going to use a contours style of one
02:11
So an existing ground contour style.
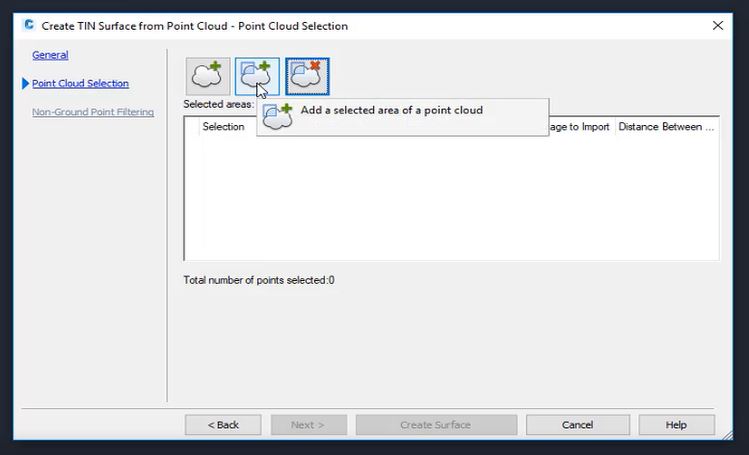
02:14
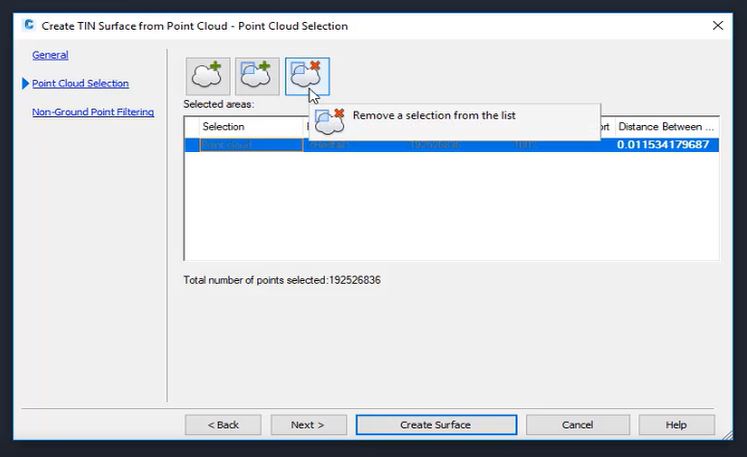
I'm a select next point cloud selection,
02:19
we can create a surface from our entire point cloud
02:21
or multiple point clouds.
02:23
But as you can see, this point cloud
02:25
has millions and millions of points.
02:35
So what we're going to do.
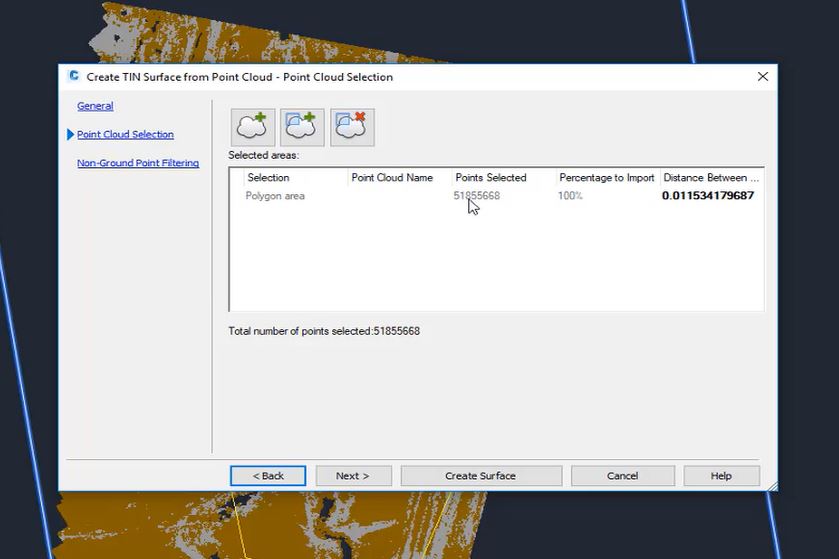
02:36
I'm going to select here in the selected area
02:38
and choose point cloud.
02:39
I'm going to remove this because we're
02:41
going to define a new area.
02:43
So I'm going to remove that from the selection list.
02:45
And I'm going to define an area that we're going
02:47
to create our surface from.
02:54
And we want to use that kind of the focal area of our project
02:57
And I'm just going to polygon an area.
03:07
It's going to window that area.
03:08
It's going to bring up that same dialog box to show us
03:11
how many points are now and that selected area.
03:16
So as you can see, we've selected an area
03:18
with much less amount of points.
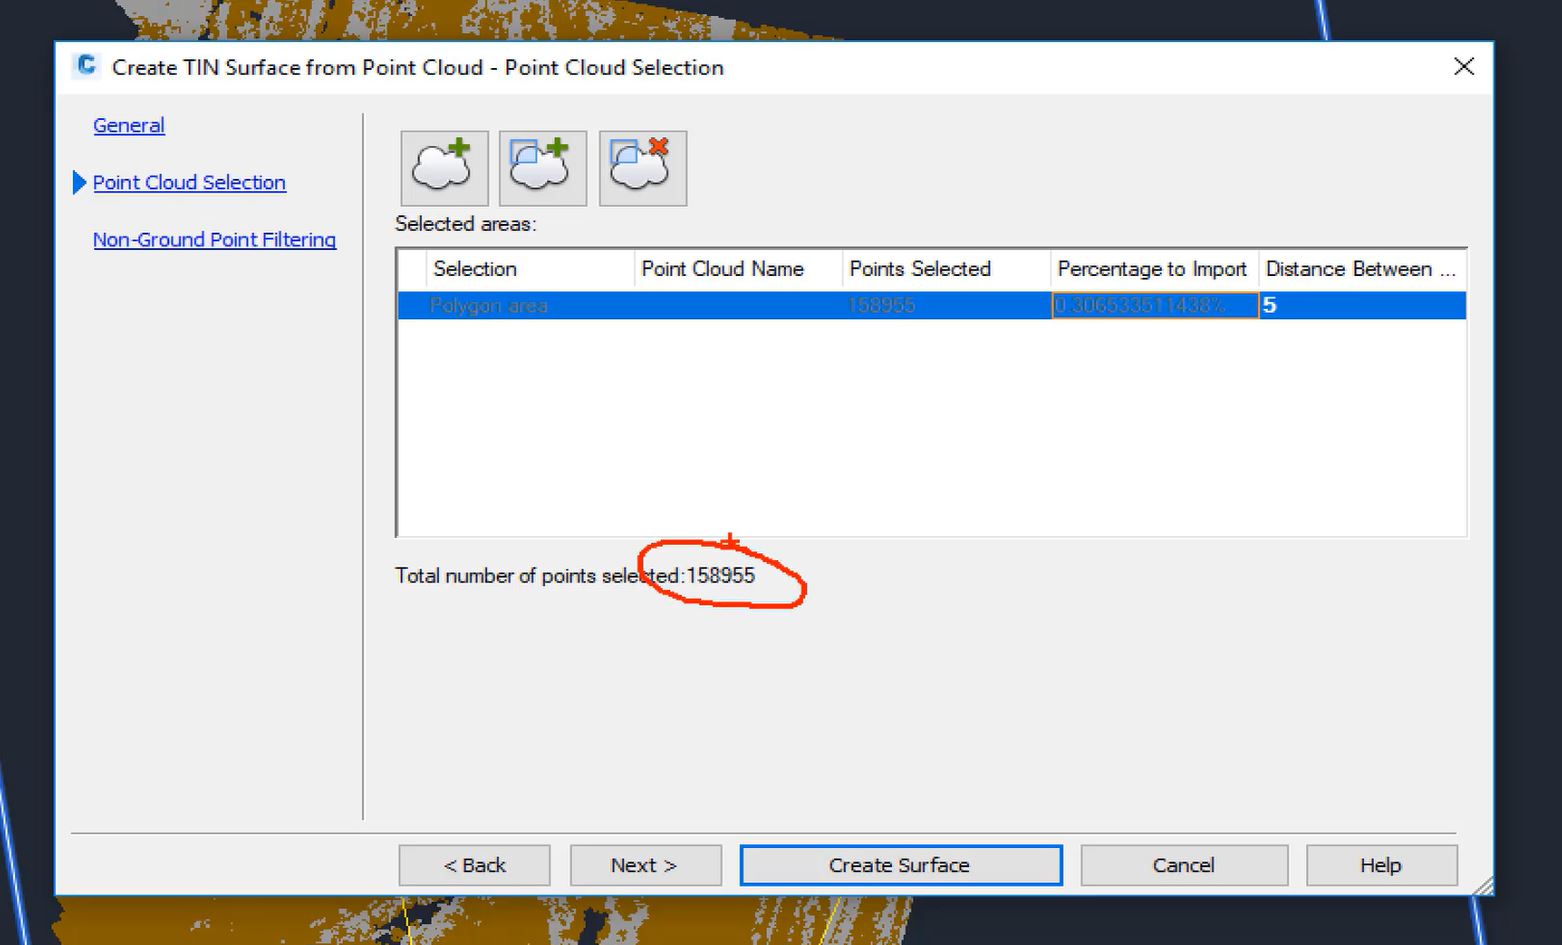
03:21
Still a lot of points to bring in a civil 3D.
03:23
So we're going to do a little bit of filtering right now
03:26
the distance between points is about hundreds of a foot.
03:30
I'm going to change that.
03:31
And I just want to do a grid of maybe 2 and 1/2 feet
03:36
and you can see that our points drastically
03:39
went down to 653,000 points you can do a different number here.
03:46
So maybe I'm going to go five points.
03:49
And again, our points are a lot less a lot easier
03:54
to manage inside civil 3D.
03:55
So we're going to go with that one.
03:58
We've defined a new area for the points to be from.
04:02
And we have changed the distance between 0.2.
04:05
I'm going to select next.
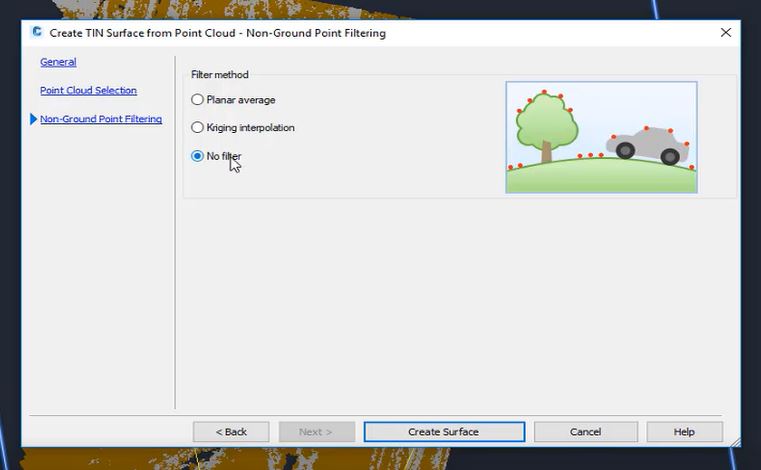
04:07
Now, there's three methods to filter this
04:09
out these non ground points.
04:12
We've got the planar average creaking interpolate relation
04:16
and we have no filter as select here the cricketing option.
04:21
And you can kind of see that it kind of gives you
04:23
a display of what may happen inside your surface.
04:27
No filters is going to take all the points
04:29
that you have they're filtered out to that five foot grid.
04:33
And in this case, we want to use no filter
04:35
we've got to have a classified point cloud we've
04:38
removed all the vegetation and some
04:40
of the buildings and other items.
04:42
So we want to go no filter and simply select create surface.
04:49
It's to process in the background going
04:51
to hit close you can continue to work while that processes.
04:56
So depending on the size of your surface.
04:57
This may take a few moments this may be pretty automatic Yeah,
05:01
you can see here, the bottom rises surface
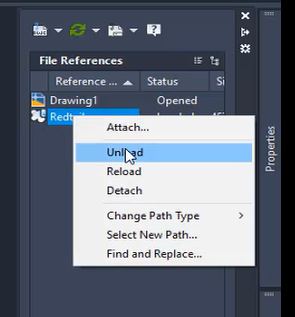
05:03
created click here to zoom to I'm going to unload my point
05:07
cloud just to show the surface.
05:09
So I mean go to my ex refs right click
05:11
and unload and let's look at a top you and do it zoom
05:22
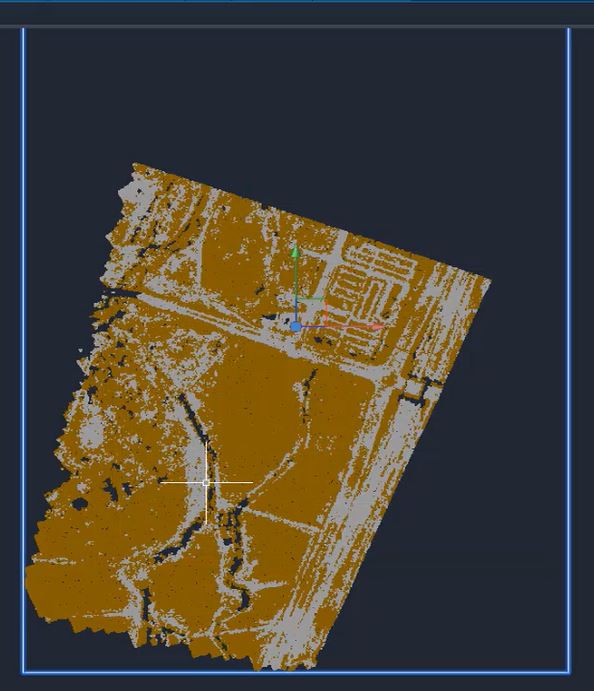
extends for our surface.
05:24
You can see that quickly we brought it in that point cloud,
05:27
we removed a lot of the non ground shots.
05:29
And we created the surface that's
05:32
one way of working with the point clouds
05:33
if we want to extract some feature lines
05:36
or draw some points in there.
05:37
There's a couple other options that we can do.
05:39
So let's look at those options.
05:46
I'm going to reload my point cloud my turn
05:51
my surface to a no display style.
05:53
So we can have a little bit more room to work here.
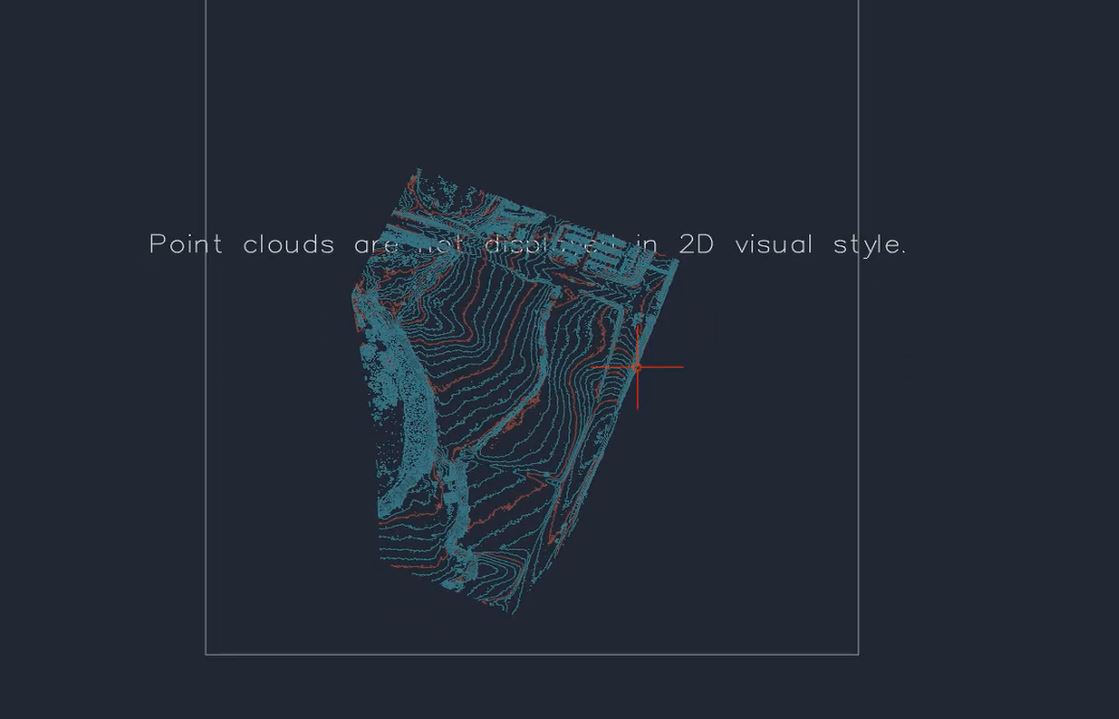
06:08
OK, let's look at a different view.
06:11
I might turn my point cloud back to the point cloud colors.
06:17
So the scan colors that way we can kind of see
06:20
what we're working with here.
06:21
And I'm just going to crop out a small portion of this point
06:26
So with that point cloud selected, go rectangular crop
06:36
and maybe we want to focus on this intersection
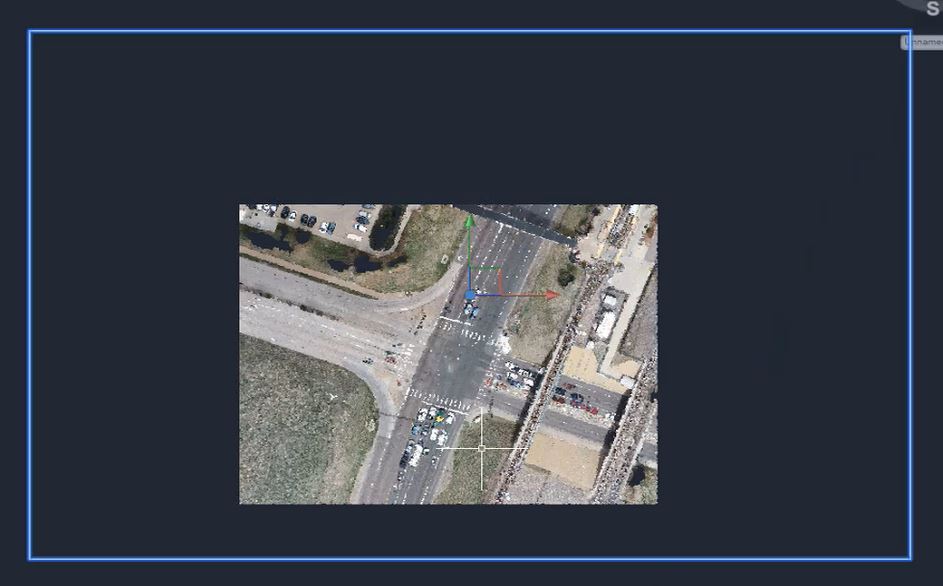
06:43
or rotate that something to see this in a 3D view.
06:50
You can see this works really well in Civil 3D.
06:54
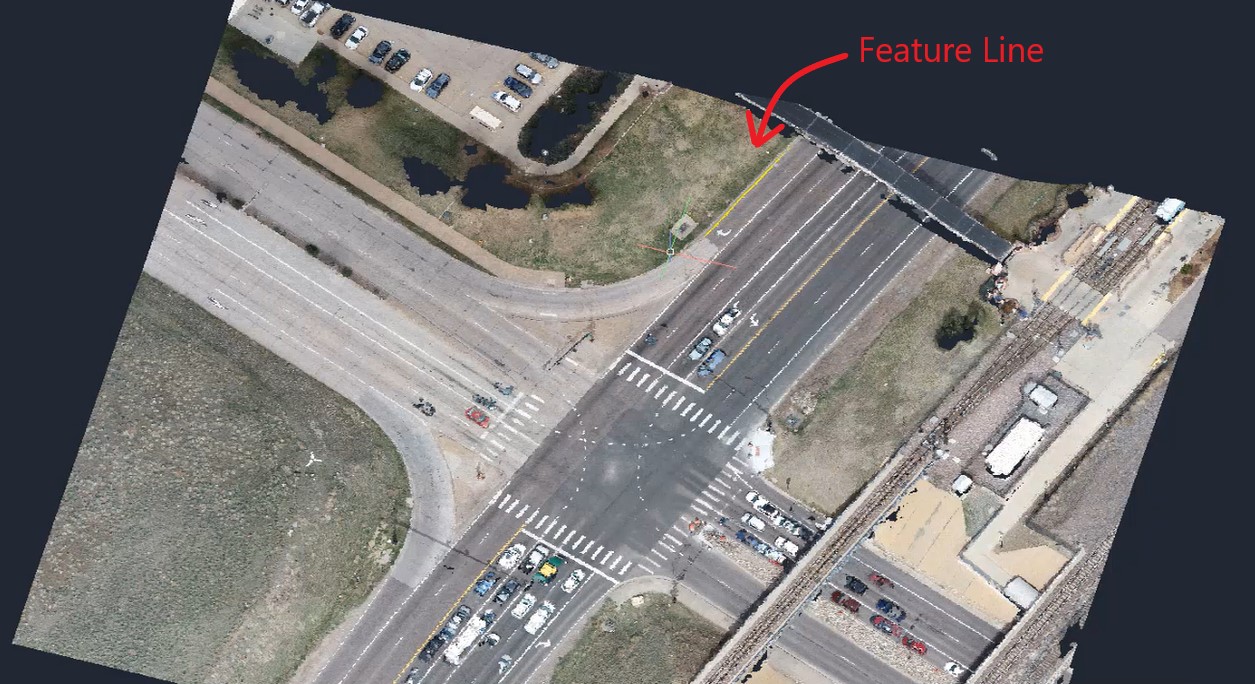
Now we can draw feature lines or our brake lines.
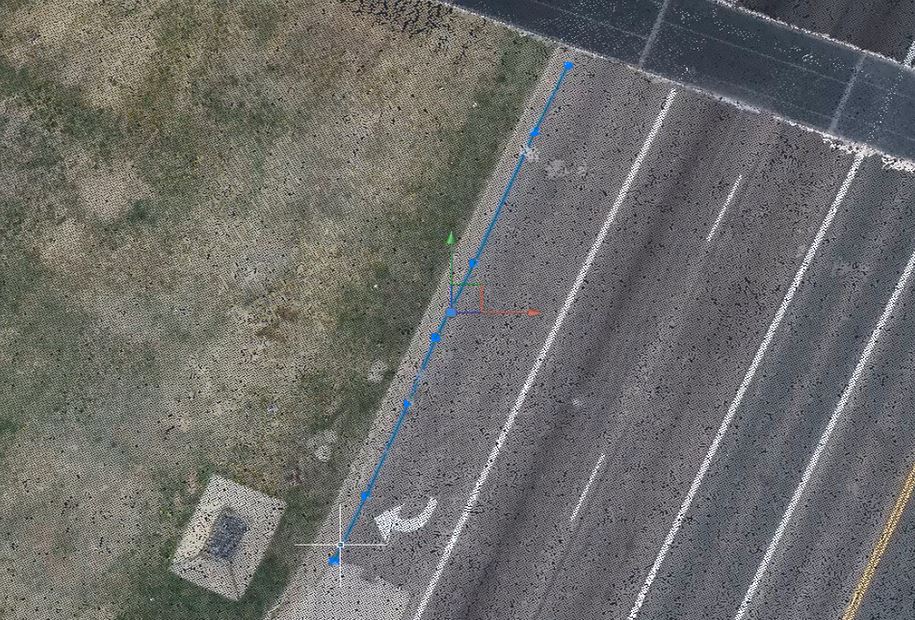
06:57
So I'm just going to draw a line here
06:59
along the edge of pavement.
07:01
Someone move that back to a top view.
07:03
Let's zoom in here to our edge payment multiple options or we
07:07
could do 2D poly line.
07:10
We could do a 3D poly line.
07:12
We could do a feature line first thing I want to check
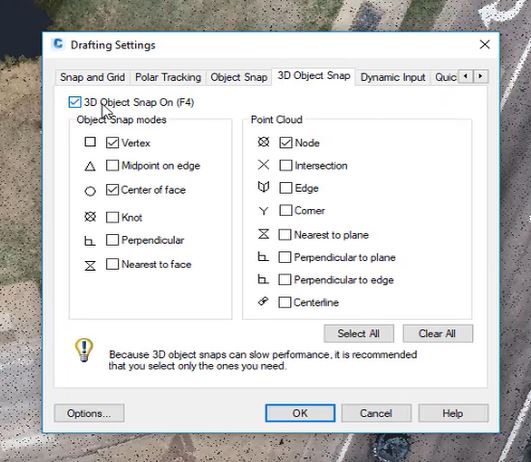
07:15
So down here in the bottom.
07:17
I mean choose my oh snap settings.
07:20
And in those settings there's a 3D object.
07:22
Step you want to make sure that
07:26
And then you can select here when
07:28
the point cloud different options to snap
07:31
to within that point cloud.
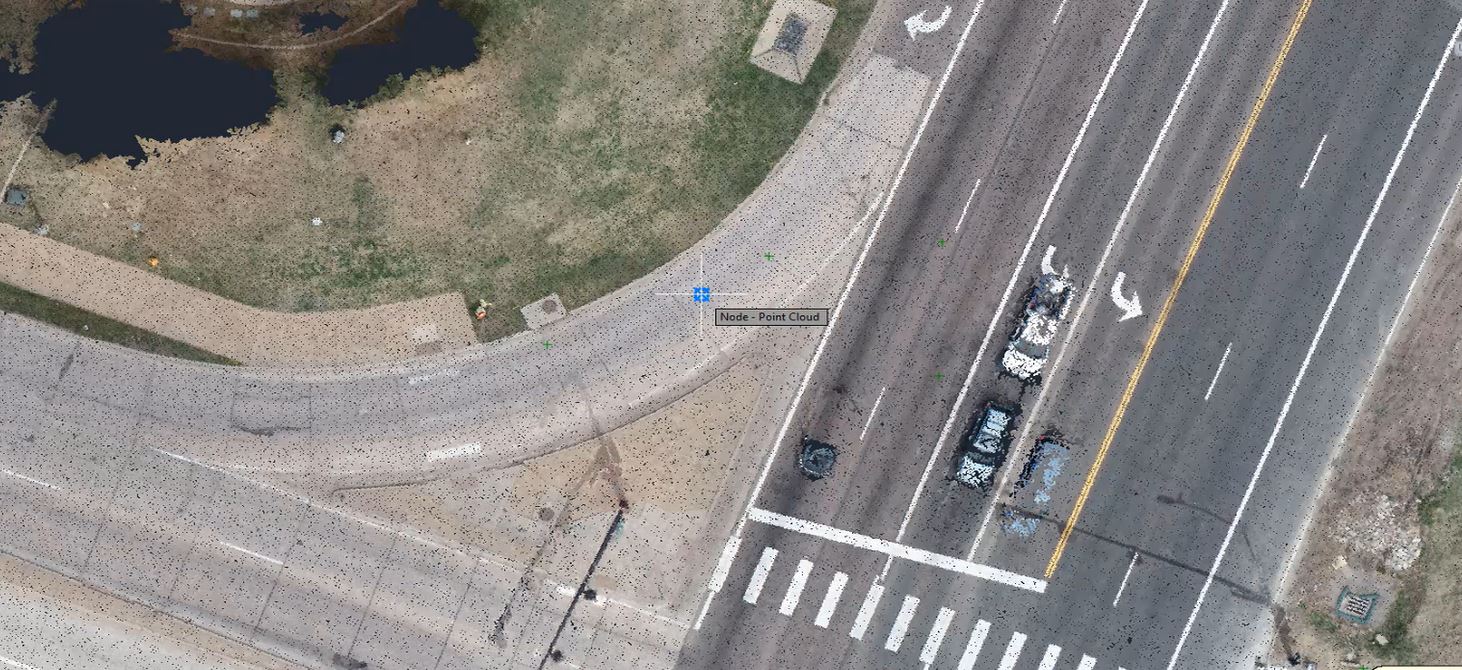
07:33
I'm going to do is just use the node.
07:35
So as long as notice selected, I'll be able to select
07:38
and snap to xyz of this point cloud head.
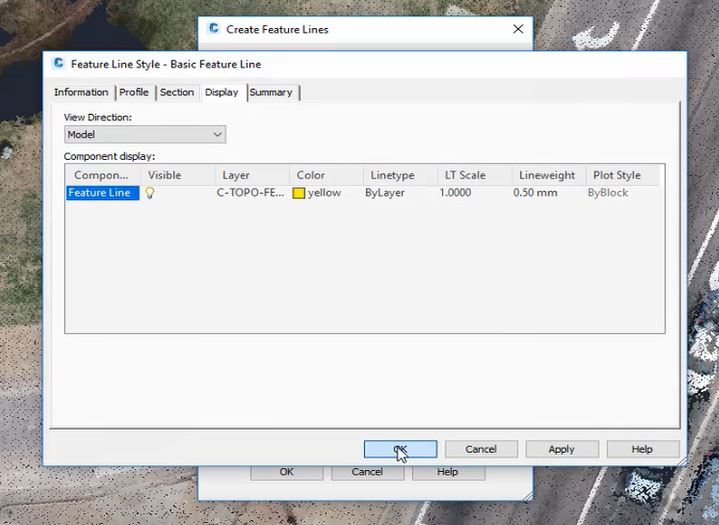
07:44
Next step, I'm going to go to my Home tab feature line,
07:47
create feature line.
07:50
We're going to put this on the feature line state.
07:53
We're going to put this style we're
07:54
going to use the basic feature line style on the display tab,
07:59
I may want to see this show up a little bit better.
08:02
So let's turn that yellow so that we can see that.
08:05
And maybe we do a line wait just a little bit larger.
08:08
So this will display a little bit better for us.
08:20
OK So now I'm in the feature line command.
08:22
You can see that blue glyph that's popping up everywhere.
08:26
I'm going that is picking a point within that point cloud.
08:29
So everywhere that blue is at snapping
08:32
to the node of an elevation y, and z of that point cloud.
08:38
So I can simply come in here and I
08:39
can find the edge of the pavement
08:41
or just go here says specify elevation.
08:46
So you can see here.
08:46
It's picking up the elevation that point cloud.
08:48
I'm just going to hit Enter.
08:50
So somewhat of a manual process.
08:52
I can walk down that road keep selecting the elevation hitting
09:08
Let's turn the plan you to something
09:10
a little bit different.
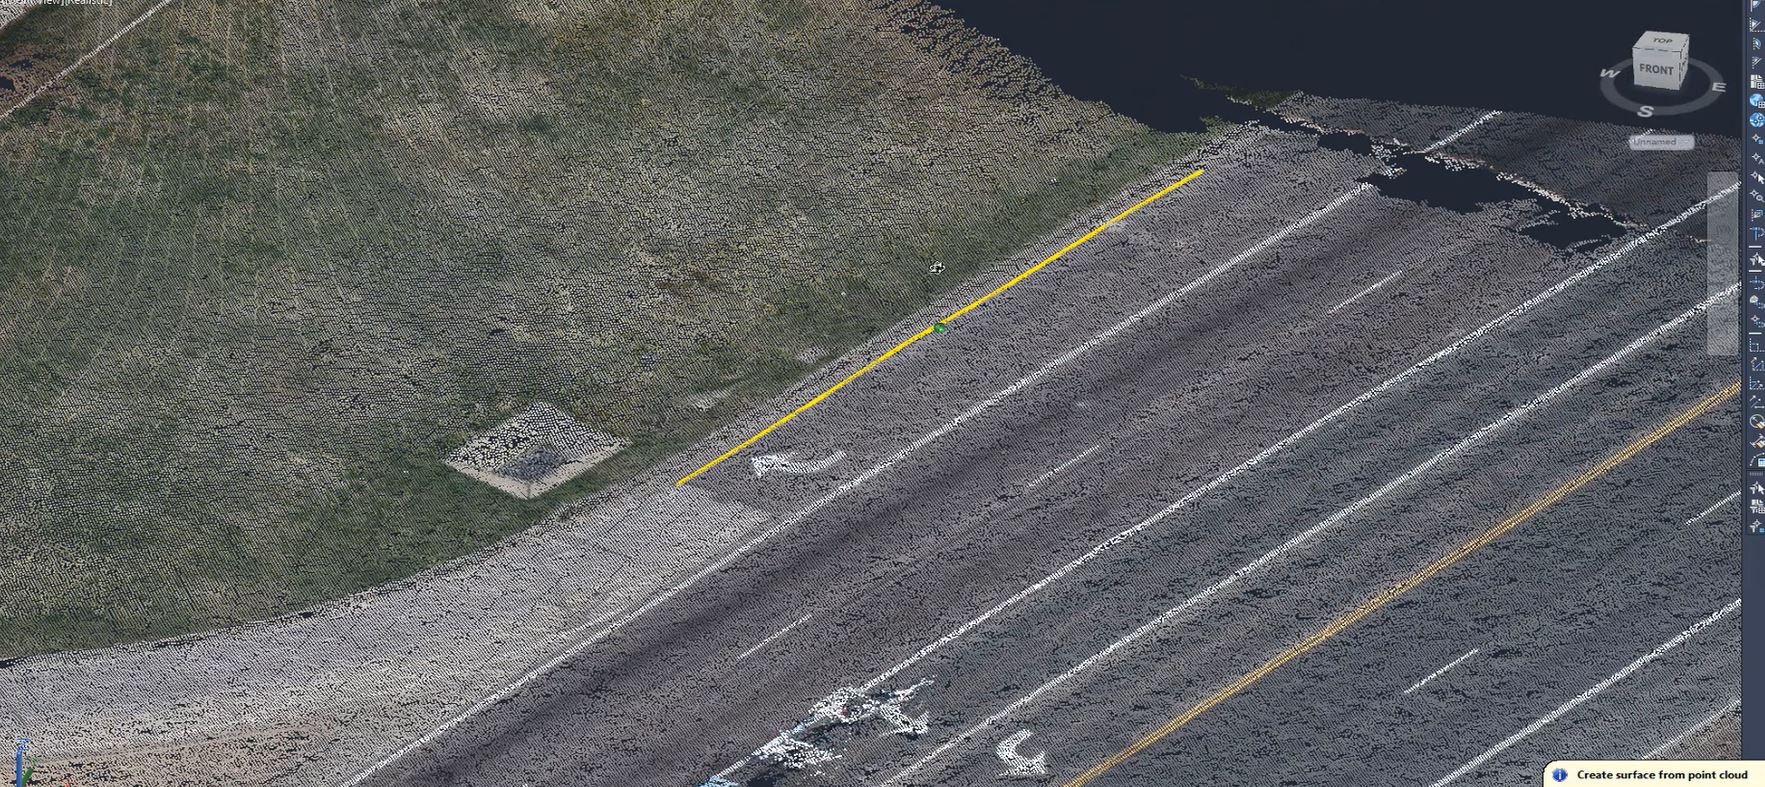
09:15
So that point cloud, and that feature line if I rotate this
09:19
to a different view, you can see it is now
09:21
draped on that point cloud.
09:24
So I can quickly and easily draw those feature lines in there
09:28
Add those to the surface.
09:30
I can extract objects like my paint lines
09:33
my curb and gutter anything that I want to draw
09:36
and from that point cloud.
09:40
a feature line through the line or 2D poly line
09:43
to start extracting objects from that point cloud.
09:46
So we did our surface.
09:47
And we did our feature line.
09:49
We could do points as well.
09:51
So that point cloud is so robust.
09:53
So rich with data, we can start extracting how much information
09:56
we want from that point cloud.