Step-by-step guide
In InfoWater Pro UDF, a flush sequence is a series of operations that defines how a flush zone will be flushed. The goal is to start from a clean water source, such as a pump station or a previously flushed sequence, and then select a hydrant to be flushed. Then, determine which valves need closing to increase the water velocity, so that it exceeds the minimum flushing (or scouring) velocity in the pipes leading to the hydrant. The hydrant must remain open for at least the time needed to turn over the water in the pipes being flushed. This is referred to as minimum flushing time.
- To begin, open a UDF model with UDF hydrant and valve layers and symbols already set, and flush zones created.
- From the Model Explorer toolbar, click Run to open the Run Manager.
- Click Run to run a simulation and create outputs for a base scenario.
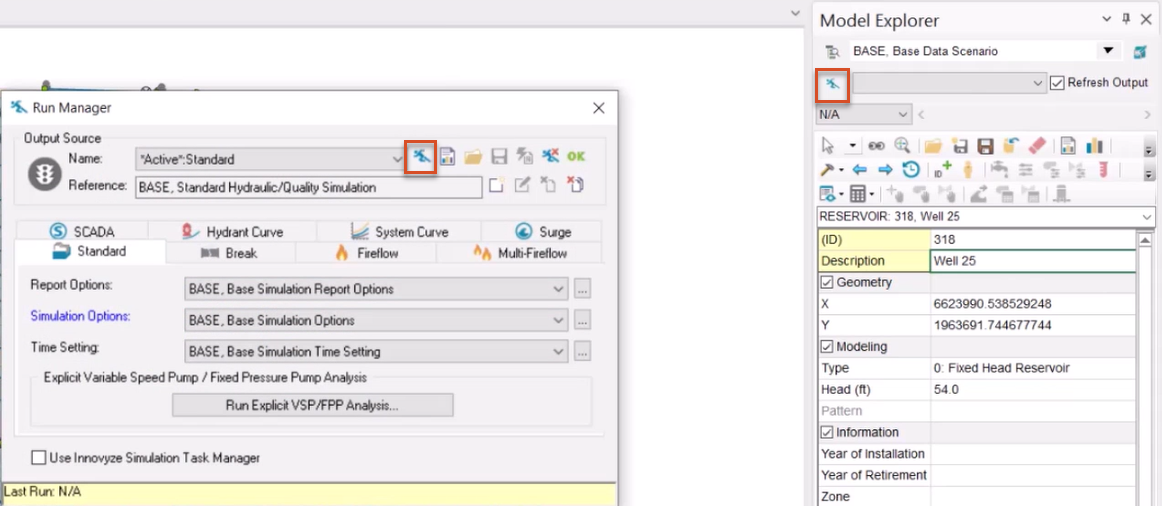
- Click OK to close the Run Manager.
To create one or more flush sequences:
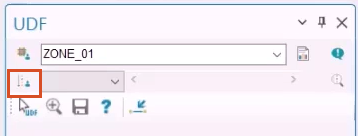
- In the Model Explorer, switch to the UDF tab.
- Expand the zone drop-down and pick a zone—for this example, select ZONE_01.

- In the map, zoom to a clean water source to select the flush sequence starting point. In this case, a fixed head reservoir is selected.
- In the Contents panel, right-click the Pipe layer and pick Label.
The map updates with pipe IDs.
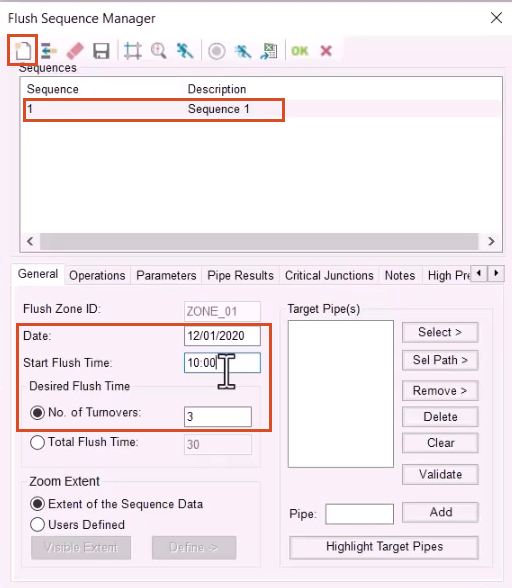
- From the UDF tab, click Sequence Manager.
- In the Flush Sequence Manager, click New.
This adds Sequence 1 to the list of sequences.
- In the General tab, set a Date and Start Flush Time for the new sequence.
- For this example, set the No. of Turnovers to 3.
This is the number of times the pipe volume will be flushed from the main.
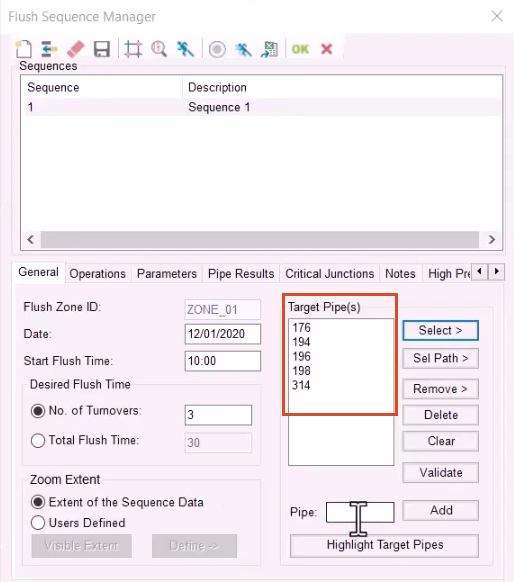
To pick the pipes to include in the sequence:
- From the Target Pipe(s) group box, click Select >.
- If necessary, drag the dialog out of the way for a better view of the map.
- In the map, click and drag to select each pipe and highlight it in blue. Here, pipes 176, 194, 196, 198, and 314 are chosen.
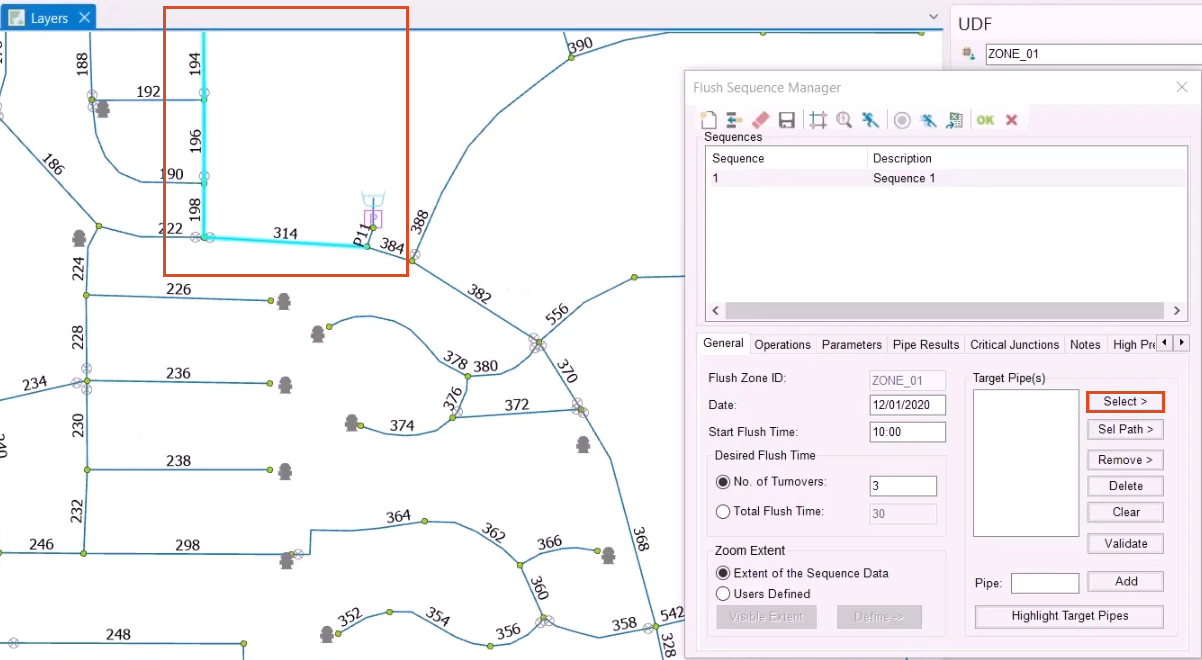
- When finished making the selection, right-click the map and select Enter.
The Target Pipe(s) group box updates to show the IDs of the selected pipes.
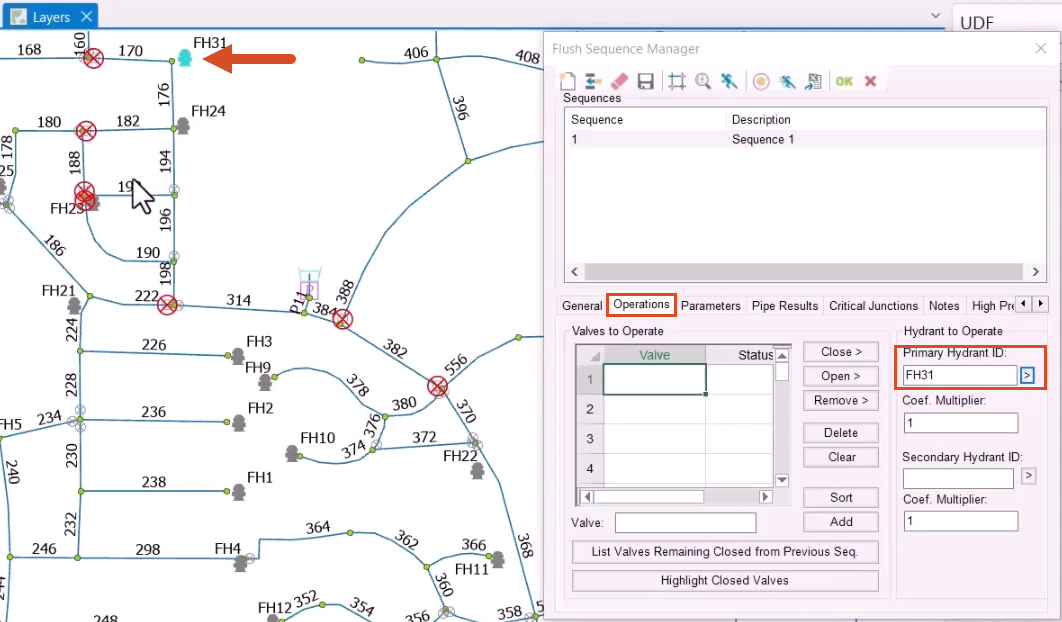
- Switch to the Operations tab.
- Under Hydrant to Operate, next to the Primary Hydrant ID field, click the arrow (>) button.
- In the map, click and drag to select the hydrant to use—in this example, FH31, since it is located at the end of the sequence of pipes to be flushed.
- From the toolbar, click Isolate Target Pipes to automatically populate the Valves to Operate table.
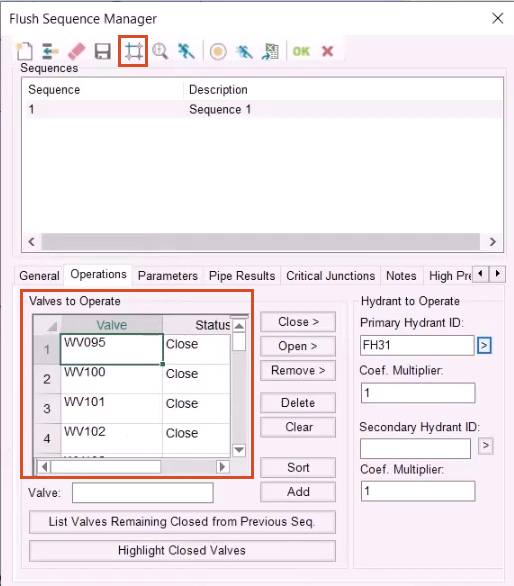
The Valves to Operate table defines which valves are set as open and closed during each sequence, in order to isolate the pipes being flushed.
Three constraints must be obeyed to use this tool:
- There is only one flow path among the pipes defined for flushing. In other words, the pipes must be in series without any branches.
- The sequence is continuous, meaning all pipes in the current sequence are connected.
- The sequence starts from a clean water source.
If any of these constraints are violated, a warning appears. Note that warnings do not affect flush sequence results, but simply inform that the simulation results do not meet the specified characteristics.
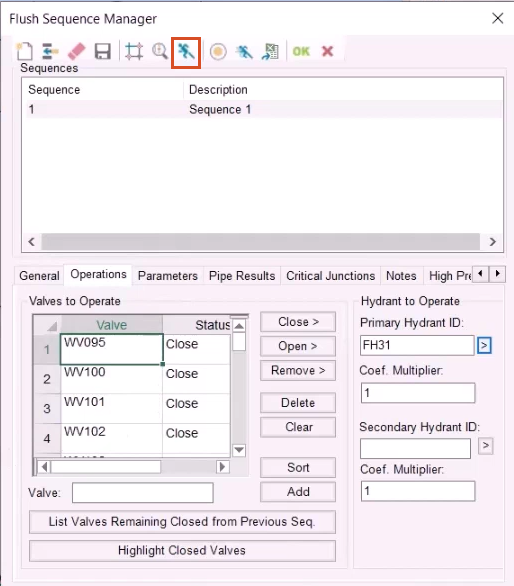
- Click Run Sequence, noting any warnings.
- Repeat this process to create and run new sequences as needed.
To save created sequences:
- From the InfoWater ribbon, Project panel, pick Save Project As.
- Specify a name and location.
- Click Save.


