Practice - Reviewing and Applying Generative Design Study Options
In this practice you will review the options presented by the Generative Design study based on the lab room and lab unit furniture element and learn how to filter the options based on various criteria. You will then select and apply one of the options to the Revit project.
1. Continue working in the Small Medical Center-Open Office.rvt project.
2. In the Manage tab > Generative Design panel click Explore Outcomes.
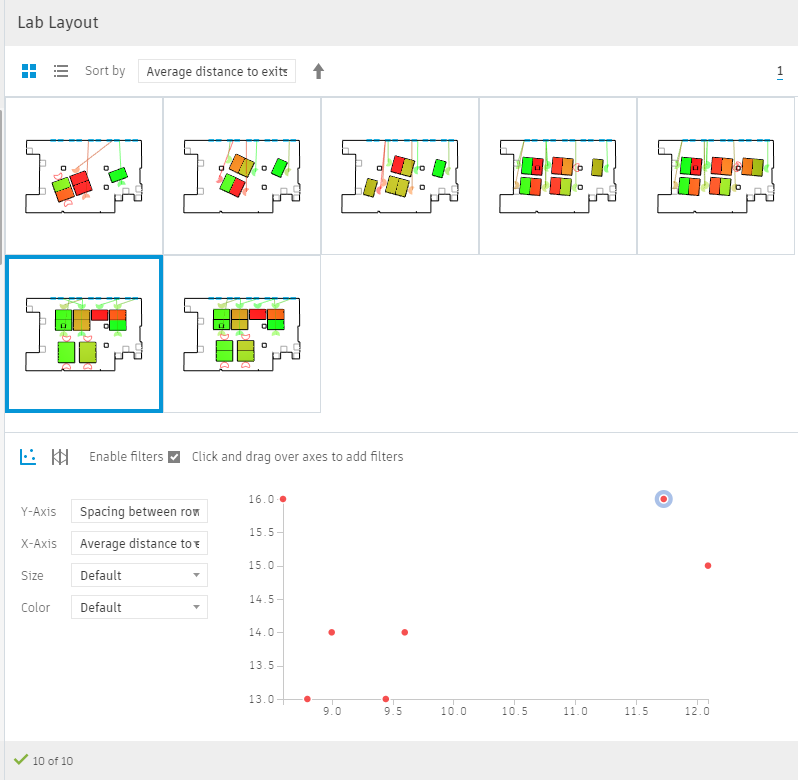
3. In the Explore Outcomes dialog box, in the left pane, select Lab Layout.
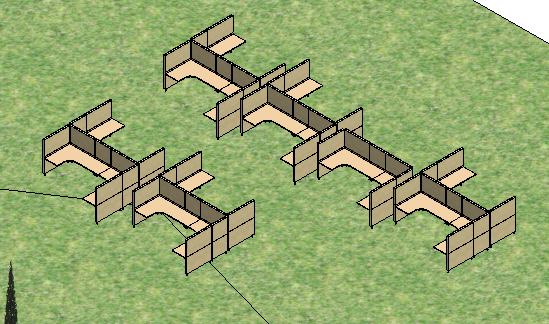
4. Review the various outcomes. Zoom in in the Details area as desired.
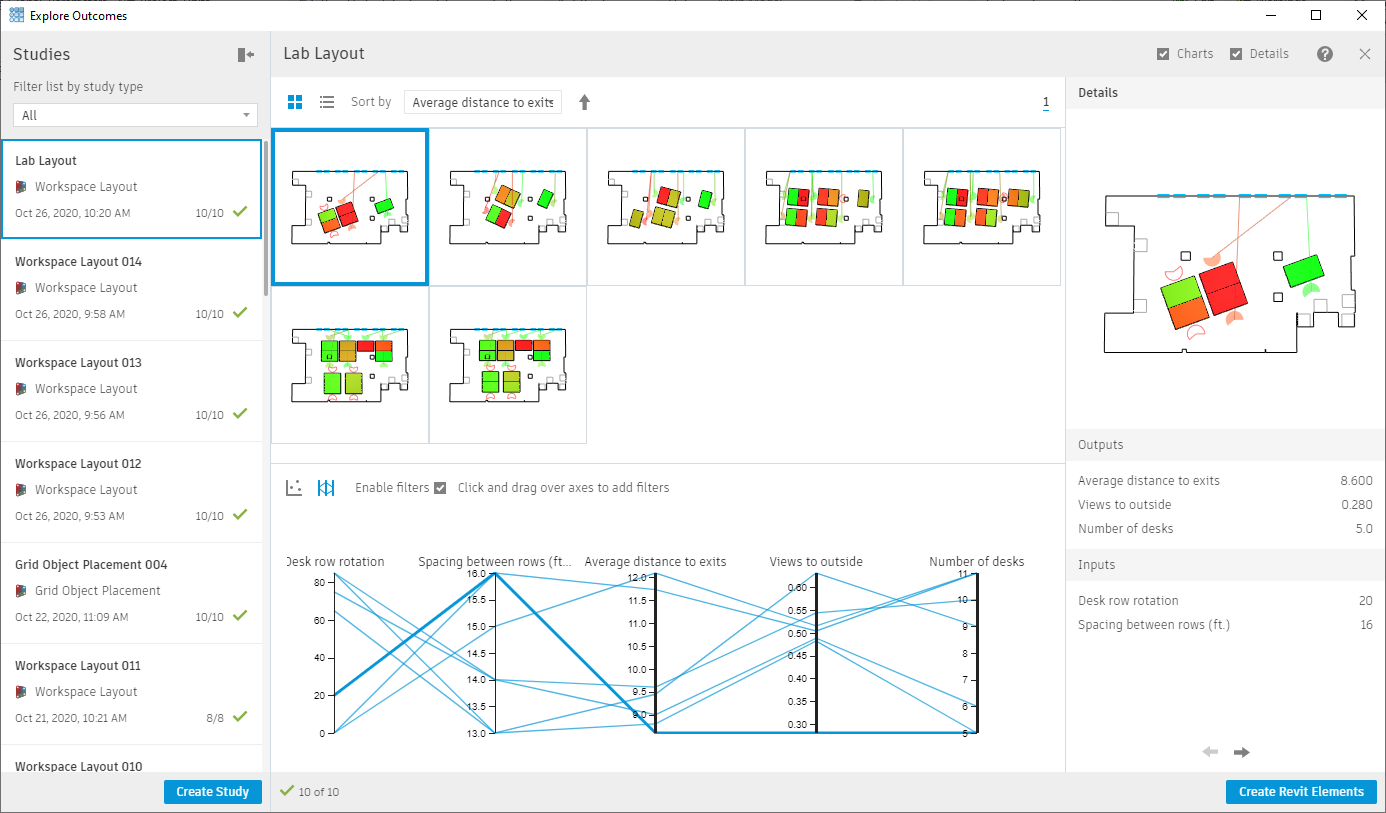
5. Verify that Enable Filters is selected.

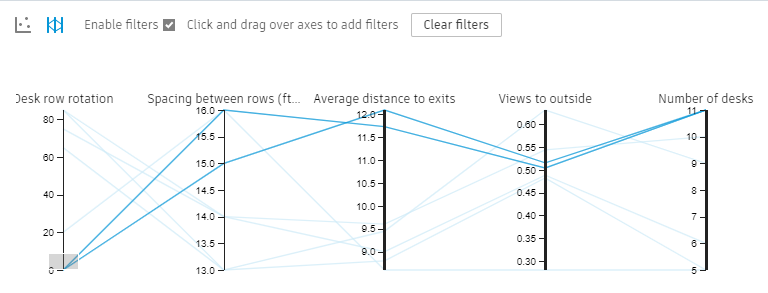
6. Click and drag over the axes to add filters. For example, you may want to show studies that only have 0 rotation. There are two in this example.
7. Click Clear Filters to return to the entire list.
8. Select more than one filter. For example, you want a larger spacing between rows and the most desks possible.
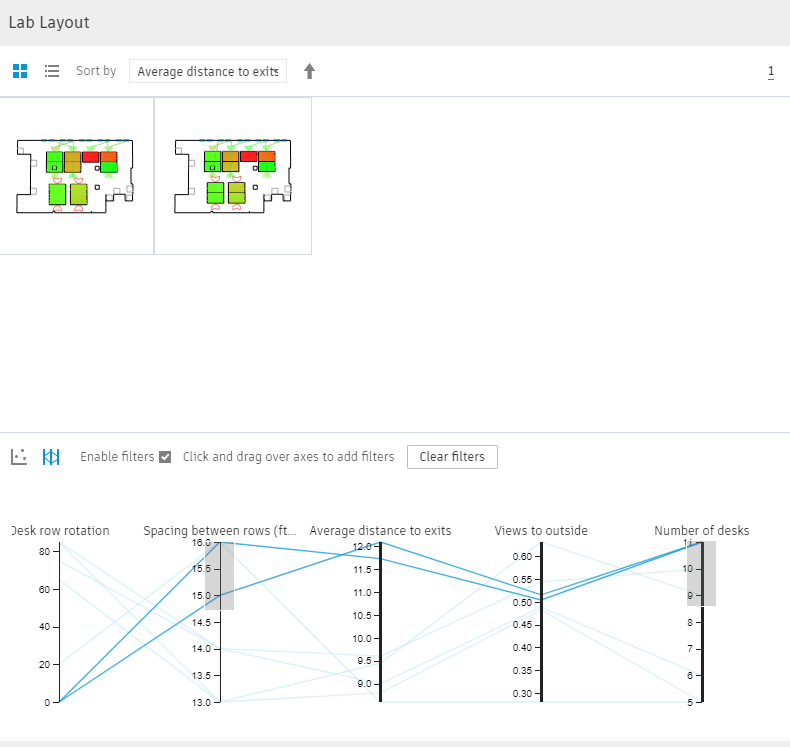
9. Click Clear filters.
10. In the Filters section, select Scatterplot. In this method you can set the requirements for the x and y axis and then modify the size and color of the dots as needed. For example, set the Y-Axis to Spacing between rows and the X-Axis to Average distance to exits. Click on the dots to select the study.
11. Return to the parallel coordinates method and reset the filters to Spacing between rows and Number of desks.
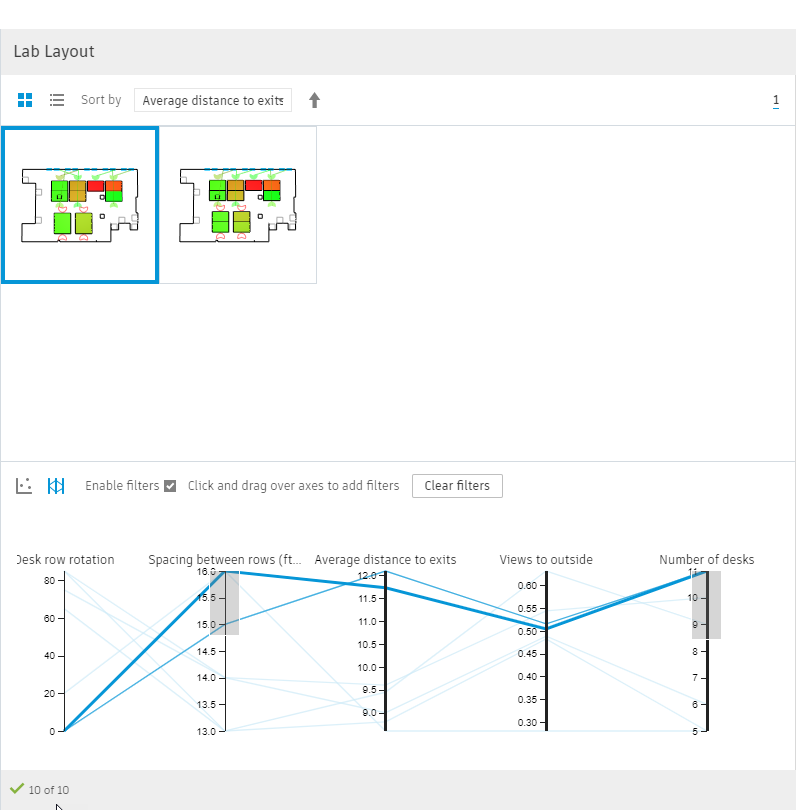
12. Select one of the two options available and click Create Revit Elements. A notice displays that says Creating Elements. This might take some time. Once it is done it reads Element creation completed and then automatically closes.
13. Close the Explore Outcomes dialog box and return to Revit.
14. In this model the furniture elements are not displaying. This is because this model has the levels set above the default 0.
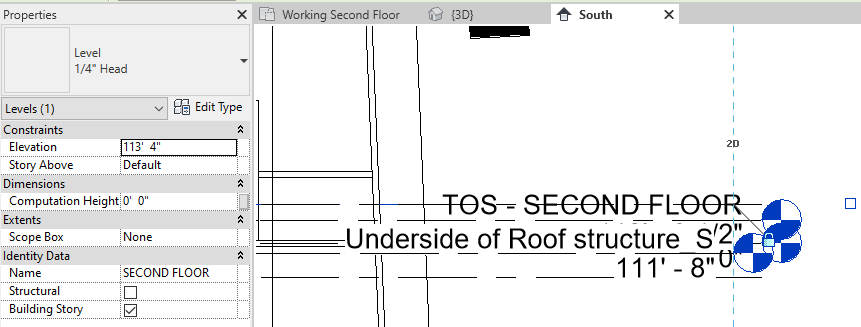
15. In the Project Browser, in the Elevations section, click South.
16. Zoom in on the TOS – SECOND FLOOR level and select it. In Properties you can see the Elevation is set to 113’- 4”.
17. Close this view and, in the Quick Access Toolbar, open the default 3D view.
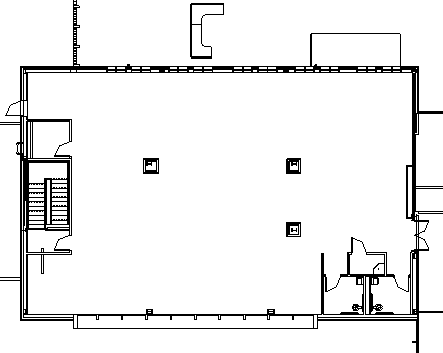
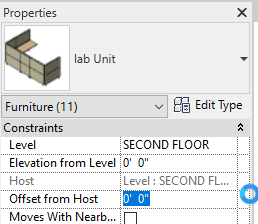
18. Zoom in on the desk units that are floating out in space.
19. Use a window to select all of them. In Properties, change the Elevation from Level to 0”.
20. Return to the Working Second Floor view and the lab units display. There are still some issues, specifically the generative design options did not account for the columns even though the room does not include them. This is a place where the dynamo graph would need to be updated to look for this sort of situation.
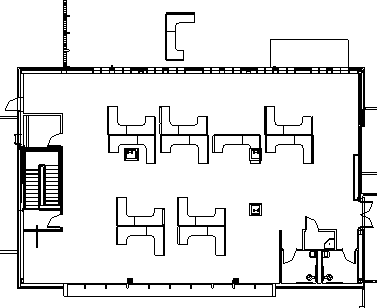
21. Modify the layout to clear the area around the columns.
22. Save the project.


