Drawing detail lines showing switch connections - Exercise
In this practice, you will create a linetype and use it to add arcs that show connections from lights to the associated switch. Switching connections look a lot like wiring diagrams. While you can create Switch System in Revit, it does not have a way to automatically annotate the connections. You can use detail lines to do this.
- Open the Small Medical Center-Switches.rvt project in the 01-Ground Floor Lighting Plan view.
- In the Manage tab > Settings panel, expand Additional Settings and click Line Style.
- In the Line Style dialog box, expand the Lines Category. A number of line styles exist in the project – some of these are automatically applied by views. They have <carets> surrounding the names such as <Hidden> and <Sketch>. You can also create new line styles.
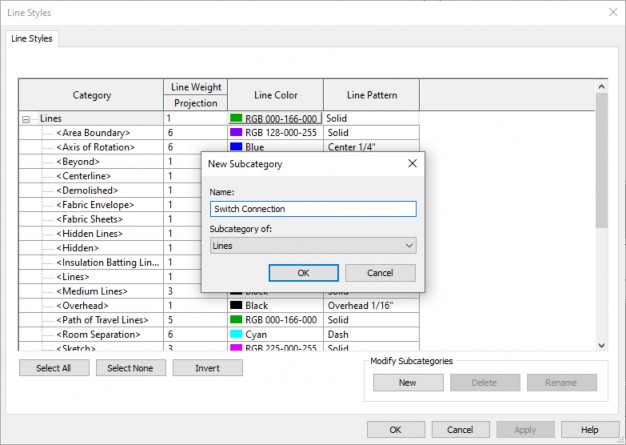
- In the Modify Subcategories area, click New.
- In the New Subcategory, type in the Name: Switch Connection, as shown below, and click OK.
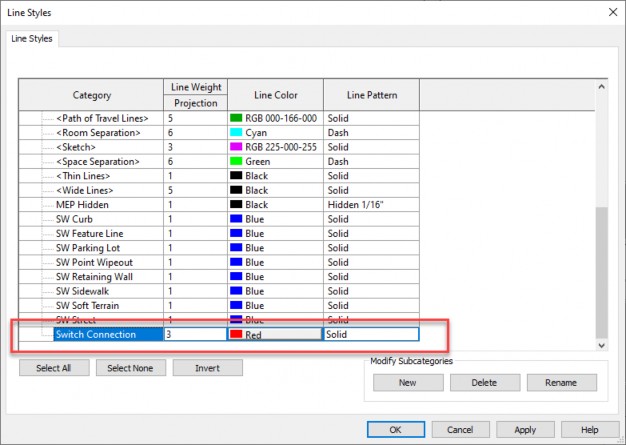
- Specify the Line Weight, Line Color, and Line Pattern you want to use. This is based on your office standard. This is also a typical element you would want to include in your project template. For example, set the Line Weight Projection to 3 and the Line Color to Red, as shown below.
- Click OK.
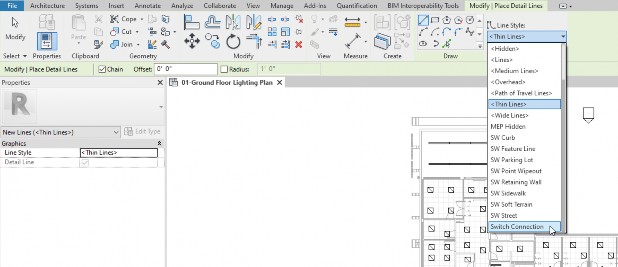
- In the Annotate tab > Detail panel, click Detail Line.
- In the Modify \ Place Detail Lines tab > Line Style panel, expand the Line Style list and select Switch Connection, as shown below.
- In the Draw panel, click the Start, End, Radius Arc tool.
- In the Options Bar, verify that Chain is selected.
- Pick a point near the end of the switch, and then one corner of the light fixture. Finally, select a point that defines the radius of the arc.
- You are still in the command. Select the corner of the next light (the corner of the first light is the first point of the arc) and then select the radius point. Select the next end point, as shown below.
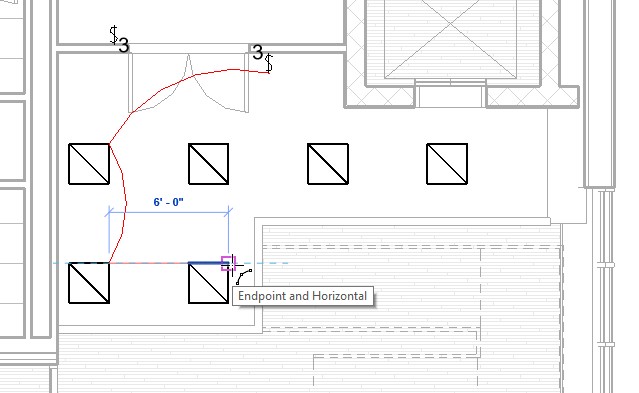
- Continue this process until all the lights connected to the same switch are connected. Press <Esc> to stay in the command and you can continue drawing another set of arcs in a different room.
- This may seem counterintuitive but it is the best way to create this string of arcs.
- Add arcs connecting light fixtures to the switch in each of the rooms as you have time.
- Save the project.


