00:01
PAWEL PULAK: Calculating Reinforcement in Robot.
00:04
In this video, we'll calculate reinforcement
00:07
and display the reinforcement results for a slab.
00:10
I'm working in Robot structural analysis
00:13
using the small Medical Center model that
00:15
was linked in from Revit.
00:17
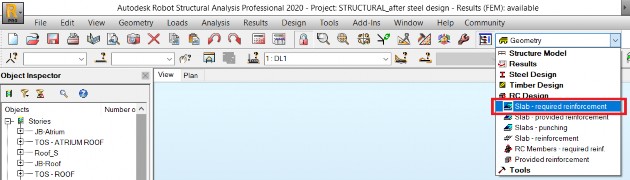
The easiest way to perform the required slab
00:19
reinforcement in Robot is to use a predefined screen layout.
00:24
In the Standard toolbar, expand the Layouts dropdown list.
00:28
And select RC design and then Slab required reinforcement.
00:34
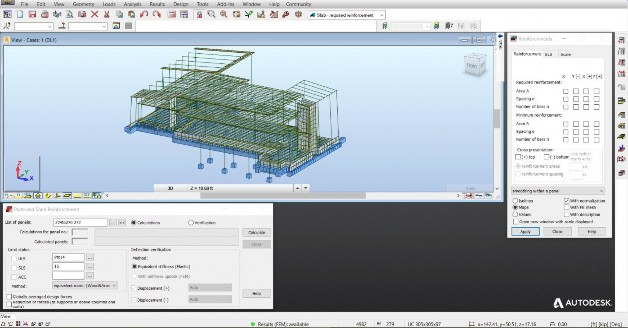
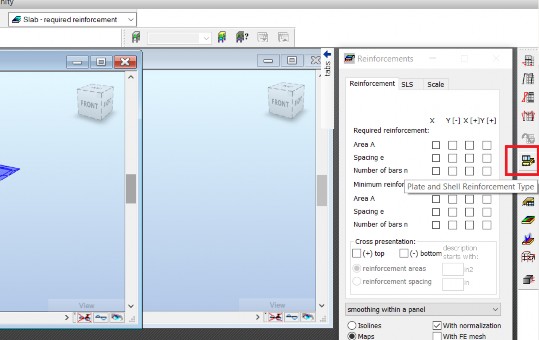
This opens the Reinforcement specific dialog boxes along
00:38
with the Structural model toolbar on the right.
00:41
We want to perform reinforcement calculations for one panel
00:45
instead of the whole model.
00:47
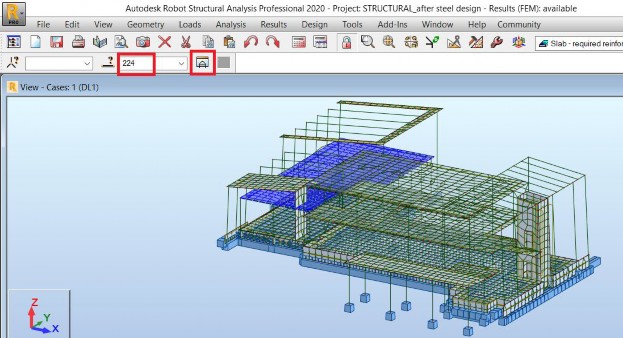
It's easier to check and assign parameters
00:49
and to display the results when this panel is
00:52
open in a new graphical window.
00:54
So I'm going to select panel 224.
00:57
And in the Selection toolbar, click Edit in new window.
01:03
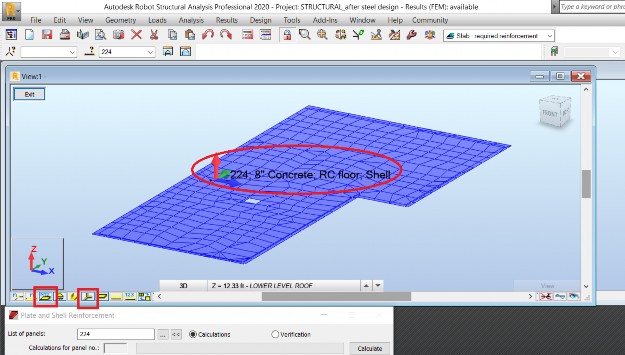
The new view displays, and I'm zooming in to see it better.
01:07
In the View toolbar, I'm clicking Panel descriptions.
01:11
It shows that the reinforcement parameter assigned to it
01:16
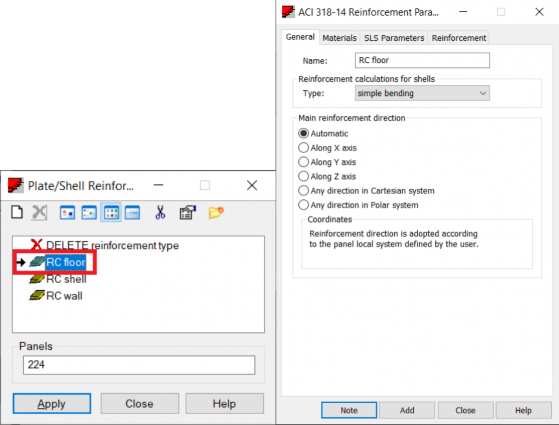
In the Structure toolbar, I'm going to click Plate and shell
01:21
Then in that dialog box, we can view and modify the parameters
01:26
for the active RC design code.
01:29
I'm double clicking on RC floor to open the Reinforcement
01:33
parameters dialog box.
01:35
In the General tab, the main reinforcement direction
01:38
is set to automatic, which means that the x direction
01:42
of reinforcement corresponds to the local x direction
01:46
of the panel, as you can see here
01:48
when I select Local systems in the View toolbar.
01:54
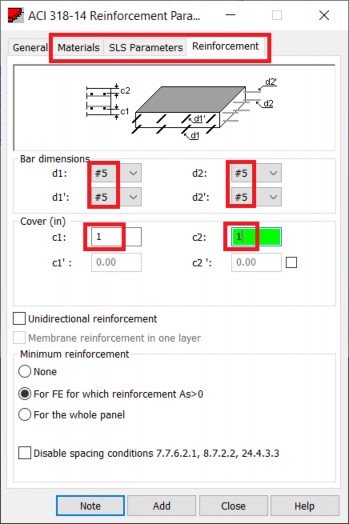
In the Materials tab, there are parameters for materials
01:58
that can be assigned.
02:00
In the SOS parameters tab, it's possible to activate
02:04
the calculation of deflection, set the deflection limit,
02:08
and specify the ratio of long term loads.
02:13
In the Reinforcement tab, you can
02:15
define the preferred sizes of rebars and the values of cover
02:19
to be used during calculations.
02:26
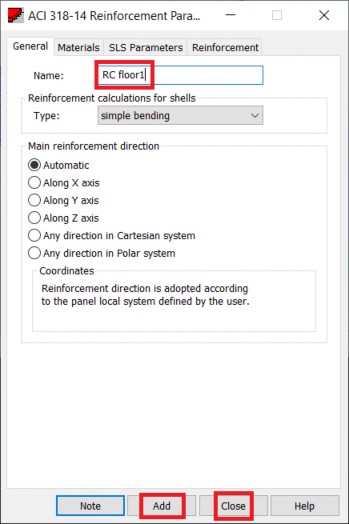
When I try to save these modifications using the Add
02:29
button, there's a message displayed that a predefined
02:32
default reinforcement type cannot be changed.
02:34
Therefore, I need to save it to a new name.
02:37
So I'm going to click OK to close the message.
02:40
And in the General tab, I'm going to change the name
02:45
Click Add, and then close.
02:48
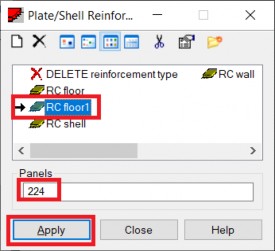
Next we want to assign the new reinforcement
02:50
type to the selected panel.
02:52
In the Plate shell reinforcement types dialog box,
02:56
verify that the new type is selected, and click Apply.
02:60
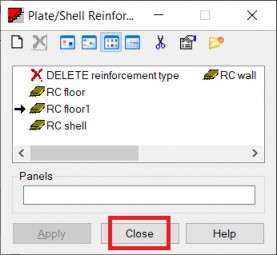
You can see the type is now applied to the selected floor.
03:03
And I've closed the dialog box.
03:09
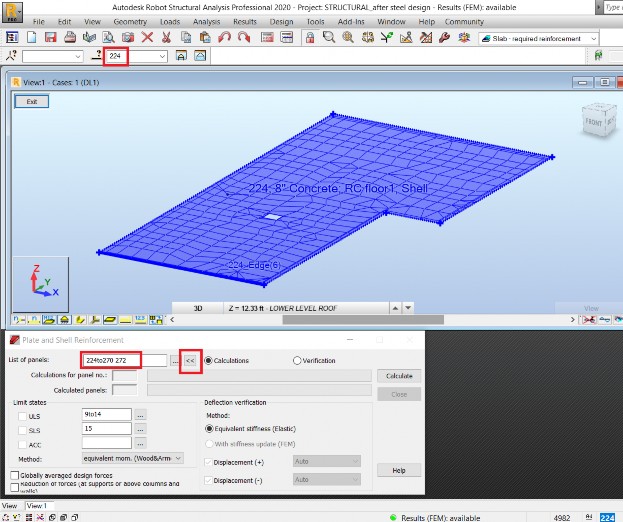
I'm reselecting the panel.
03:10
And I want to transfer it to the Plate and shell reinforcement
03:13
calculation dialog box.
03:15
I'm going to click the button with two arrows to the left.
03:19
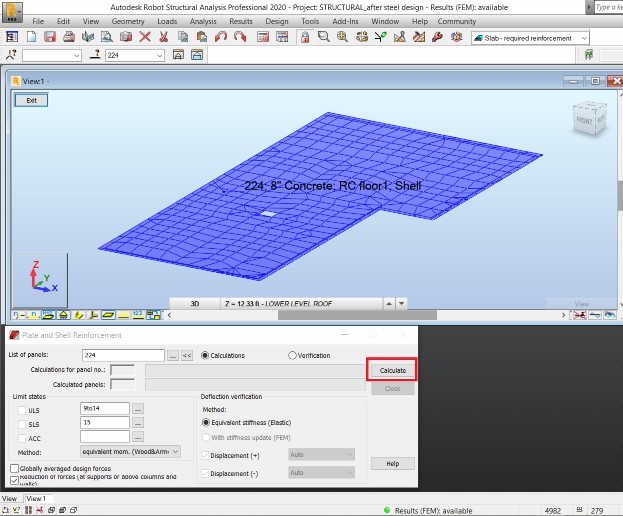
Now we can check and modify the design combinations
03:22
and calculation method to be used, and then click Calculate.
03:28
And the reinforcement is calculated.
03:32
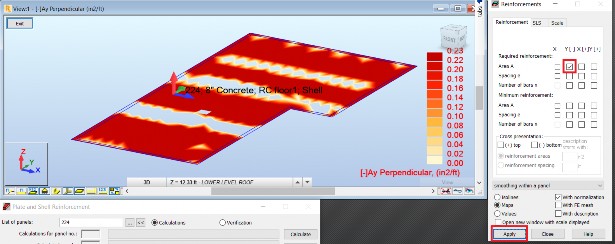
To display maps of the calculated results
03:35
in the Reinforcements dialog box,
03:38
select the various directions, and click Apply
03:52
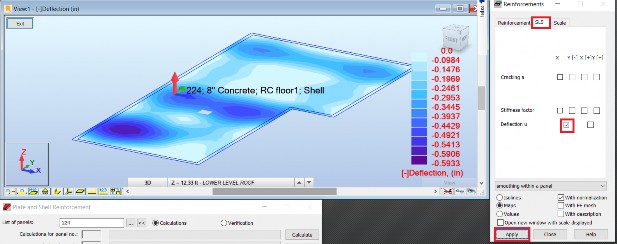
In the SOS tab, you can also display
03:54
maps of long term deflections.
03:58
From here, you can continue designing the reinforcement
04:01
for other parts of the model.