BIM Collaborate Products user interface
The user interface has all the tools you need to work on a drawing.
Explore the modules that make up BIM Collaborate and BIM Collaborate Pro projects in ACC.
ACC Account Admin
If you're an administrator, use Account Admin to manage projects, users, project templates, and other account settings.

- Product Picker: Toggle to the module you want to work with.
- Account Selector: Toggle between different accounts and projects you have access to, or search for a specific project.
- Help Menu and Autodesk Profile: This area takes you to more resources including Forums, Support, the Learning Panel, and your Autodesk ID profile.
- Projects tab: Create or edit projects. Click a project to go to Project Admin section for that project.
- Members tab: Manage account members and their access to services.
- Templates tab: Create templates and edit existing project templates.
- Settings tab: Edit the Account name, and find your Account ID.
- BIM 360 admin tab: Access the Analytics, Apps, Companies, Roles, and Settings tabs in the BIM 360 Account Admin module.
- Project Type icon: Specifies whether projects are hosted on ACC or BIM 360.
Project Admin
Administrators and project managers use Project Admin to manage project members, permissions, and project-level settings.
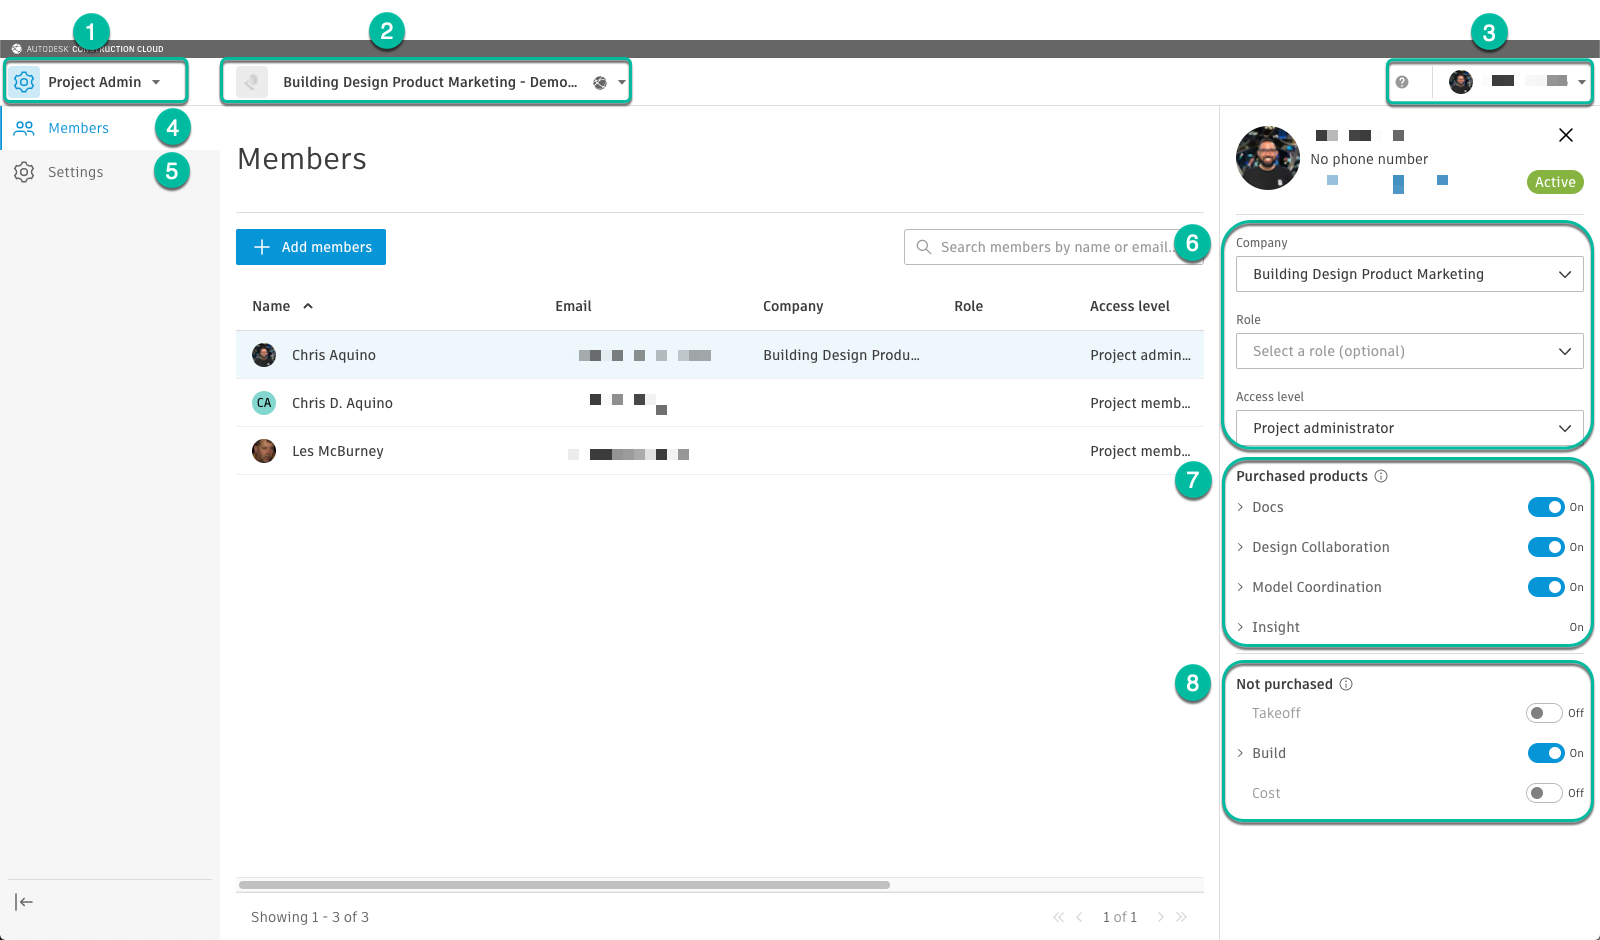
- Product Picker: Toggle to the module you want to work with.
- Project Selector: Toggle between different projects you have access to, or search for a specific project.
- Help Menu and Autodesk Profile: This area takes you to more resources including Forums, Support, the Learning Panel, and your Autodesk ID profile.
- Members tab: Manage account members and their access to services. The default tab in Project Admin.
- Settings tab: Edit the project profile information and access the settings for the activated project modules.
- User Project settings: Part of the drawer that opens when you click a user. Used to assign or edit user information for the project.
- Purchased products: Product entitlements assigned to the user.
- Not Purchased modules: Modules not included in the subscription for the account but activated anyway (access requires subscription).
Docs
Docs allows you to organize project data across the project teams.
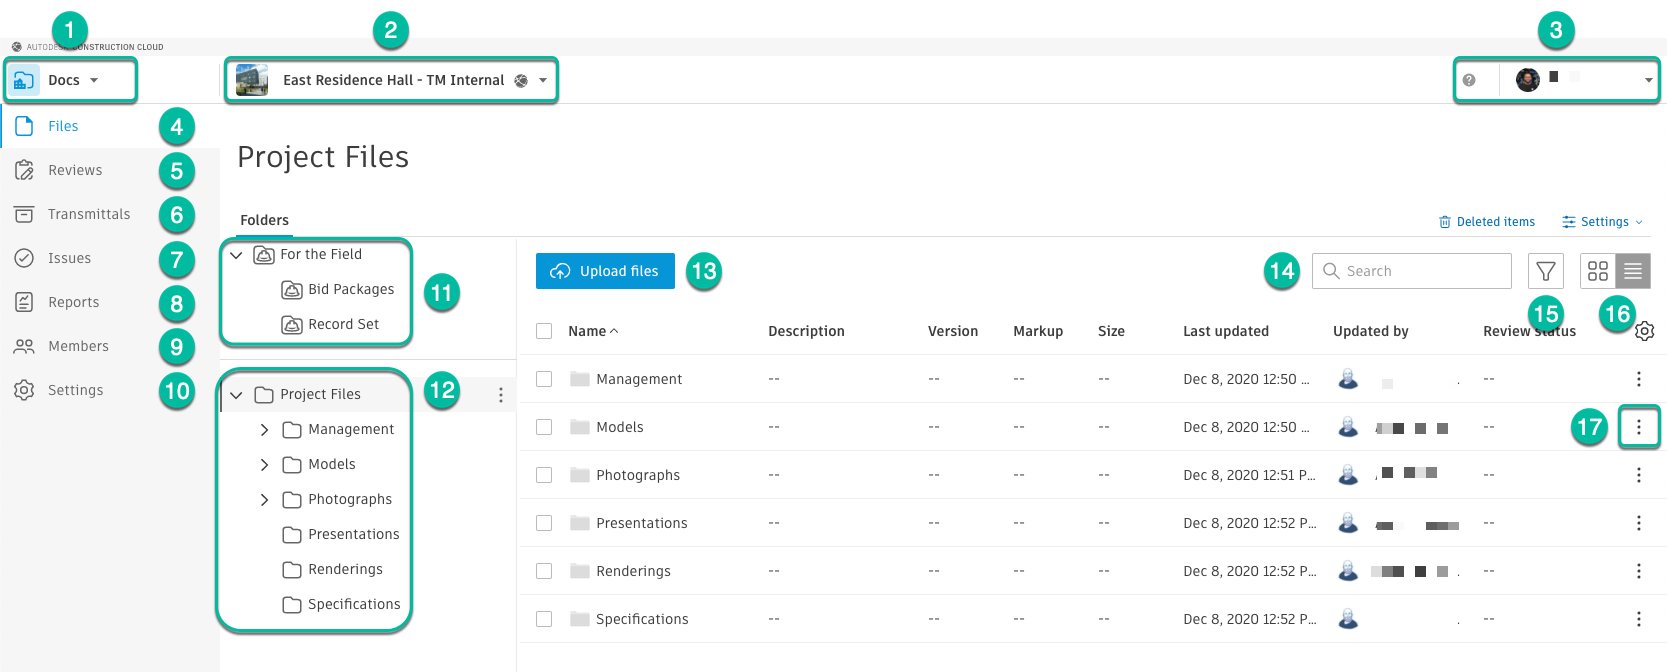
- Product Picker: Toggle to the module you want to work with.
- Project Selector: Toggle between different projects you have access to, or search for a specific project.
- Help Menu and Autodesk Profile: This area directs you to more resources, including Forums, Support, the Learning Panel, and your Autodesk ID profile.
- Files tab: Manage the structure of your project folders and control permissions to files and folders.
- Reviews tab: Create approval workflows and review files.
- Transmittals tab: Create, review, and export transmittals.
- Issues tab: Create and manage issues in the project.
- Reports tab: Create, configure, schedule, and view reports.
- Members tab: Manage members and their access permissions.
- Settings tab: Edit the project profile.
- For the Field: View files that are available to all project members.
- Project Files: View files that are in progress and not ready for the field.
- Upload Files
- Search bar: Search for text in 2D files.
- Filter: Filter files by Action By, Activity, or time period.
- File display: Display files in a grid or in a list.
- Folder/file management: Expand the gear icon to view tools for managing folders and files.
Design Collaboration
Design Collaboration allows firms to manage and explore data sharing in a visual way using the timeline, project model, and change visualization.
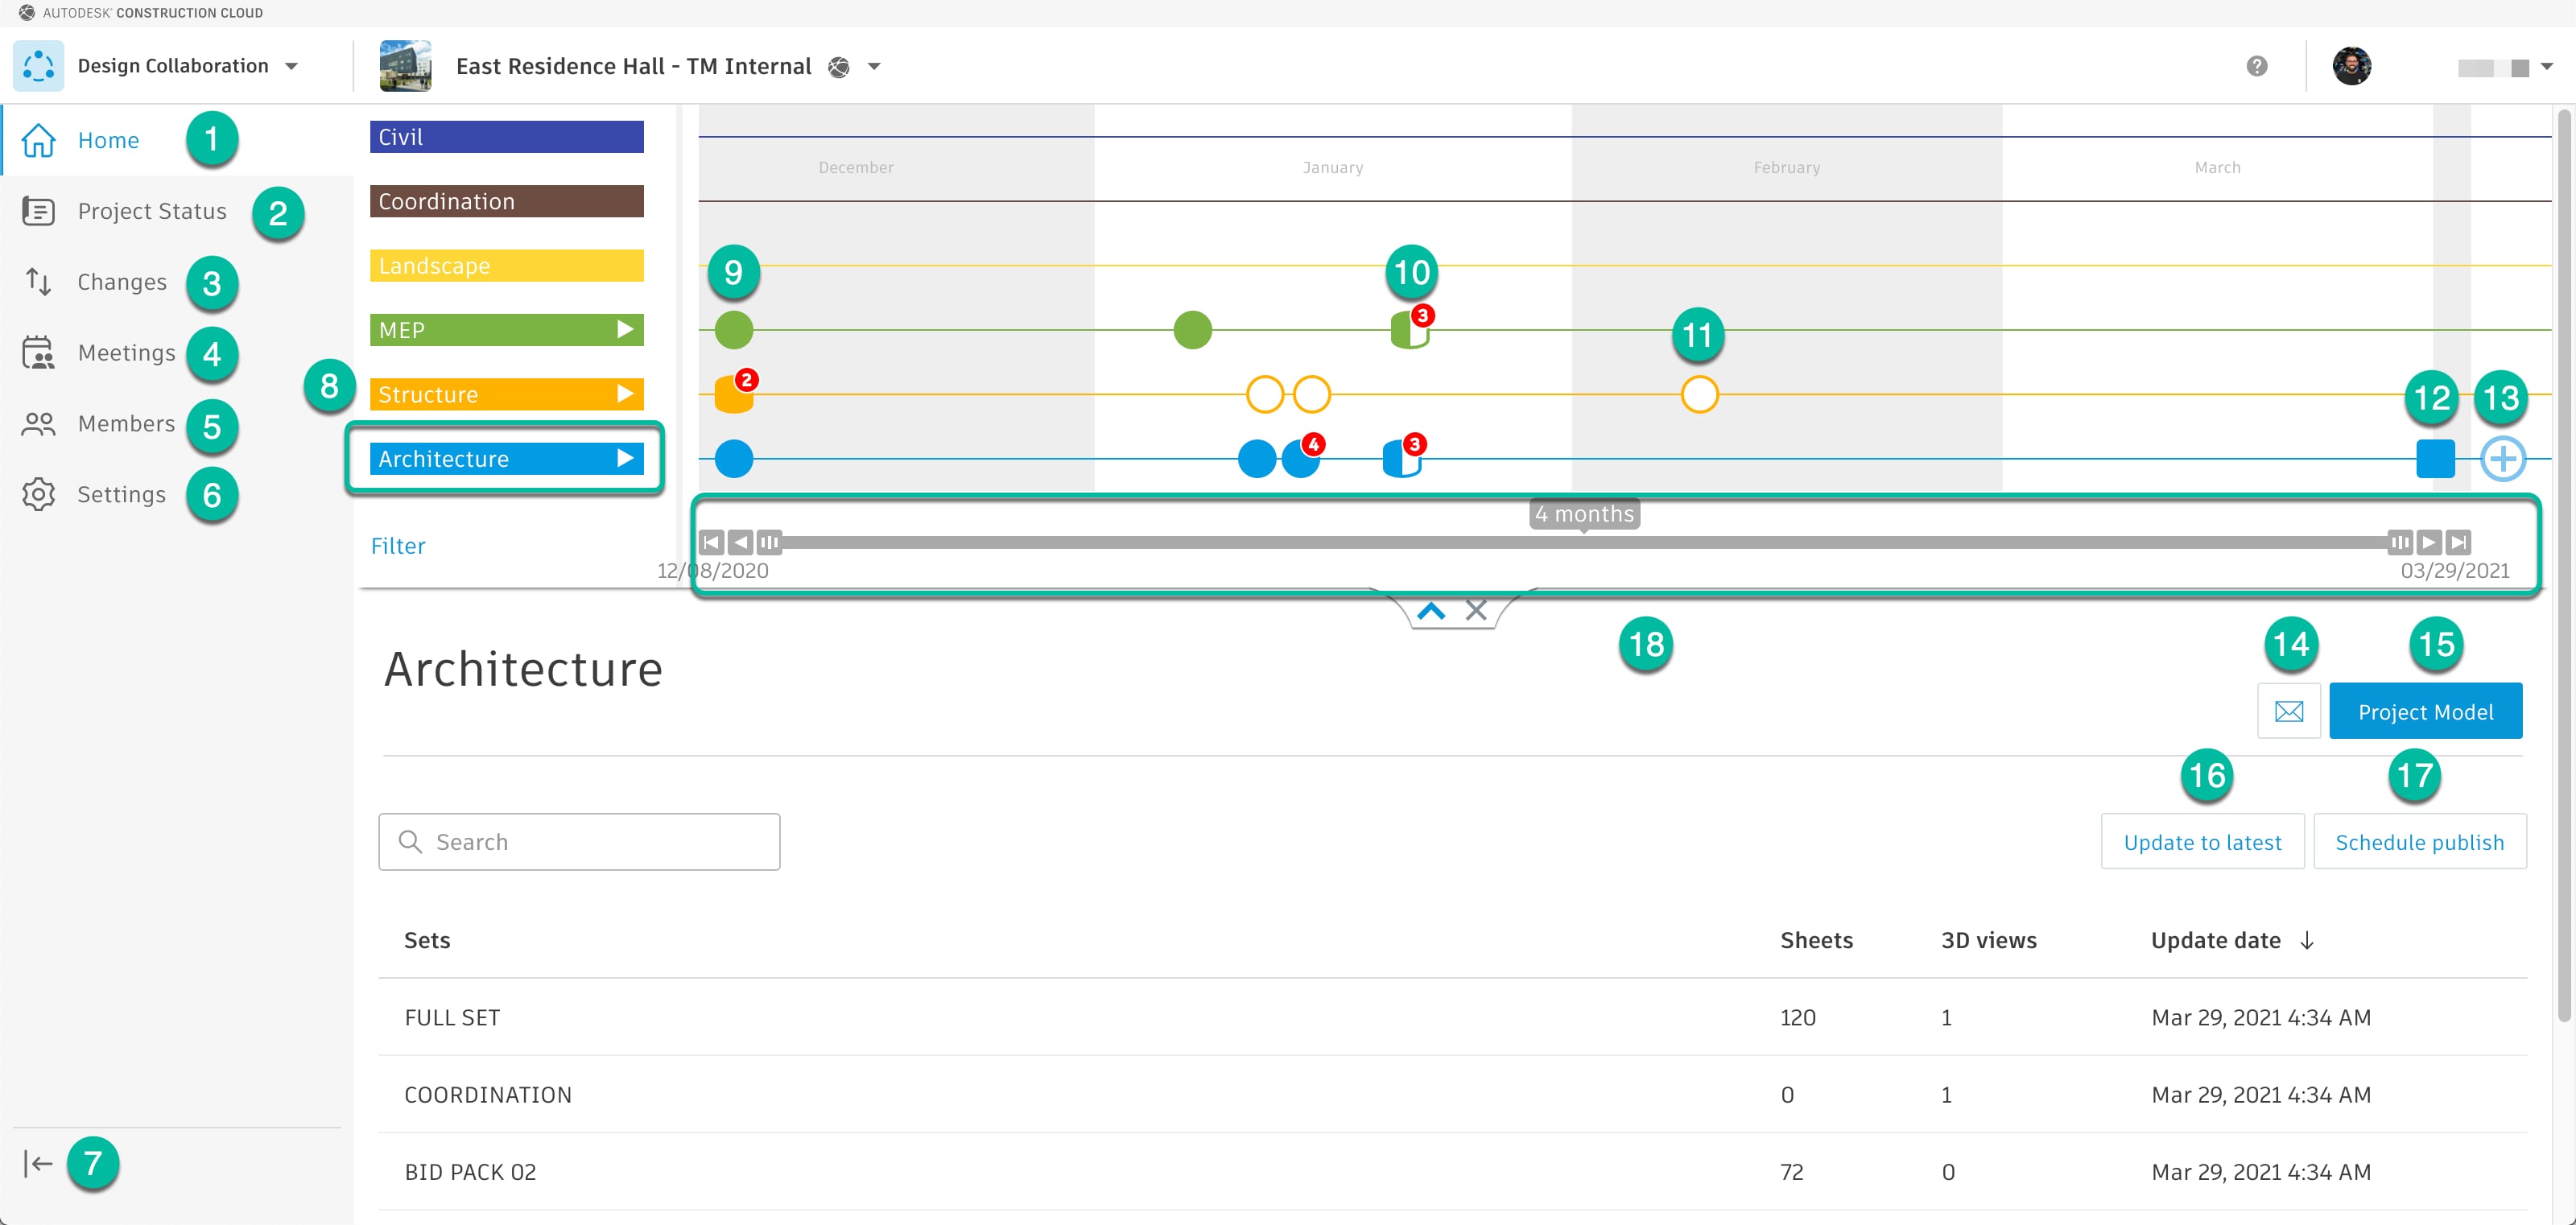
- Home tab: See the project timeline and the sets in your team space.
- Project Status tab: See when the files in your team were updated.
- Changes tab: Create and review watch groups and review changes in the models.
- Meetings tab: Document and facilitate meetings between project members.
- Members tab: Manage members and their access permissions.
- Settings tab: Edit the project profile.
- Collapse button: Collapse the tabs column.
- Active Team: This is the active team’s timeline and set list.
- Filled Circle: A filled circle in the timeline represents a consumed package.
- Half-filled circle: There are multiple packages available, and at least one of them hasn’t been consumed. The superscript denotes how many packages are available.
- Empty Circle: A package is available but hasn’t been consumed.
- Filled Square: A new version of the work-in-progress model has been published.
- Create a package button: Create a package from a published model to be shared with other teams.
- Email notifications: Manage email notification settings.
- Project Model: View your team’s project model, consisting of your team’s work-in-progress models and any consumed models from other teams.
- Update to latest: Update the work-in-progress model by triggering publishing from Revit.
- Schedule a publish: Automatically publish your model on a weekly schedule.
- Timespan: Change the timespan displayed in the timeline.
Model Coordination
Model Coordination provides an easy way to identify and review clashes in project models.
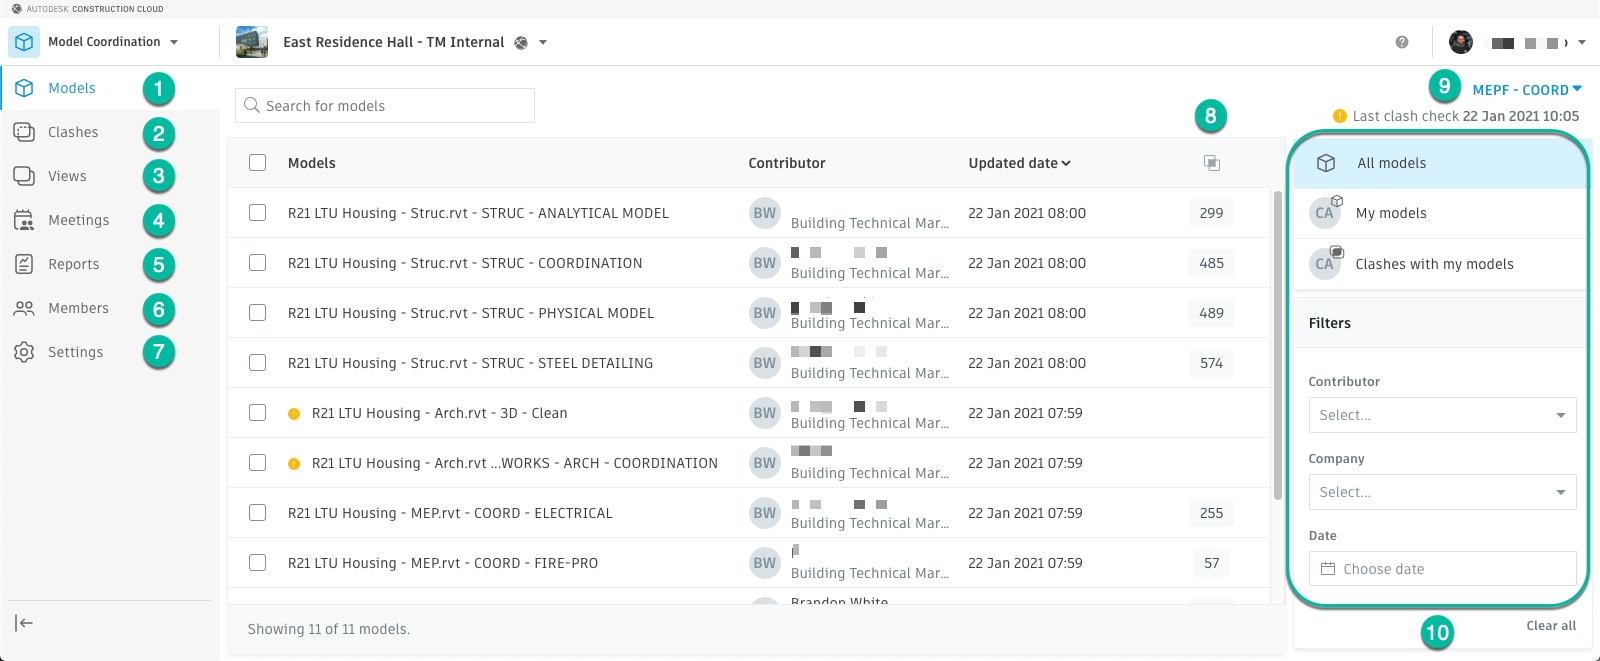
- Models tab: See the models in your coordination space.
- Clashes tab: Access the clash grid to view the clashes between models.
- Views tab: Create and open views.
- Meetings tab: Document and facilitate meetings between project members.
- Reports tab: Create, configure, schedule and view reports.
- Members tab: Manage members and their access permissions.
- Settings tab: Edit the project profile.
- Number of clashes in the model: See how many clashes are in each model in the coordination space.
- Coordination space picker: Select the coordination space you want to review.
- Filters: Filter the models available in the list.
Insight
Insight provides project-level analytics.
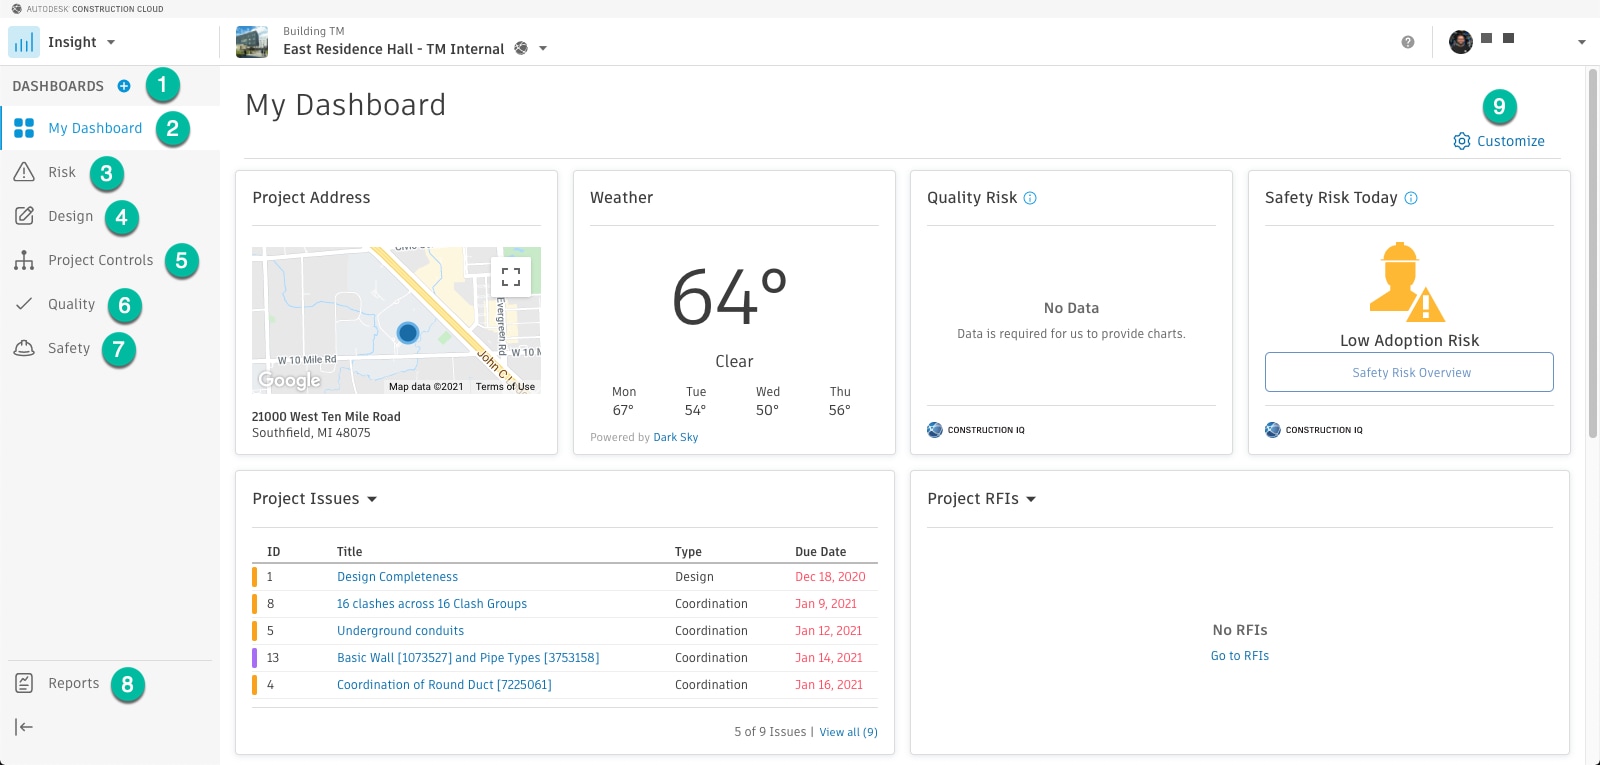
- Create shared dashboard button: Create shared or private (project admins only) project dashboards.
- My Dashboard: Display your default dashboard.
- Risk tab: Review aggregated risk data.
- Design tab: Review design review and model coordination metrics.
- Project Controls tab: RFI and submittal metrics
- Quality tab: Project quality metrics related to issue status, activity, and root cause.
- Safety tab: Monitor daily safety status, observation, and risk.
- Reports tab: create, configure, schedule and view reports.
- Customize button: Organize and add new cards to your dashboard.
Was this information helpful?