Wall views - bidirectional associativity and multiple views
Define bidirectional associativity. Work with multiple views. Switch and tile views. Constrain walls to levels.
Tutorial resources
These downloadable resources will be used to complete this tutorial:
Step-by-step guide
Define bidirectional associativity. Work with multiple views. Switch and tile views. Constrain walls to levels.
- Continue using the project you started in Part 2 of the example.
- In the Project Browser, under Elevations, double-click South to open the view.
- In the View tab, Create panel, click 3D View.
To remove the level lines from the 3D view:
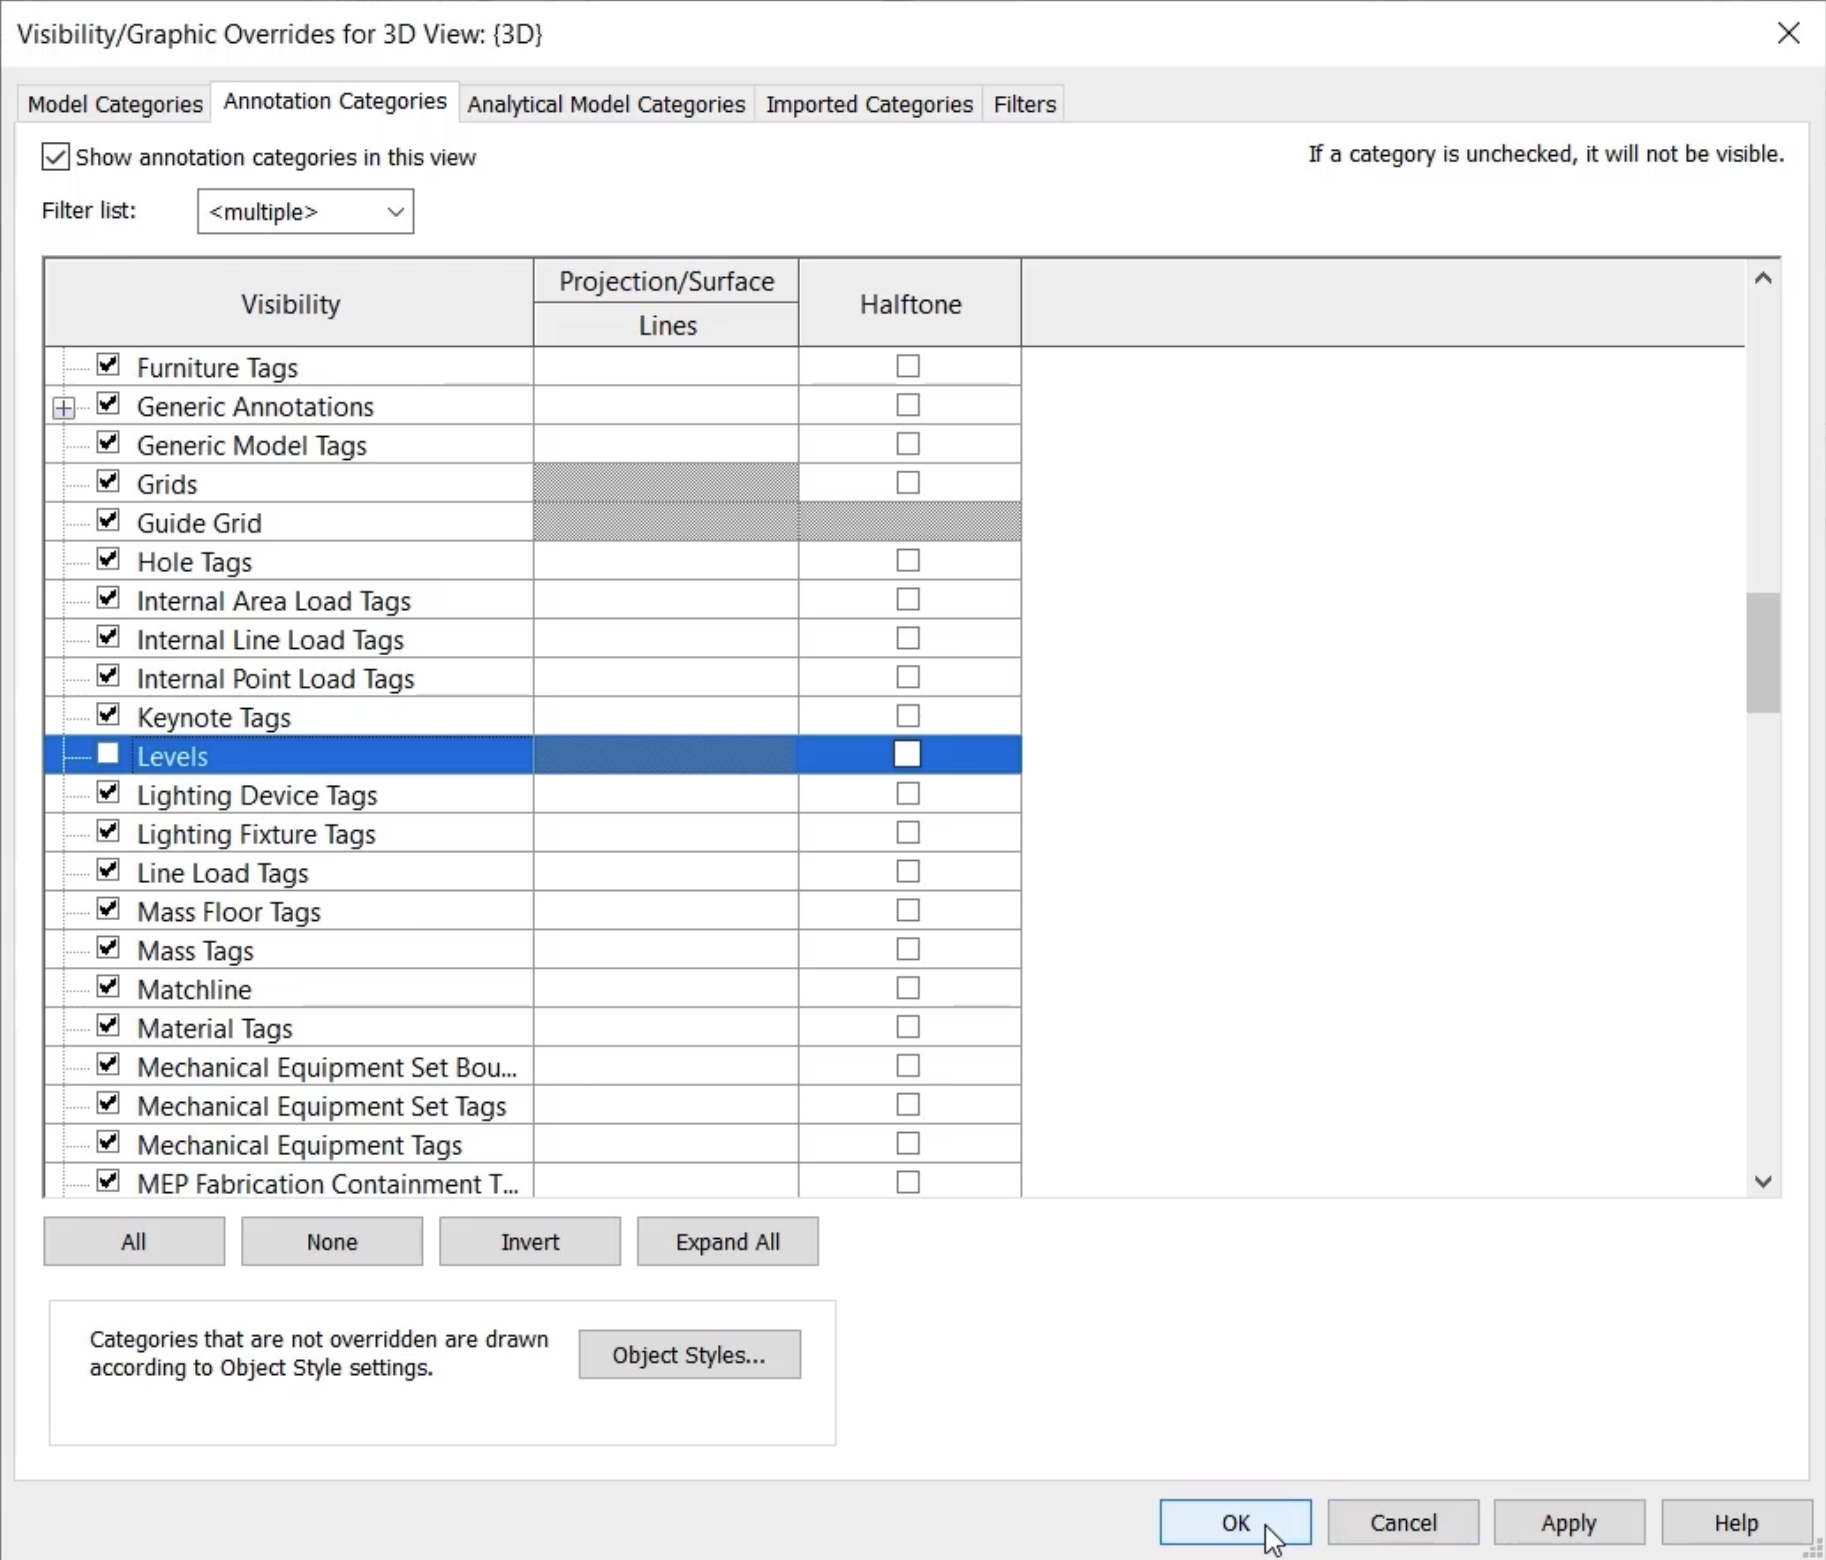
- In the Graphics panel click Visibility/Graphics.
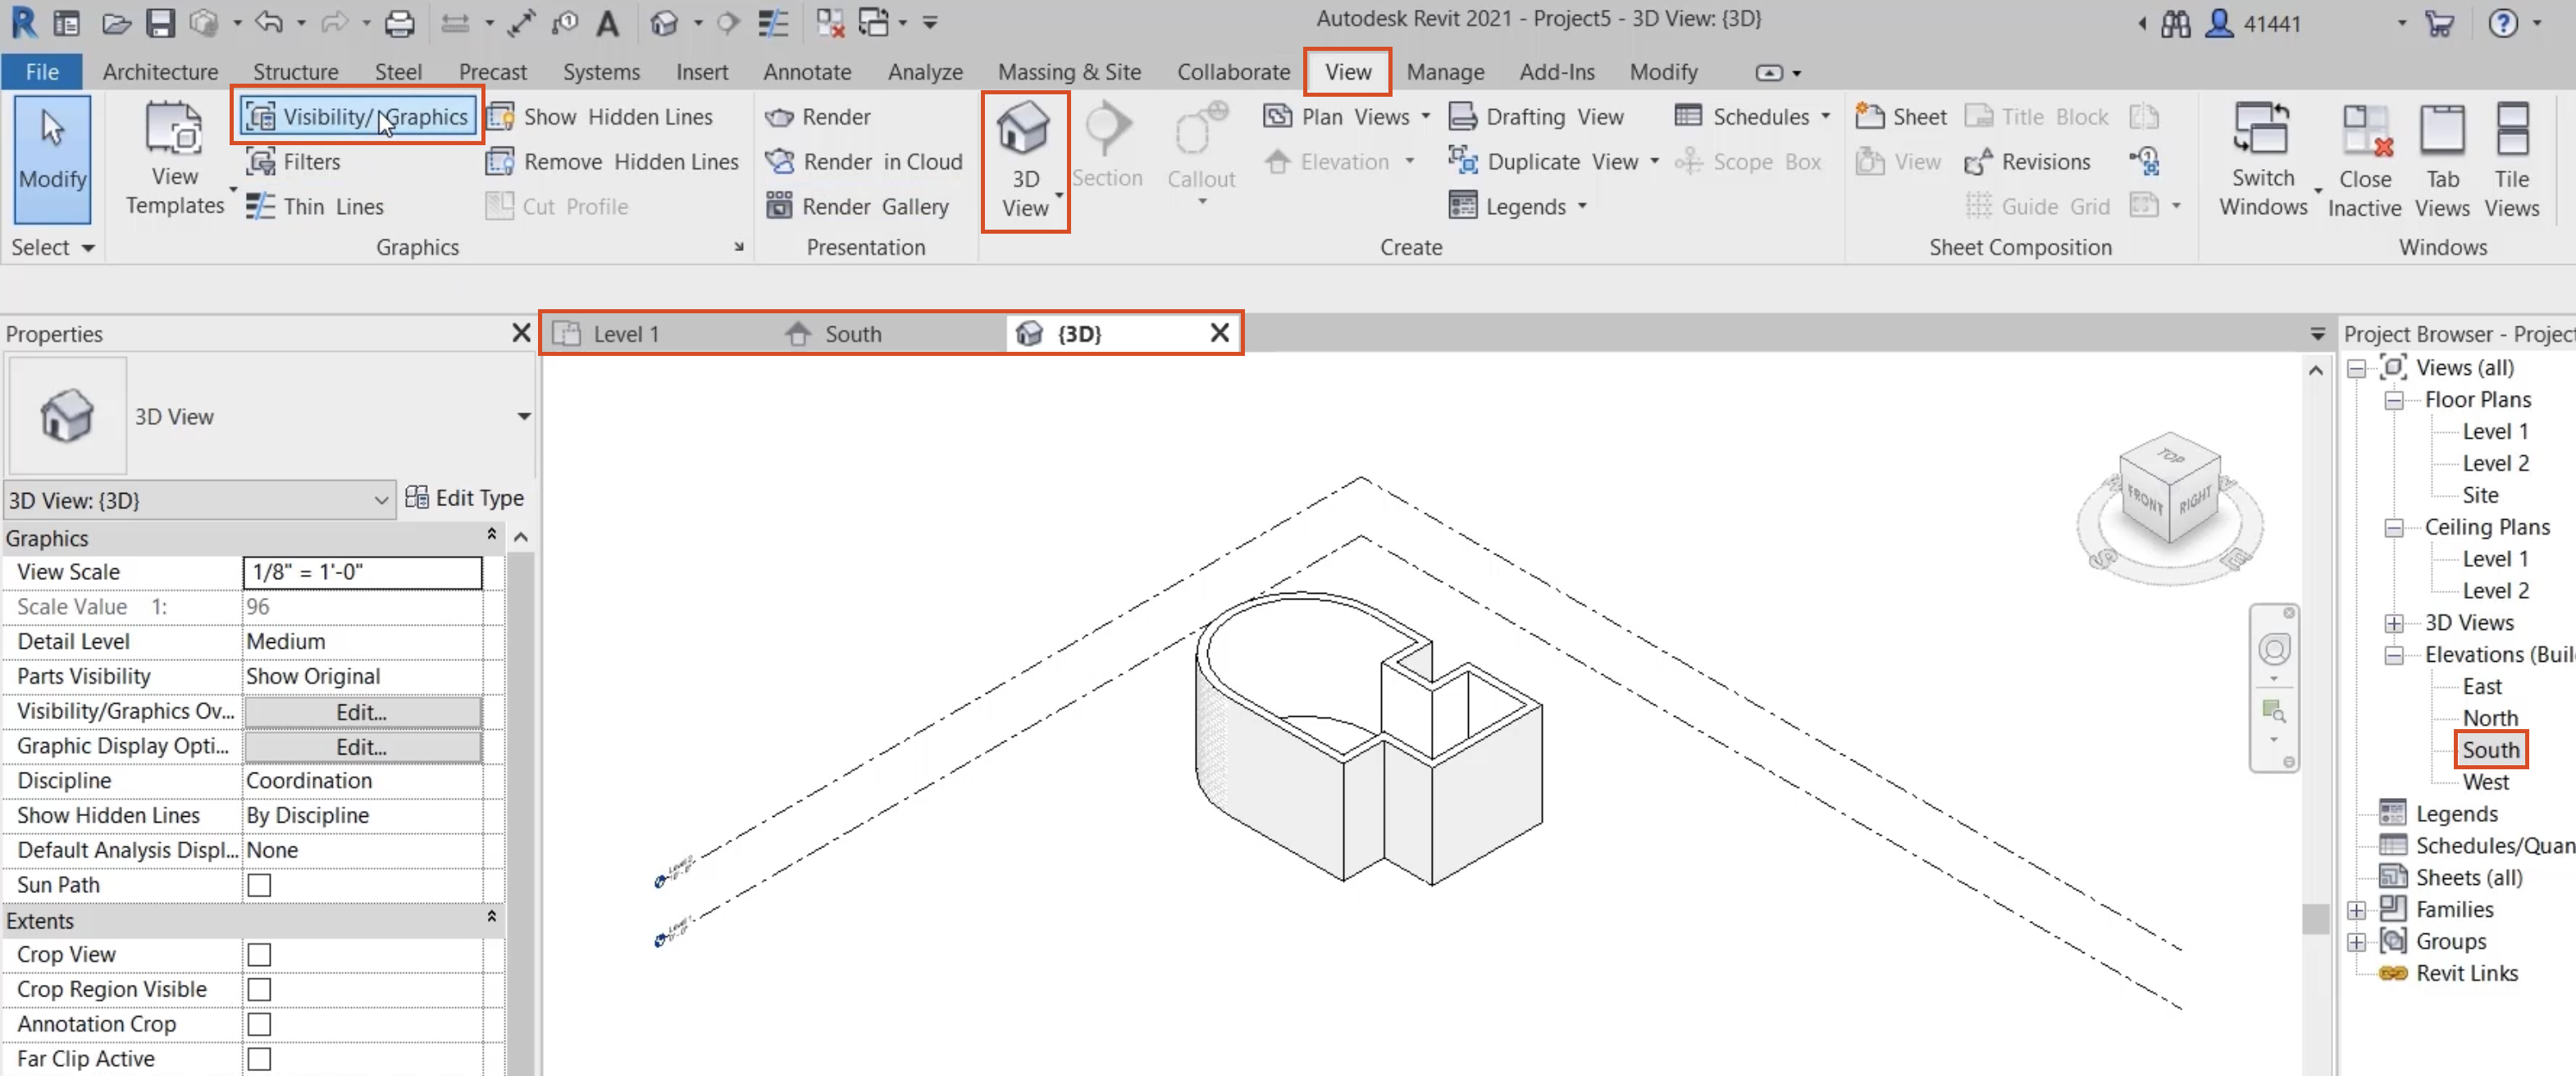
- In the Visibility/Graphic Overrides dialog box, Annotation Categories tab, scroll down and deselect Levels.
- Click OK.
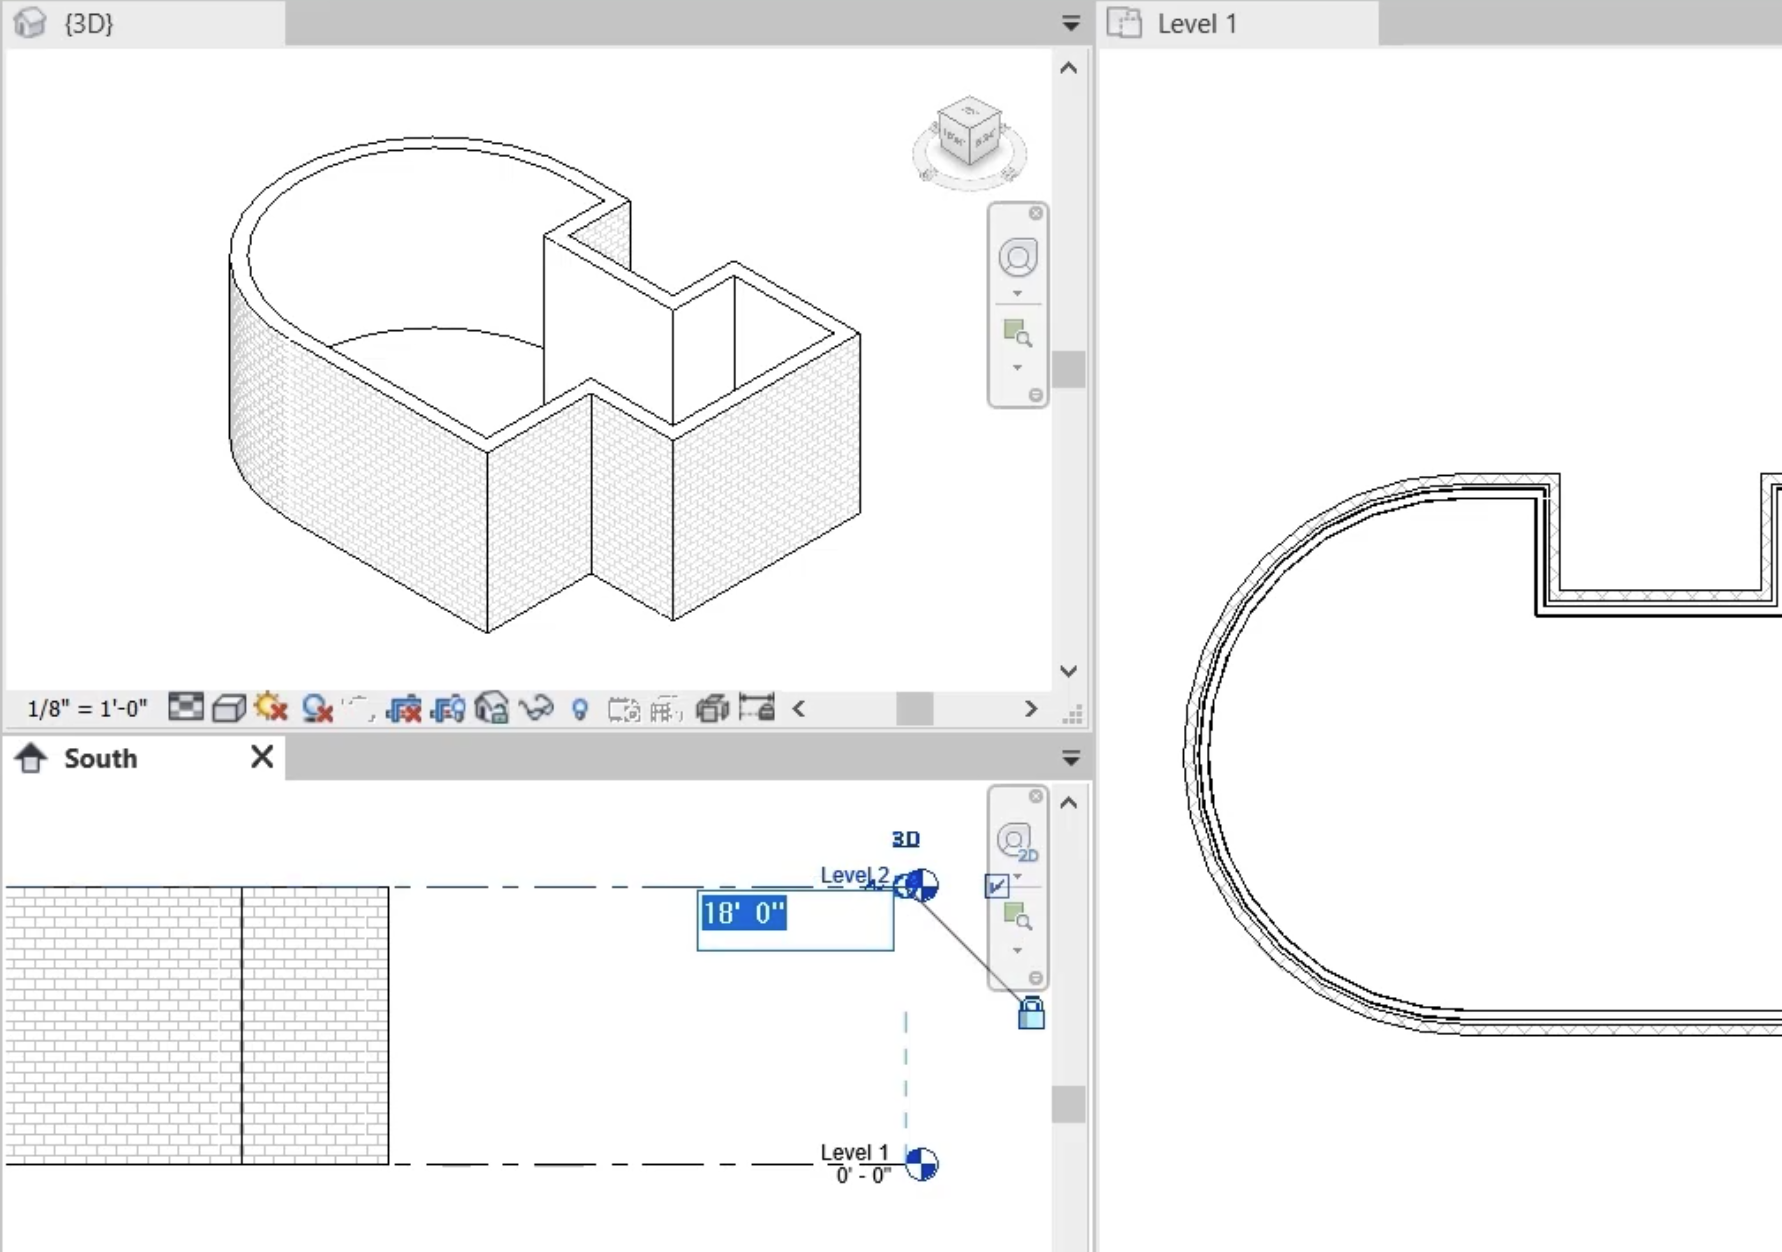
To adjust the display of the 3 open views:
- In the Windows panel, click Tile Views.
- Press ZA to Zoom All to Fit.
- Zoom into each view, as needed.
To demonstrate bidirectional associativity, make some edits:
- In the Level 1 plan view, select a wall, noticing its selection in the 3D view.
- Move the wall in the plan view, and it also moves in the 3D view.
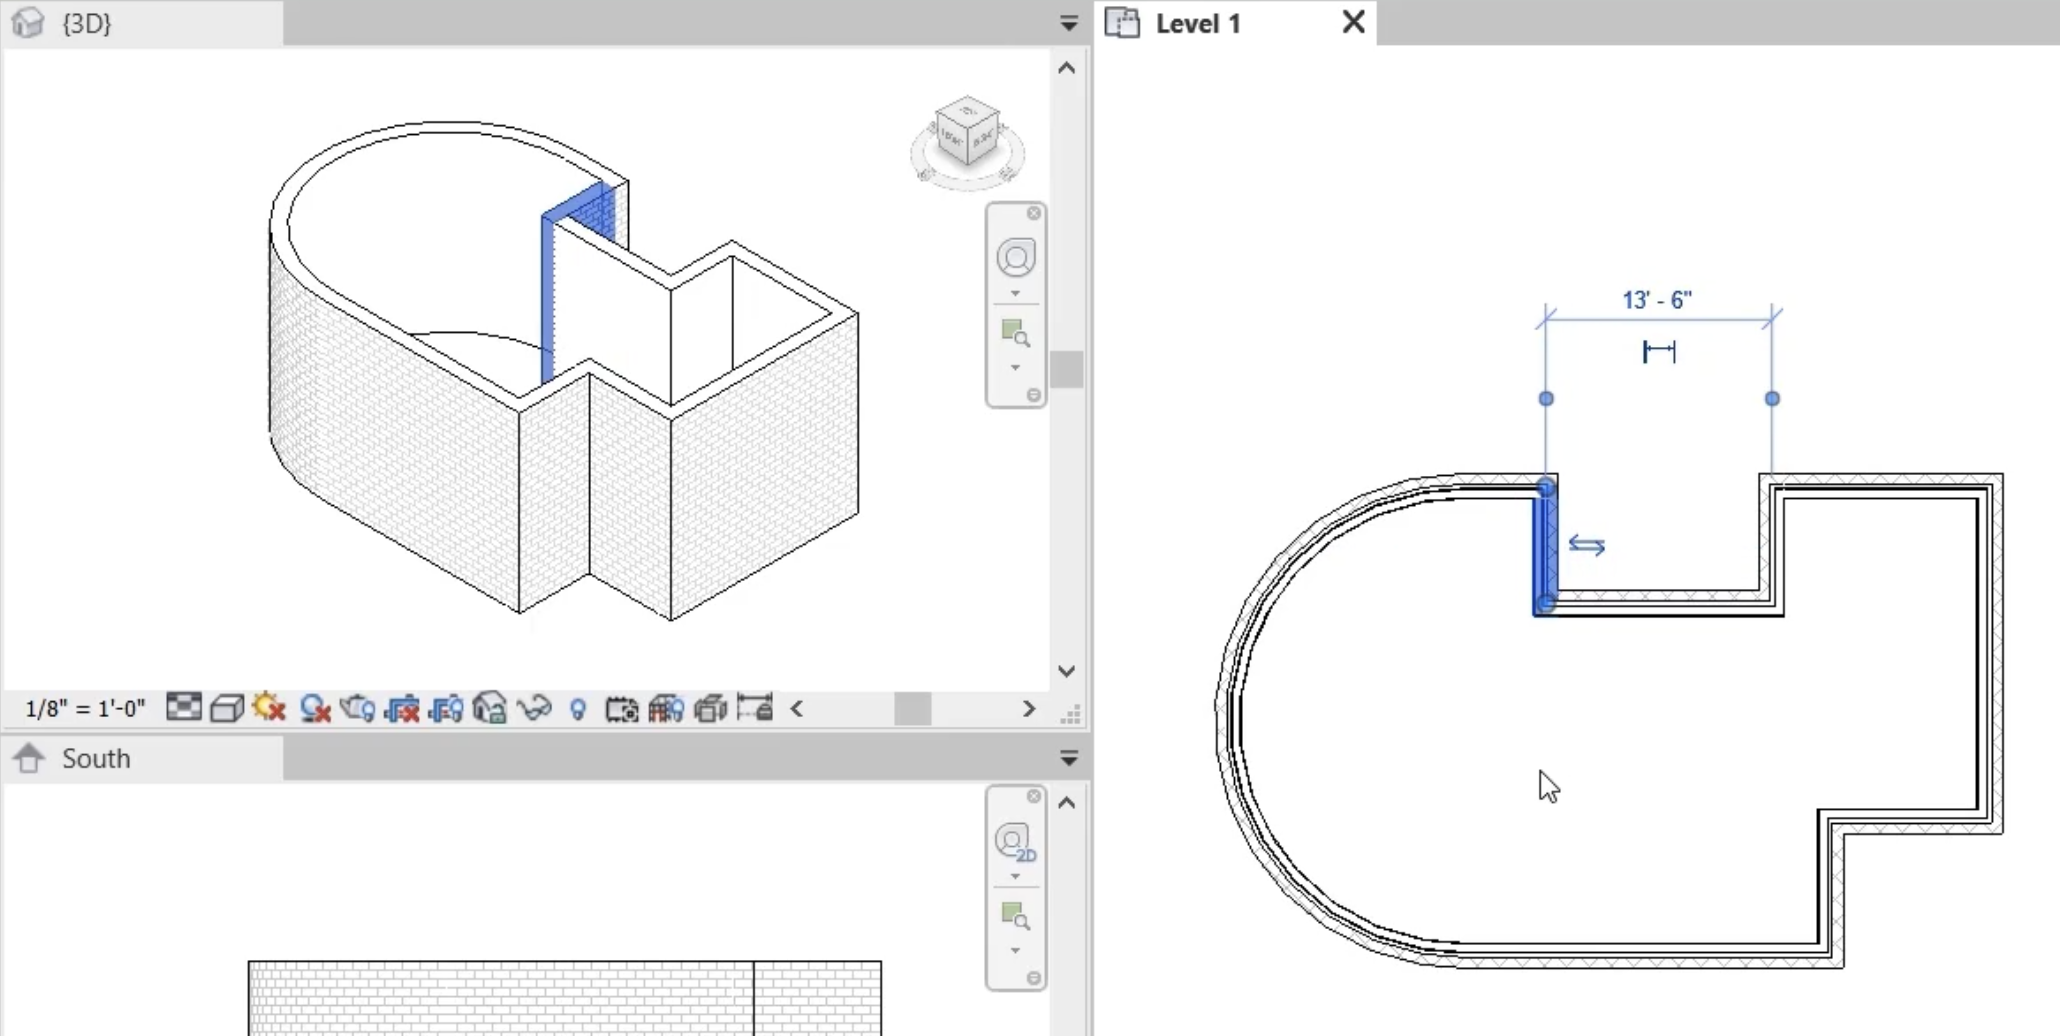
- In the Level 1 plan view, select the wall on the front of the building, which is visible in all three views.
- Move it down a little, and notice the curved wall updates parametrically.
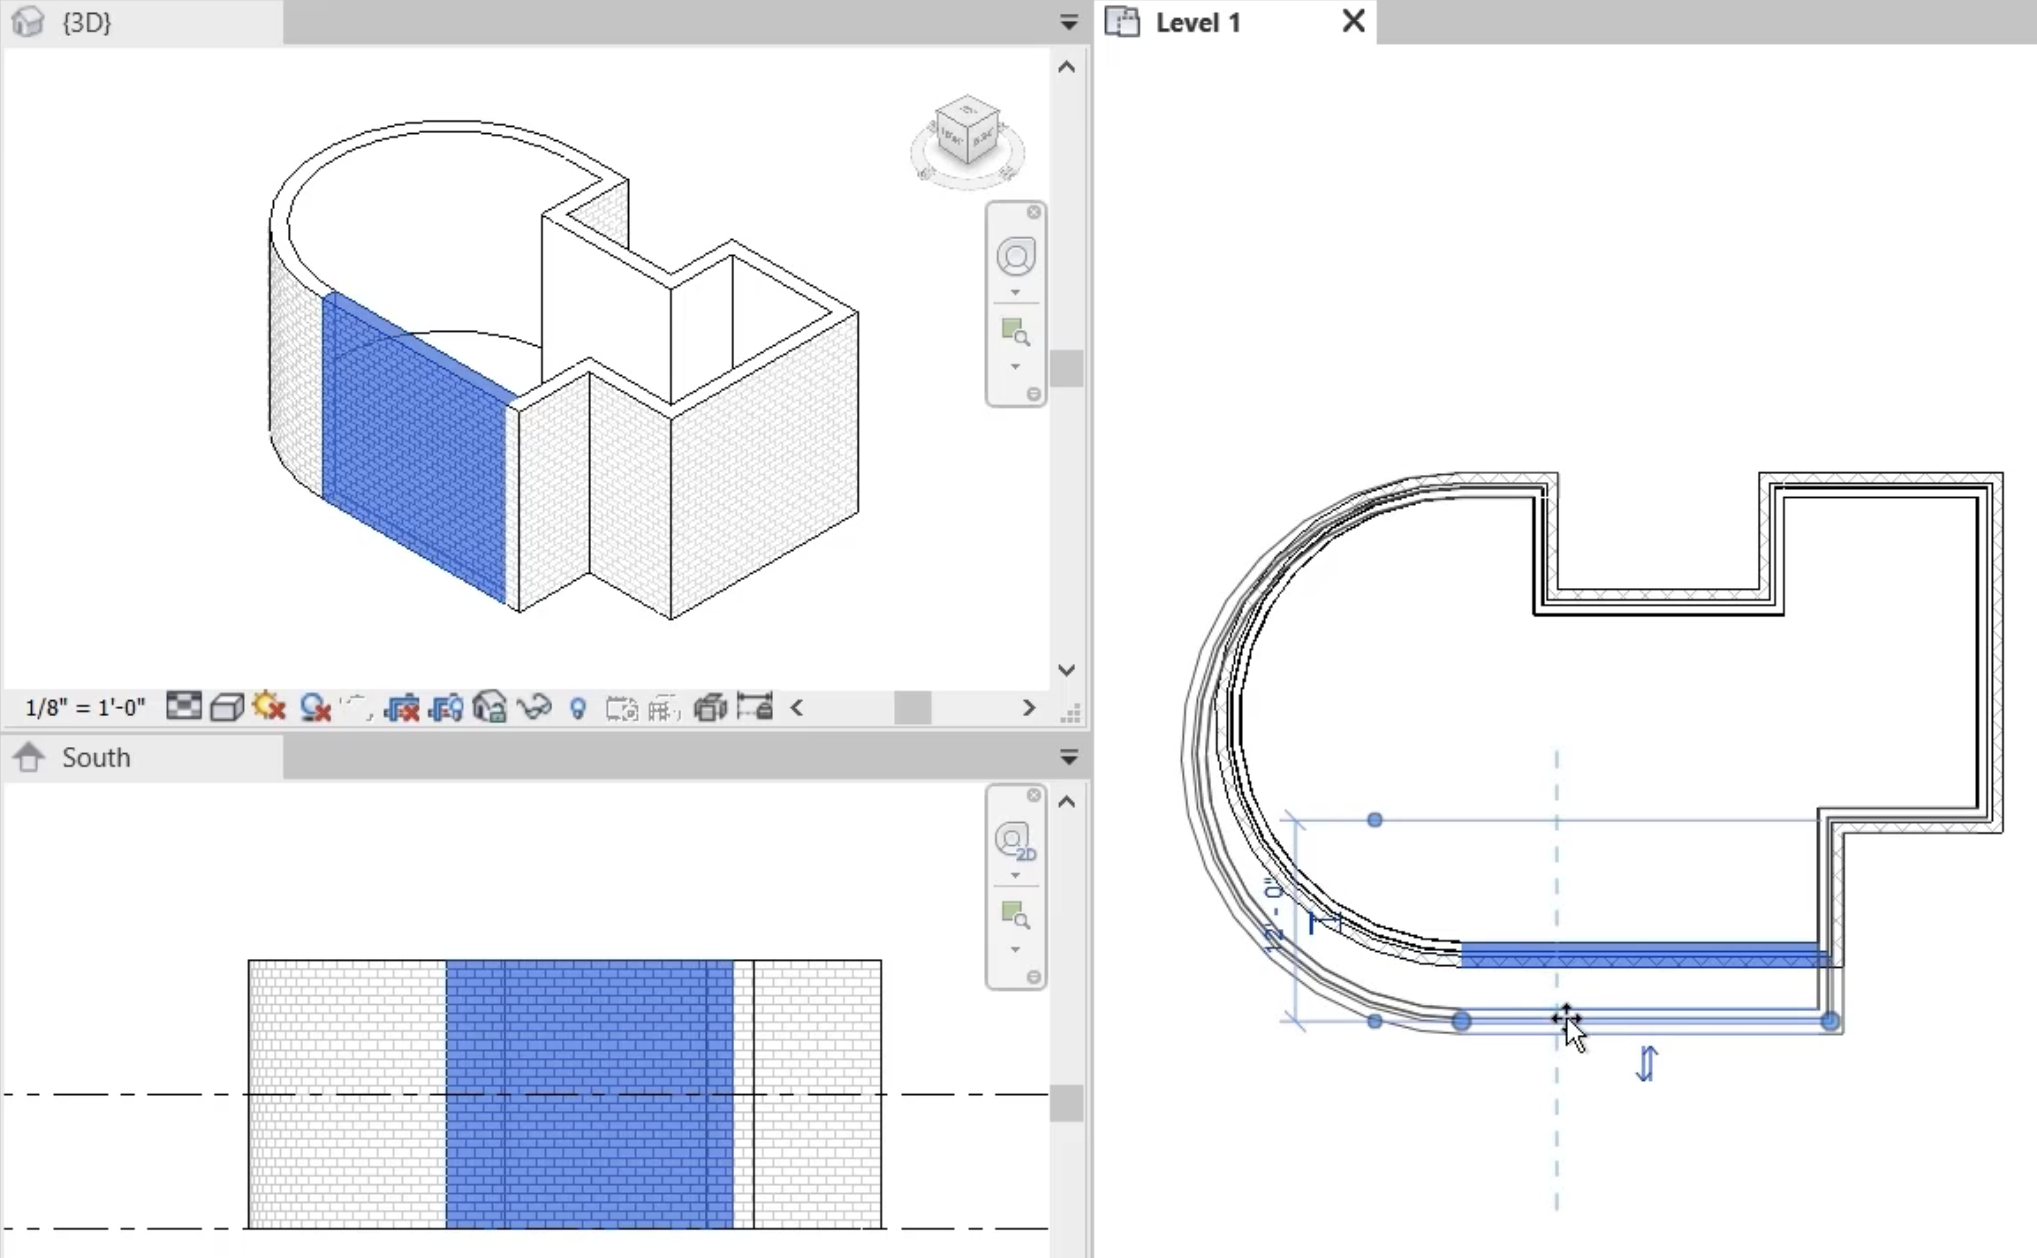
- In the 3D view, select all the walls.
- In Properties, change the Unconnected Height to 15'-0". The height changes in all 3 views.
- Change the Top Constraint to Level 2.
- In the South elevation view, click the Level 1 line.
- Use the control to drag the text closer to the wall.
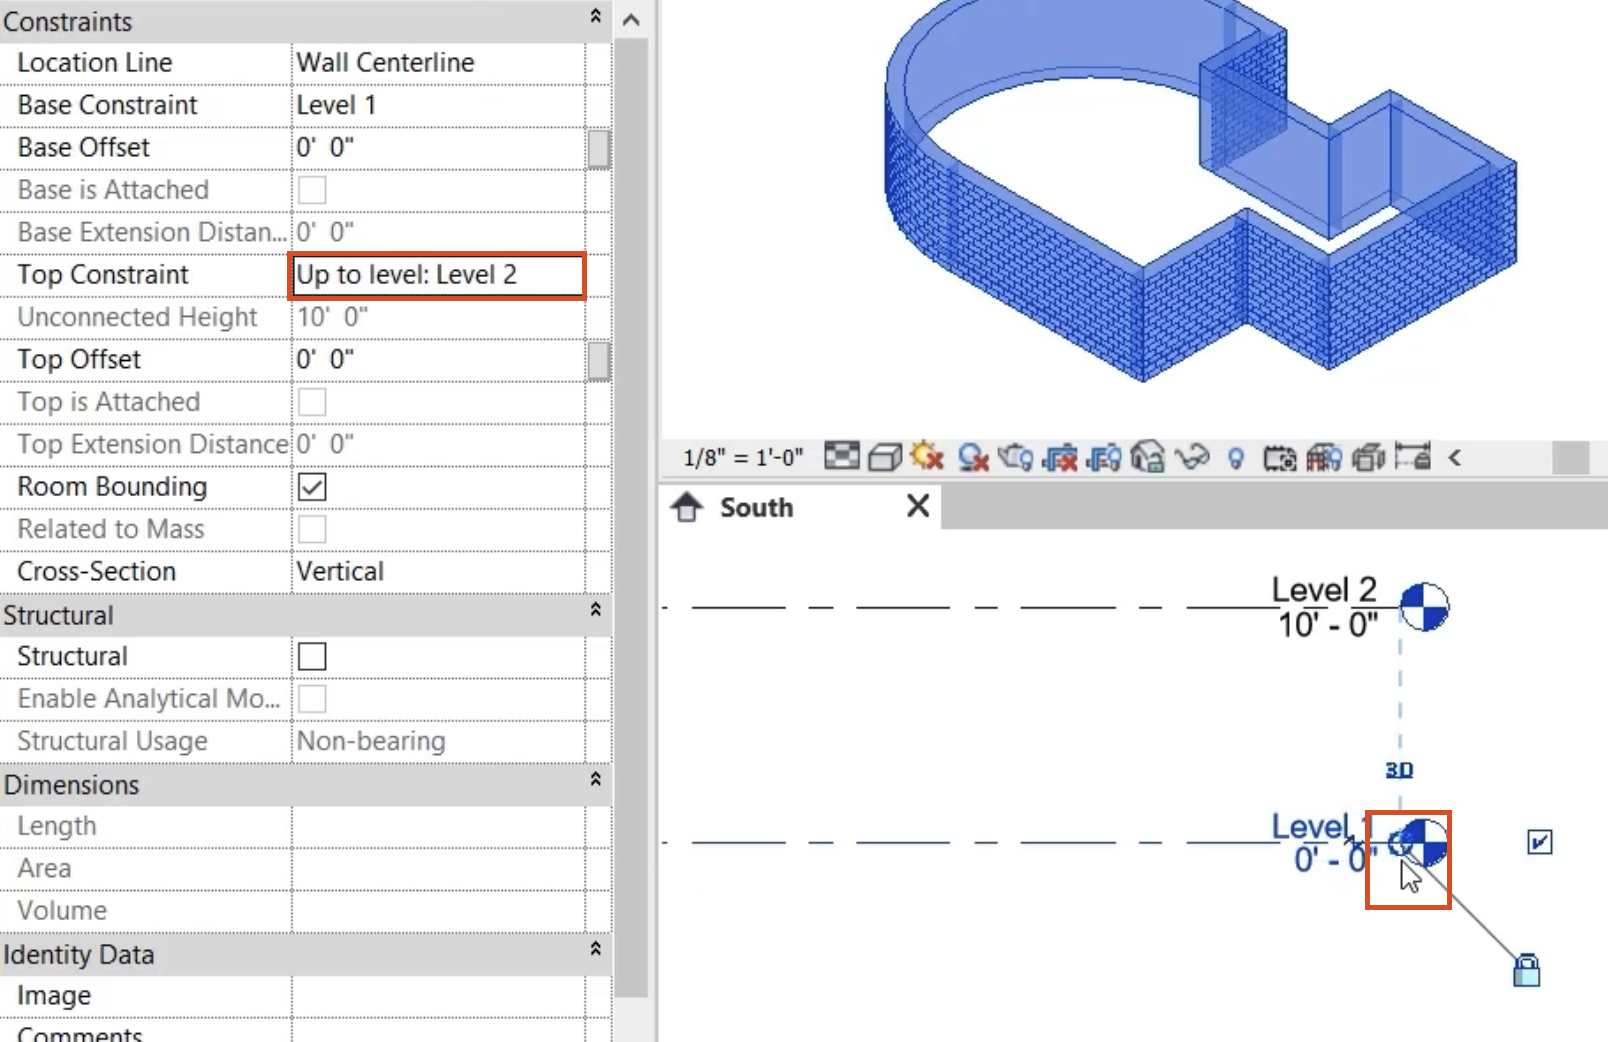
- Click Level 2.
- Change the height to 18'-0".
- Change the height again to 8'-0".
In all 3 views, all the walls connected to Level 2 move with the height of the level.