How the Robot Structural Analysis interface works
Learn how the user interface supports your workflow.
How the interface works
Learn how the user interface supports your workflow.
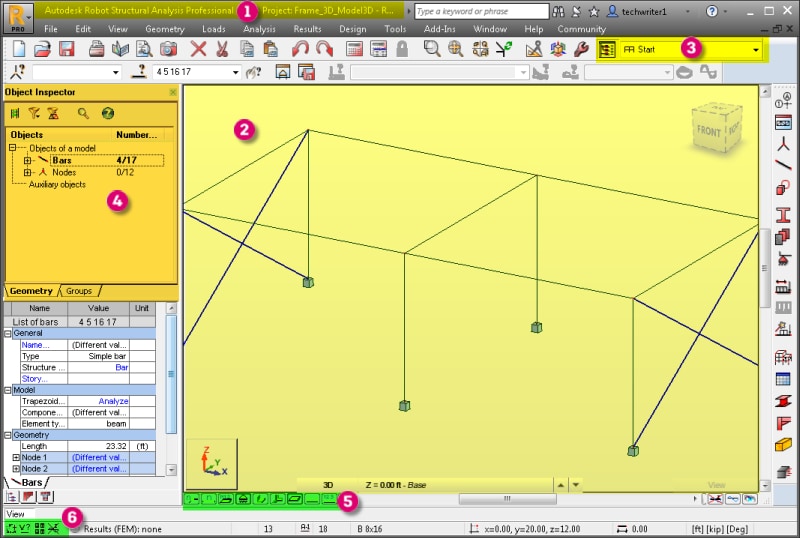
After you select a structure from the Start panel, you see a module-specific interface.
- Title bar: The title bar displays the project name and structure calculation data.
- Drawing area: The drawing area is the display and editing area of the structure. Above the drawing area, you see an array of menus, lists, and toolbars that you use in the design phase. The toolbar on the right contains commonly used tools.
- Layouts: Layouts are the dialogs, viewers, and tables that you use to perform specific operations. They facilitate consecutive operations while you define, calculate, and design a structure.
- Object Inspector: The Object Inspector shows the list of the objects that you can select, view, or edit in the structure.
- Views: These buttons control the views and display the properties of a structure. The viewed elements include node and bar numbers, panel numbers, support symbols, section shapes, load symbols and values, and structure deformations for a given load case.
- Quick launch buttons: At the bottom, you see quick-reference information, such as the names of active editing fields, cursor coordinates, and units. It also contains several quick launch buttons, such as Display, Snap Settings, and the Graphical Selection Filter.