Scale a plumbing fixture using AutoCAD LT
Follow these steps to scale a plumbing fixture in a sample drawing.
In this tutorial, you will learn how to insert and scale a plumbing fixture in a sample drawing. This will allow you to customize templated fixtures to your desired specifications.
Open
- Select Explore Sample Drawings from the start tab.
- Click on Sheet Sets > Architectural > Res > Wall Base.dwg and open the file.
- You will be asked if you want to open the drawing in Read-Only mode. You will not need to save changes, so click Yes.
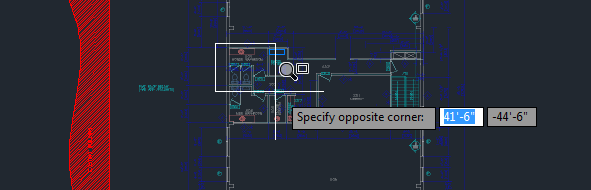
- Zoom in to room 205.
Insert
- In the ribbon, click on the Insert tab. In the Block pane, click Insert.

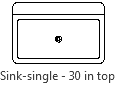
- In the Blocks palette, Current Drawing tab, scroll down and click the Sink-Single icon.
Scale
- Press S for Scale and enter 0.75 to scale the sink to ¾ of its original size.
- Use the Midpoint object snap to place the sink on the midpoint on the front of the splashboard.

Assign properties
- Select the oval sink. Right-click and select Properties to find out which layer is assigned to it. The sink’s layer, 2_Arch_Plan_Sink, will be specified in the Layer row of the Properties palette, underneath General. Press Esc to deselect.
- Select the new sink that you just placed.
- Right-click and select Properties in the menu.
- In the General section of the Properties palette, select 2_Arch_Plan_Sink from the drop-down menu located to the right of the Layer row.
Erase
Select the old sink and erase it by clicking Erase from the ribbon or by pressing the Delete key.
Conclusion
In this tutorial, you learned how to insert a plumbing fixture.
Now you can:
- Open a sample drawing
- Insert a fixture
- Assign layers
Was this information helpful?