00:01
In the previous video, we set up a customized view to generate a perspective.
00:07
Now I could simply hit the easy button for rendering.
00:12
However, what I want to do is I want to demonstrate what type of materials I have in mind for this particular room.
00:19
So in this video, we will be creating a brand-new material for the floor and we will apply it to the floor,
00:27
and we will apply existing materials to other parts of the room.
00:32
So, let's get started.
00:34
In Revit 2024, we can open up the small medical center that we were working on all along.
00:42
Or if you did not finish the previous video, you can open up small medical center material.
00:49
If Revit doesn't automatically open to the SECOND FLOOR - BREAKROOM 3D view.
00:55
In your project browser, go to the 3D Views category and double click on SECOND FLOOR - BREAKROOM.
01:07
So, I select the floor that we want to add a material to and you'll notice that it's a 12-inch generic floor.
01:17
That was good enough for the preliminary design.
01:20
But now we're getting more into a detailed design.
01:23
So, let's change that to a more specific floor.
01:28
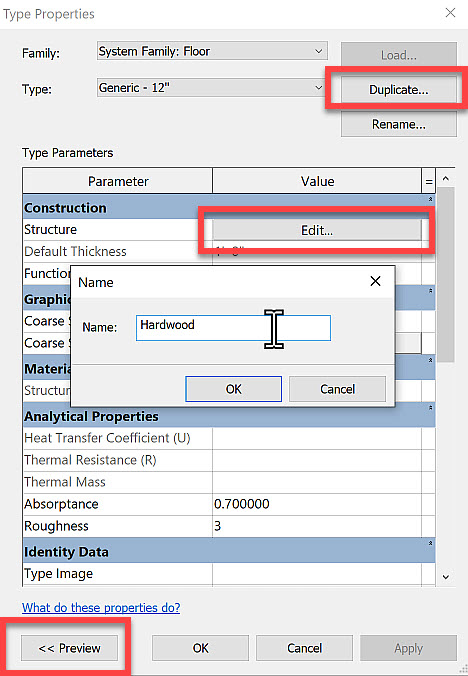
I click on "Edit type" in my properties. I want to duplicate this floor type and I will call it hardwood, expand your preview.
01:38
So, we can see what we're doing in section.
01:41
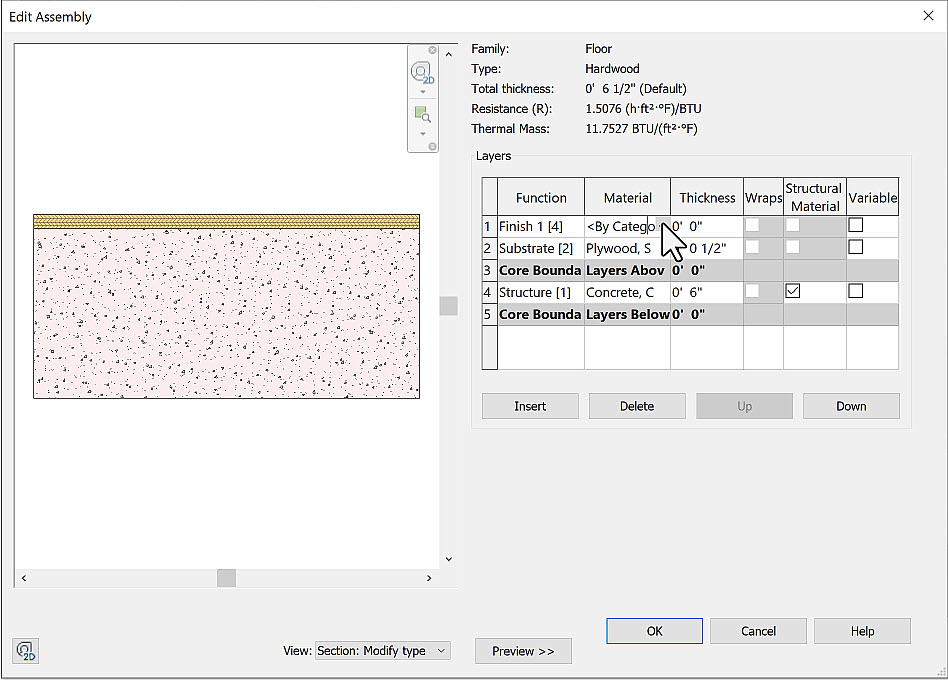
And for the structure, click on "Edit".
01:45
For structure [1], which is the core.
01:48
The material is by category.
01:50
So, let's change that by clicking on the browse button.
01:55
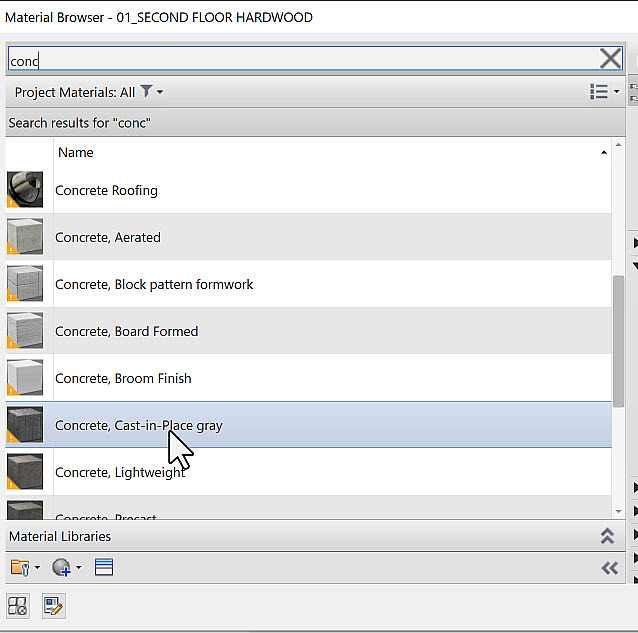
I want to make this concrete.
01:58
So, in my search button, I type in conc for concrete,
02:02
and I select "Concrete, Cast-in-Place gray" and click "OK".
02:08
For the thickness, let's make it 6 inches, make sure that you have this inch symbol.
02:15
Otherwise, it will be 6 ft. I want to add a new layer which is going to be above the core.
02:23
So, I select my core row and insert for a new layer.
02:27
The function for this layer is going to be substrate.
02:33
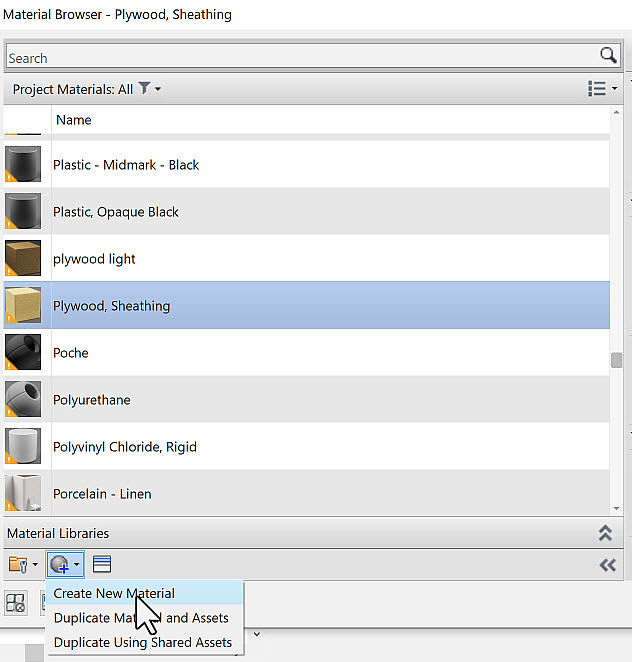
And for the material, I click on the browse button.
02:37
I want a plywood material. So once again, I'm going to search for plywood and here's my plywood sheathing.
02:46
Let's add some graphics to this.
02:49
Note that the foreground cut pattern is already set to plywood which is fine.
02:58
And let's make this thickness half an inch.
03:02
Let's add one more layer.
03:05
This one is going to be Finish 1.
03:10
And for the material and click on browse.
03:14
In this case, what we want to do is create a new material.
03:18
So down below expand and select create new material.
03:22
It's called Default New Material(1).
03:25
So, let's rename that to American Cherry.
03:34
For my appearance, so, let's click on this image folder.
03:40
Oops, it doesn't read the materials folder properly.
03:46
So, select another material and click on the name of the material and notice that it is going to the proper folder.
03:54
And all I need to do is click "Cancel".
03:58
Hopefully, Revit now remembers where the folder for the materials are.
04:03
So, if I go back to American Cherry, now I have the folder or my materials and here's my American cherry.
04:14
I want to tweak the image.
04:16
So, this time I select the preview of the image and my texture editor opens up.
04:23
I'm going to click on "Link texture transforms".
04:27
So, what this means is if I rotate the floor,
04:31
the graphics and the texture itself will rotate with it.
04:35
For my sampling size, 1 ft is a bit small.
04:40
I'm going to create my sampling size that for 36 inches.
04:44
My repeat pattern is going to be horizontally and vertically tiled. So that's good.
04:52
I also want to add a bump to give it some more texture. So, I expand bump, check it on, select the same material.
05:02
And once again, I'm going to make my sampling size 36 inches both X and Y,
05:09
and just make sure that my tiling horizontally and vertically is set.
05:13
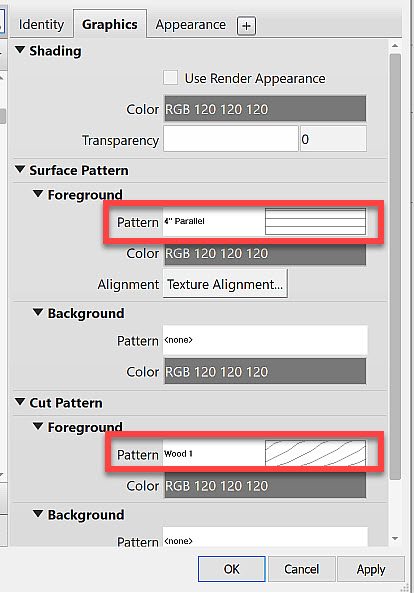
Now for my graphics or my cut pattern we need to go to the bottom.
05:19
Here is a variety of wood patterns. I'll select "Wood 1".
05:25
And for my surface pattern under foreground, I want to make this model lines.
05:31
So, the lines drawn on the surface will actually be 4 inches apart,
05:37
rather than scaling based on my output scale.
05:49
Now, for my thickness for this hardwood, I'm going to make this three quarters inch.
06:01
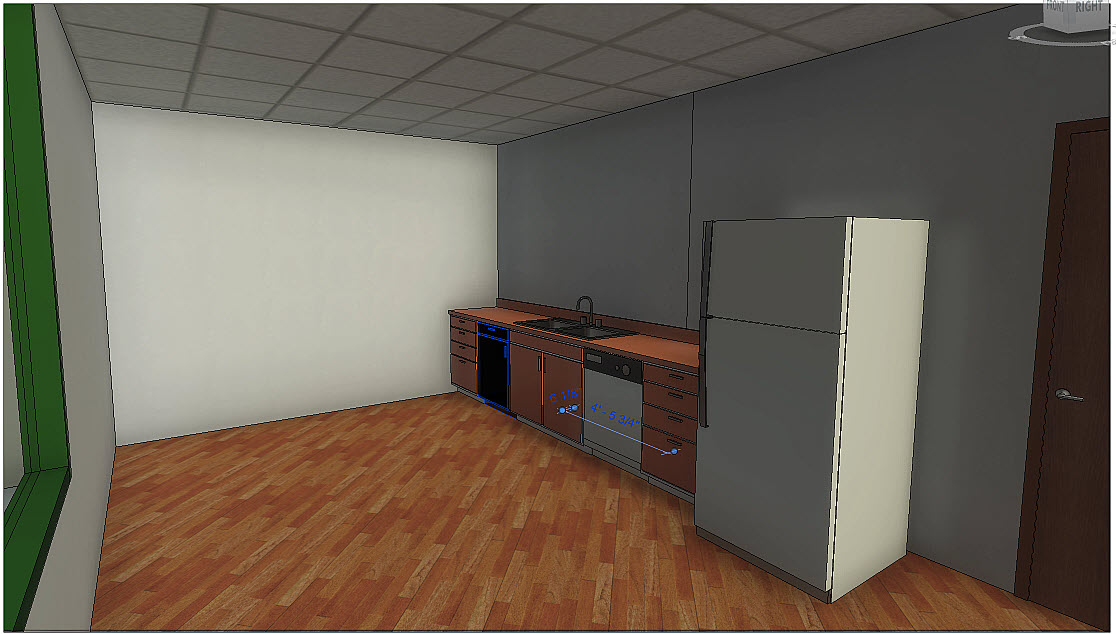
And the "Modify", and here's my floor.
06:05
Let's go to the SECOND FLOOR - BREAKROOM Callout that we created.
06:11
Notice that the floor is already set to a 45 degree.
06:16
Hover over the floor.
06:19
Use the tab key to select one of these model lines.
06:26
In my contextual ribbon, click on "Rotate".
06:30
Let's type at 90 degrees.
06:34
Now, the surface pattern is rotated for 90 degrees and let's look at our 3D view...
06:41
And you see how the material is rotated as well.
06:47
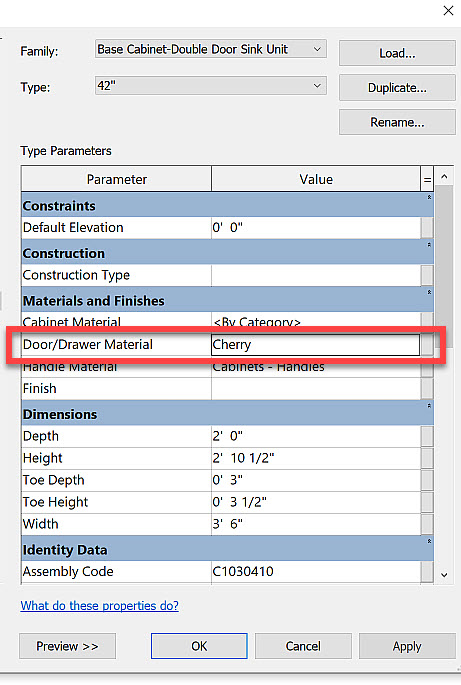
Now let's change some of these cabinets.
06:50
So, I select the cabinet.
06:52
I got to edit the type of that.
06:56
You notice that my door material is set to by category.
07:02
So, I browse out once again.
07:07
I don't want the American Cherry.
07:09
I want the regular cherry.
07:18
Hit the "Modify" button to deselect it and I can do that for the other cabinets as well.
07:27
Select the cabinet, edit the type and change the door material.
07:37
Hit "Modify" once again, select the cabinet.
07:44
Edit type for the drawer material,
07:49
make that browse out for cherry.
07:52
Now, this looks a little bit more realistic.
07:55
However, before rendering, we really should add some lights for a more effective rendering.
08:02
And we'll do that next.