| |
| |
Completion Time: 15 Minutes
|
Completion of the Update and Retag Drawings Lesson
| |
Objective: In this exercise, you update, retag, and resequence the Schematic Editing project. You change the component tags from reference-based to sequential, and change the inter-drawing cross- referencing to display the sheet and rung number.
|
| |
1: If the Project Manager is not displayed, on the Project tab, Project Tools panel, click Manager.
|
| |
2: If Schematic_Editing_NFPA is the active project, skip to step 6. If it is open but not active, in the Project Manager, do the following:
■ Right-click Schematic_Editing_NFPA.
■ Click Activate.
■ Skip to step 6.
|
| |
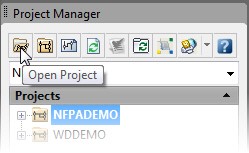
3: In the Project Manager, click Open Project.
|
| |
4: Browse to where you installed the exercise files. Select Schematic_Editing_NFPA.wdp. Click Open.
|
| |
5: In the Projects list, click the expansion node next to Schematic_Editing_NFPA to expand the drawing list.
|
| |
6: Right-click Schematic_Editing_NFPA_04.dwg. Click Open.
|
| |
7: Zoom in to the right side of rungs 407-409.
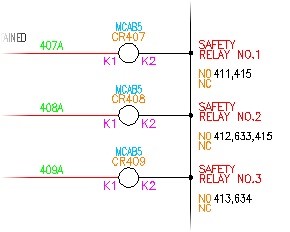
Notice the relay tag and cross-reference values.
|
| |
8: On the Project tab, Project Tools panel, click Update/Retag.
|
| |
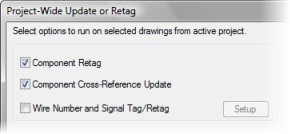
9: In the Project-Wide Update or Retag dialog box, select Component Retag.
|
| |
10: Select Component Cross-Reference Update.
|
| |
11: Clear the Wire Number and Signal Tag/Retag check box.
|
| |
12: Select Other Configuration Settings.
|
| |
13: Click Setup for other configuration settings.
|
| |
14: In the Change Each Drawing's Settings dialog box, select Component Tagging Settings.
|
| |
15: Click Sequential. For Sequential, enter a start value of 1.
|
| |
16: Select Inter-Drawing Cross-References.
|
| |
17: For Format, type "%S%N" then click OK.
|
| |
18: In the Project-Wide Update or Retag dialog box, click OK again.
|
| |
19: In the Select Drawings to Process dialog box, click Do All. Click OK.
|
| |
20: If requested, in the Qsave dialog box, click Always Qsave.
The project drawings are sequentially processed.
|
| |
21: Zoom in to the right side of rungs 407-409.
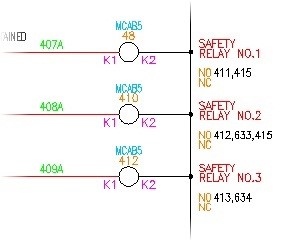
Notice the sequential tag names on the relay coils. The contact cross-reference on CR3 displays only rung numbers for contacts on this drawing, but it displays the sheet and rung number for contacts on different drawings.
|
|


