00:07
Our next step is to actually look
00:10
at all the different things that we can
00:11
do to move through our project.
00:14
What does this project FILE actually provide us,
00:16
and what are the things that we can
00:18
do with it to be able to make it easier
00:20
to navigate our entire AutoCAD Electrical project?
00:24
One of my favorite things is something called the surfer.
00:27
So the surfer could be accessed in a few ways.
00:29
Now I'm going to show you the most common way,
00:31
and I'm also going to show you where
00:33
it's located in another spot.
00:34
If I were to right click on any component,
00:37
you'll see that there's this little fun marking
00:39
menu that gives us all of the most common commands that we
00:43
might want to use on an individual component.
00:46
We have unique marking menus throughout all
00:49
of AutoCAD Electrical.
00:50
So every different type of image or block or whatever
00:54
it is that you see on screen is going
00:56
to have a different marking menu associated with it.
01:01
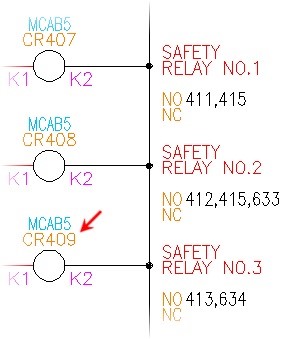
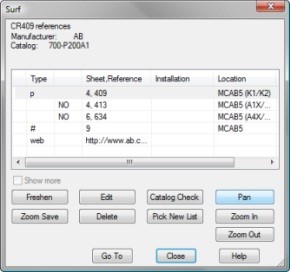
If I go over to the surfer, what this just did
01:06
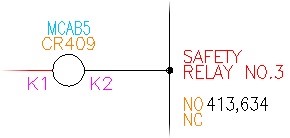
is scanned the entire project for all related devices
01:10
to this particular control relay that I clicked on.
01:13
So it surfed through the project.
01:16
Now, that project has a parent device
01:20
which is the one I was on, and that's showing me
01:23
exactly where it's located.
01:25
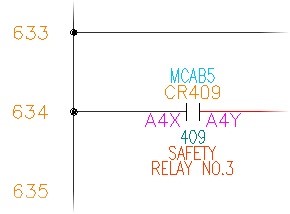
And then if I double click on this next one,
01:27
it actually zooms me up on that device.
01:30
So it's allowing me to literally surf through the entire project
01:34
to find all of these connected devices.
01:37
So this is a child component.
01:39
If I were to double click on the next one,
01:41
it's going to jump me to a completely different drawing
01:45
This is the power of a project because they are connected now.
01:48
I'm on a different DWG file, but it zooms me right up
01:51
on that connected device.
01:54
Now the last one in this list with this little footprint
01:56
symbol is actually the panel footprint.
02:00
And when we see panel in electrical,
02:02
it doesn't have to be an enclosure.
02:05
It often is but it doesn't have to be that.
02:08
A panel is just any physical representation of that device
02:14
that you are drawing into your schematics.
02:16
So all of the wiring information,
02:18
all of the connections in the schematics
02:20
then will relay that back out to whatever
02:24
your physical display is.
02:25
It could be the location of those devices along a conveyor,
02:29
it could be an entire mechanical unit of something else.
02:33
It does not have to be a panel as the title of this infers,
02:37
but it is obviously also designed for enclosures.
02:41
Now I could go back to the parent symbol
02:43
and it will navigate me right back to that same control relay
02:48
And that's the power of the surfing tool
02:50
and having all of those connected devices
02:54
across all of these drawings in our project.
02:57
Now the other way to get to the server
02:59
is up here in our quick access toolbar
03:03
or here on our project tab.
03:05
Now in AutoCAD Electrical we have access
03:08
to all core vanilla AutoCAD commands.
03:11
However, most of them are turned off in our ribbons
03:15
because we don't need all of those other ribbon tools.
03:18
However, you can turn them on any time you want.
03:21
The tabs we do have that you don't have in vanilla AutoCAD
03:25
are the ones specific to electrical like project,
03:28
schematic, panel, reports, all very task based.
03:32
So all very oriented to what it is that you're trying to do.
03:36
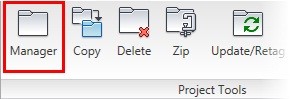
So the server tool is located on the Project tab here.
03:42
Now the one extra that the ribbon
03:44
gives us is it gives us this continuous surfer.
03:47
So if you ended up exiting out of the surfer
03:49
command for wherever you were but you had navigated
03:52
to a couple drawings away, if you
03:54
wanted to be able to pull that same surfer back up
03:56
you'd see where you had been with the little X's that
03:59
are next to where you've navigated
04:01
and you'd be able to jump right back to what you were doing.
04:04
So this is a little bit of a hidden command,
04:06
it's a little bit of a hidden gem
04:08
if you need it when you're surfing.
04:11
So this is all about moving through our projects.
04:13
Now, the next couple of things to talk about here
04:16
are just the basics.
04:17
We have this previous to next drawing buttons
04:20
and they're also located here.
04:22
Be careful not to confuse them with your undo and redo arrows.
04:26
They do look different, but they're not
04:28
far away from each other.
04:29
So there is a difference.
04:30
There is undo and redo, core AutoCAD undo and redo.
04:34
And then that's previous to next.
04:35
And what previous to next do is they
04:38
save the drawing you're on, close it and open the next.
04:42
Seems simple but just keep that in mind
04:44
because as you're double clicking through the list
04:47
if I were to just keep opening drawings,
04:49
you're going to see them all start populating up here
04:52
as all of these open drawings.
04:54
In my session they could be in or out of my active project.
04:57
They could still be open but they're no longer a part
05:00
of the project I'm working on.
05:02
So keep in mind what you have open.
05:03
Sometimes you can have hundreds of Windows
05:05
and not even realize that you're doing that.
05:07
So the previous to next is just a different way
05:10
to step through your whole project
05:11
without opening each drawing to keep them simultaneously open.
05:16
Take a minute and move through your project drawings
05:20
in the next exercise.


