00:08
One of the very powerful commands
00:09
we have in AutoCAD Electrical is called Swap and Update Block.
00:14
It gives you the ability to do a massive project-wide swap out
00:17
of different types of blocks and symbols based off
00:20
of what you need for your particular customer
00:24
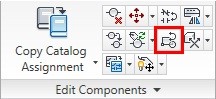
So if we go to the Swap and Update Block command located
00:27
right in the middle of the Edit components panel,
00:30
it will open up a dialog box that gives you a few options.
00:33
Let's talk about option A versus option B. Option A
00:38
is to swap two totally different blocks.
00:41
That's what I will be demonstrating today.
00:43
Option B is actually an ability to update all of your blocks.
00:48
If you didn't know this in core AutoCAD functionality,
00:51
if a block is already inserted into a drawing,
00:54
it will mimic that block when you
00:57
go to insert a new version of that same block,
01:00
not necessarily if you've updated
01:02
that version of the block in a different area.
01:04
It wants to match what's in the database of the drawing.
01:08
One way we can do this if we want a full update of all
01:11
of our blocks in our project is to utilize the Update a Block.
01:15
So you're substituting a new version
01:18
of that exact same block.
01:20
The Library Swap is the most powerful example of this.
01:23
So if I wanted to change my entire project
01:25
from being NFPA to IEC, I can do a full Library Swap.
01:32
The blocks have actually been named,
01:35
matching each other across libraries to ensure
01:38
that that swap can happen.
01:40
Obviously, if you've created your own custom symbols,
01:42
if you didn't follow that same format across both NFPA
01:46
and IEC, then the block is not going to flip.
01:49
But for all of the symbols that come with the software,
01:52
you can do a full Library Swaps.
01:54
You can also do this on a more basic level
01:56
if you think about a new updated NFPA library compared
02:01
to the existing NFPA library.
02:03
Perhaps you have an older version of the software,
02:05
and you created a project a couple of years ago.
02:08
And you want now the updated version of those symbols.
02:10
You can do a Library Swap then as well.
02:12
We'll go through the entire project
02:14
and update all of the symbols with the new symbol format.
02:19
But let's talk about the swapping of one block
02:21
for an entirely different type of block.
02:23
Now we can do that one at a time--
02:25
drawing-wide or project-wide.
02:27
In this case, I am just going to do one at a time,
02:30
so you can see the swap happen.
02:32
I'm going to pick the new block from the Icon menu,
02:35
and I'm going to retain all of my other attribute information
02:38
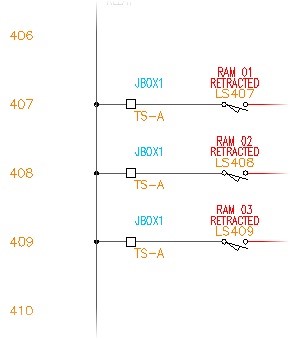
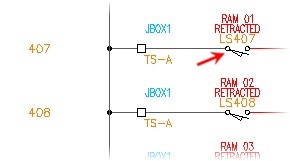
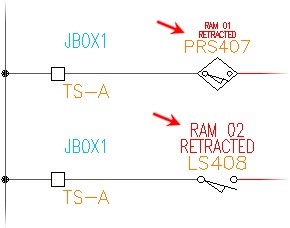
Now, the blocks that I'm going to switch--
02:42
the example of this that might be
02:43
is I have proximity switches on this drawing.
02:46
What I'm going to swap for is a limit switch.
02:48
So I'm going to go now to OK.
02:51
I'm going to go to the Icon menu.
02:53
I am going to find my limit switches.
02:55
Choose a normally open one.
02:57
And I'm going to swap this proximity switch for a limit
03:05
It scans the project, makes the update,
03:07
and it even updates the family code on it
03:09
but keeps it in its same format, placing any attribute
03:12
information, will be kept in the same spot.
03:15
Now please take a moment to do the Swap
03:17
and Update Block exercise.