00:03
MICHAEL KILKELLY: Welcome to Create and Analyze
00:07
Here we are in the space planning
00:09
for new health guidelines.
00:12
And this is the last lesson in this workflow.
00:17
Now that we've added one way indicators to our model
00:20
and we've run a preliminary path of travel through the building,
00:24
it's time to further refine our movement paths.
00:27
In this lesson, we're going to add some additional one way
00:30
indicators to direct the flow of travel along corridors.
00:34
We're then going to make our path a little more realistic
00:37
and add waypoints or stops along the path.
00:40
This will better simulate an actual visit
00:42
to the medical center.
00:44
Lastly, we'll study a variety of exit options
00:47
to determine the safest path for visitors to the building.
00:52
So here we are in our sample medical center model.
00:55
I've already added some one way indicators and a path
00:58
from the entrance to the exam room.
01:00
Let me go ahead and zoom in.
01:03
And I'm going to add some additional one way
01:05
indicators to control movement along the corridors.
01:08
So I click the Analyze ribbon.
01:12
Then click the One Way Indicator tool.
01:17
Just like I can add an indicator to a door,
01:19
I can do the same thing to a corridor or other open space.
01:24
Now I want to add an indicator to this corridor here.
01:28
So I press the space bar to rotate it and one more time
01:34
to align it with the corridor.
01:38
Now I align it inside the corridor opening.
01:42
And then I click to place it.
01:46
If I select the indicator now, I can press the flip arrows
01:51
to change its direction.
01:53
I want to make sure the indicator is sized correctly
01:59
And I can see I need to adjust the extents of the indicator.
02:04
So just click the End arrows.
02:07
And now the indicator matches the corridor with.
02:10
So I'm going to zoom back out, and if I
02:14
click on my Existing path of travel,
02:17
then I click the Update button up here,
02:21
the path reorients itself to comply with the directions
02:25
shown by the indicator.
02:27
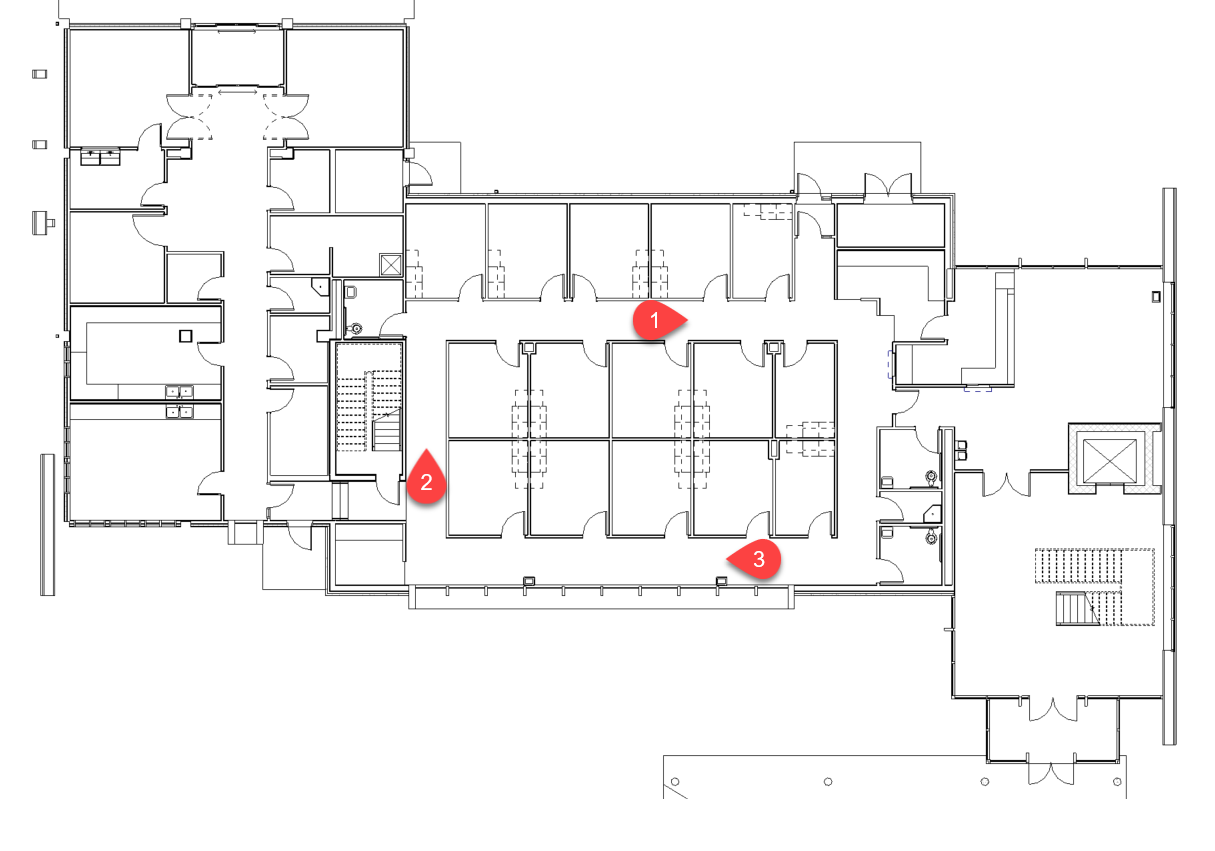
Now let's say I want to check the path from the entrance
02:30
to the reception area here, then from the reception
02:34
to the exam room, and finally from the exam room to an exit.
02:39
To do this in a path, I can use the Add Waypoint tool.
02:44
So with my path selected, I click Add Waypoint.
02:49
Then I click on the point on the path of travel
02:52
where I want to add this waypoint.
02:56
Now I'm going to add a stop at the reception area.
03:02
And now with the point added, I can drag it out
03:05
to the reception area like this.
03:07
And my path of travel updates accordingly.
03:11
Now I want my path to end at an exit.
03:14
So I'm going to take the endpoint in the exam room
03:19
And drag it to this exit here.
03:22
You can see it's skipping the exam room.
03:25
So I'm going to add another waypoint.
03:29
I click on the Add waypoint tool again,
03:33
and I click to add it here.
03:35
So now I'm going to drag the new waypoint
03:38
to the exam room like this.
03:40
And once again, the path of travel updates itself.
03:44
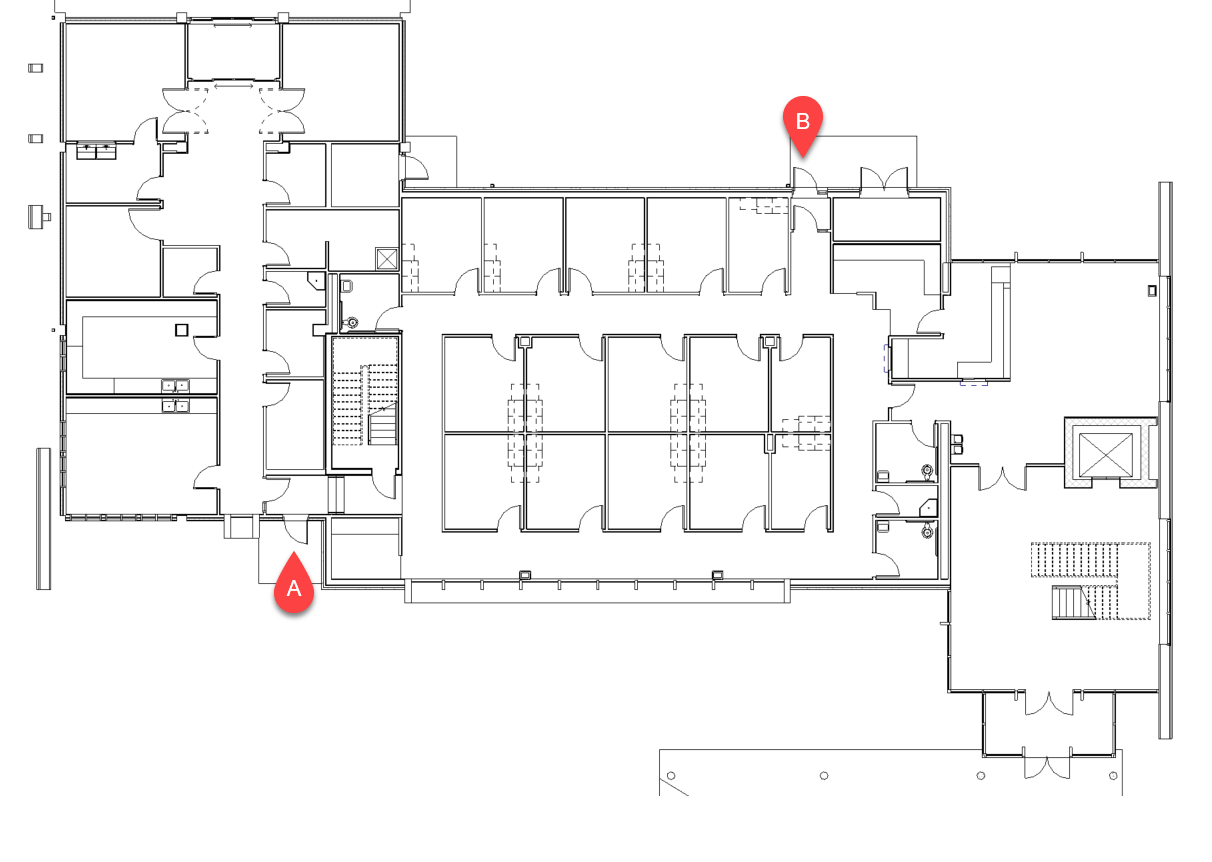
So now my path is starting at the entrance,
03:46
stopping at the reception area to check in,
03:49
moving on to the exam room, and then finally out and exit.
03:53
The total length for that path is shown here as 261 feet.
03:59
If I want to test the path using another exit,
04:01
I can drag the endpoint here.
04:05
And then drag it to this location like so.
04:08
This path is only 252 feet long, but you
04:12
can see I haven't fully mapped the corridor with one way
04:16
So if I add some additional indicators here and here,
04:21
like this, then click the Update button to update the path,
04:27
my path now looks like this.
04:31
It will now take the visitor 350 feet
04:34
to comply with the path of travel.
04:37
If I change the direction of travel of my indicators
04:41
like this, then click the Update button again,
04:45
my path reroutes itself to this.
04:49
OK, so that's much better, only 200 feet
04:52
to get through the building.
04:54
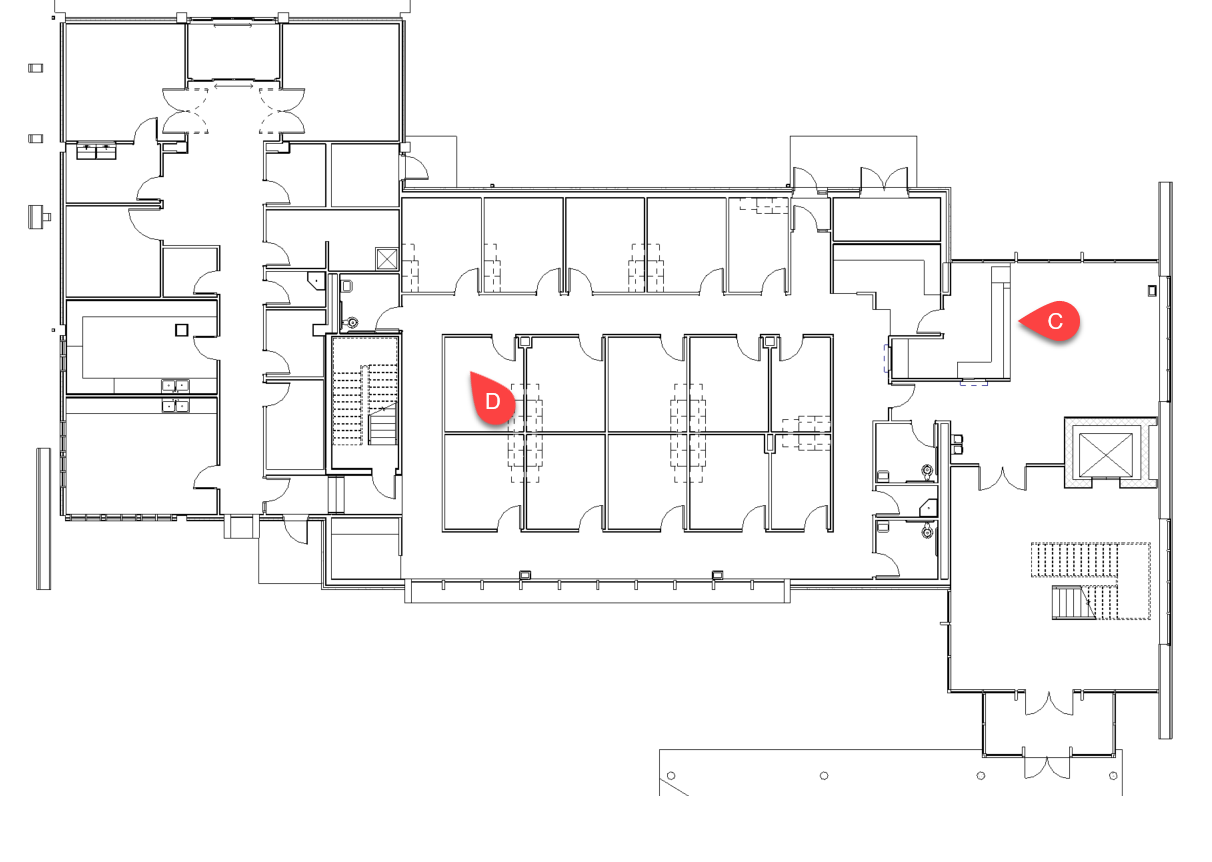
Now, what happens if I want to reach an exam room over here?
04:59
So I can drag my waypoint over to this exam room.
05:03
And it looks like I need to add another one way indicator here
05:07
to enforce the direction of travel.
05:13
Now I click the Update button.
05:16
And here's my new path.
05:18
It's a lot longer at 357 feet.
05:22
So for exam rooms on this side of the building,
05:24
I may need to route patients out the other exit.
05:30
I grab the exit point and move it here.
05:34
So this reduces the travel path to 289 feet
05:38
to keep it compliant with the direction of travel.
05:41
And that's a lot better.
05:43
Now, as with most things, our scenario
05:46
gets more complicated if we add people to the mix.
05:51
I can add people to the model by clicking the People Content
05:56
And I'm going to add some people where
05:58
they're likely to congregate in real life.
06:02
So I added three people here, here, and here.
06:06
And you can see they each have a 6-foot circle around them
06:09
to represent an appropriate social distance.
06:13
If I go ahead and select my path and then click the Update
06:17
button, I get an error telling me that the path of travel
06:22
can't be computed because there are
06:24
conflicts between the people obstacles and the one way
06:30
It looks like the issues are right here.
06:33
The spacing is too narrow to allow a person
06:35
to safely pass if another person is standing at these locations.
06:41
Now, another tool I can use from the people
06:43
flow tool kit that can help me solve this problem
06:46
is the spatial grid.
06:50
The spatial grid generates a filled region
06:52
of a grid inside of a room.
06:55
So I click the icon to activate the tool.
06:59
From the dialogue, I can select either a square grid
07:02
or a hexagonal grid.
07:04
And I can specify the grid spacing as well.
07:08
I'll choose a hexagon grid and keep the spacing at 6 feet.
07:15
Then I select the rooms I want to put the grid in.
07:20
I'm going to place a spatial grid in the reception area
07:23
to help me locate where I should position people to keep them
07:26
out of the patient movement path.
07:29
Once I've selected all the rooms,
07:31
I press the Finish button up here.
07:35
Now with the grid in the room, I can
07:37
see that I can reposition this person to another grid location
07:41
and get them out of the way of the path.
07:44
And likely, I'll need to use some signage or other devices
07:48
to keep this area clear.
07:51
So here's the new position for the person.
07:54
And I can either keep the grid in the room
07:56
if I need to locate more people, or I can just
07:59
delete it and move on.
08:01
I'll keep the grid in place for the time being.
08:05
Now, if I select the path then click the Update button,
08:09
the path resolves itself correctly
08:11
and adjusts to avoid the people.
08:14
Now, if I needed to test other scenarios,
08:16
I could add additional people to the model
08:19
or even adjust the social distance
08:21
radius in the family type.
08:23
There are a lot of ways I can fine-tune the model
08:25
to test movement path options.
08:28
So let me go ahead and zoom out.
08:31
And using the people flow tool kit,
08:33
you can get a much better understanding
08:35
of the movement of people through your building.
08:37
And you can use this to develop strategies
08:39
to direct and control the movement to ensure
08:42
social distancing guidelines are met
08:45
and occupants are kept safe.
08:47
So take a look at the activity in the next section
08:50
and try these tools out yourself.