00:01
NARRATOR: Modeling cable tray horizontally
00:04
In this video, we're going to show you
00:06
how to get cable tray and cable tray
00:08
fittings to work when the tray is running horizontally.
00:13
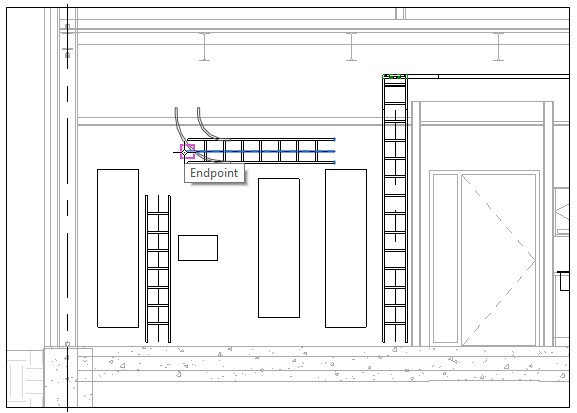
I'm in the Small Medical Center project in the electrical room
00:16
South wall section view facing the panels.
00:20
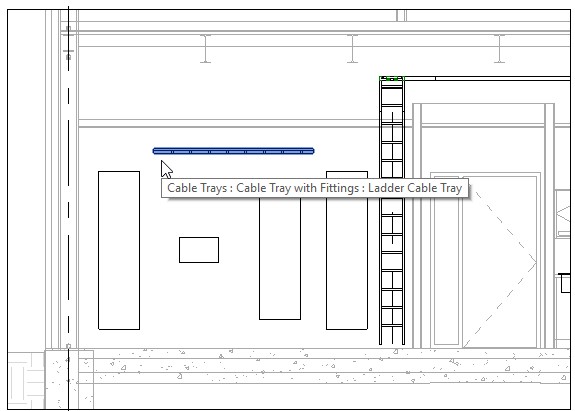
You can see the vertical cable tray
00:22
that was added in the previous video.
00:25
But what if you want to place cable tray horizontally
00:29
This is a bit more complex.
00:32
So I'm going to start the cable tray command in systems
00:36
electrical fittings, and I'm going to draw a cable
00:43
Now the width is always seen as the value visible in plan
00:47
and the height in elevation.
00:50
If I try to rotate this cable tray,
00:52
it'll only rotate around the same axis,
00:55
but it's not going to rotate to flat against the wall.
00:59
So I'm going to delete the cable tray.
01:02
If we want to have the cable tray run
01:04
horizontally but on edge, we need to use a workaround.
01:08
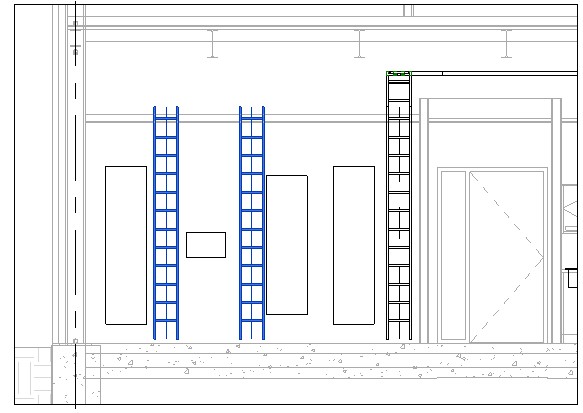
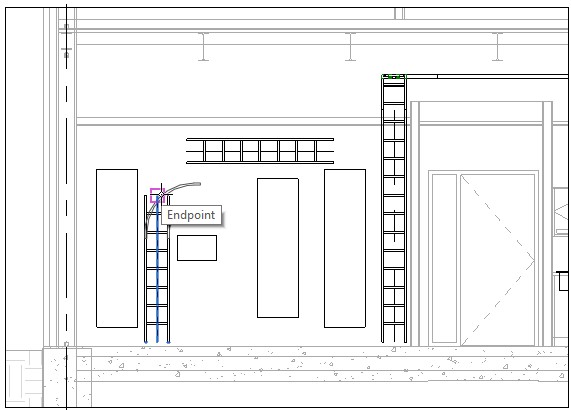
Basically, we're going to copy the vertical cable tray
01:13
So I've copied it once, I'm going
01:15
to copy it again because I want another vertical one.
01:18
I go to the rotate command and I'm
01:20
going to rotate this 90 degrees.
01:24
And now I can drag it into position.
01:26
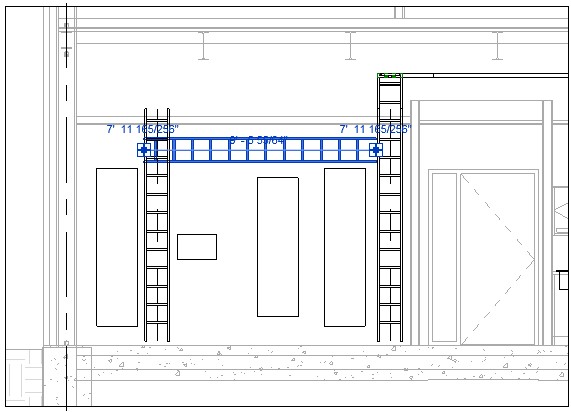
Before I go further, I'm going to nudge the cable
01:29
tray along the right wall over a little bit.
01:32
I'm using arrow keys on the keyboard to do this.
01:36
Now watch out because a lot of standard commands
01:38
that work fine in plan do not work with horizontal cable
01:43
If I try to use the connectors by dragging control
01:46
from the horizontal to the vertical cable tray,
01:49
it rotates back to the way the program wants it to be.
01:52
And there's an additional error, so I'm going to undo that.
01:56
So instead of using the connectors,
01:58
I'm going to change the length using temporary dimensions.
02:02
So I want this to be six feet.
02:04
I can go ahead and use the connectors
02:07
on the vertical cable tray and it does work just fine.
02:12
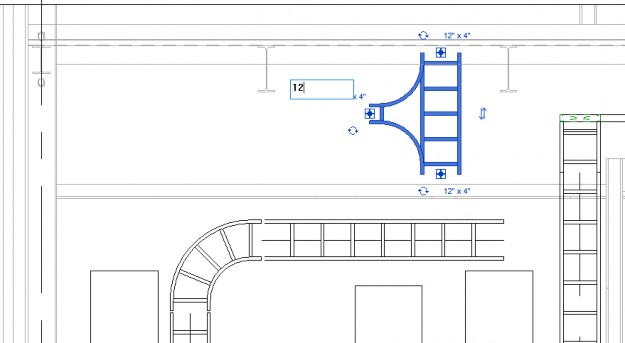
Now let's try adding a fitting.
02:16
In the Systems tab on the electrical panel,
02:18
I'm clicking Cable tray fitting.
02:21
In the type selector, I'm selecting the ladder horizontal
02:27
Now if I try to place it on the cable tray,
02:30
you can see it comes in but it's facing the wrong way.
02:34
If I try it on the vertical one it
02:36
looks fine but then when I actually place
02:38
it puts it on the opposite end.
02:42
So I'm going to delete this one out.
02:44
What I have to do instead is place the cable tray then
02:48
use the rotate controls to move it around until it's
02:52
facing the right way.
02:54
This does take a little bit of time, and you see,
02:56
I'm choosing a bunch of different ones
02:57
here until I finally get it rotated as I'm expecting.
03:02
Now I'm going to use a regular rotate command
03:05
to get it to face the direction I want it to face.
03:12
And then I realize, Oh no it's not showing the ladders.
03:16
So let me just make it the right size first
03:19
and I'm going to make that the right size,
03:20
and I'm going to use the rotate commands again
03:23
to get it into the right place.
03:26
So there it is showing the ladder,
03:28
and finally one more time I'm going
03:30
to rotate it and make sure it's facing the right direction.
03:39
And now I'm going to move it into place.
03:41
But just like the other situations
03:42
I don't want to move it into place using the connectors.
03:46
So if I come in here and try it out with the vertical one.
03:50
So sometimes you think Oh, the controls work on the vertical.
03:53
But if I Zoom in here and move the control on the vertical
03:57
and connect them, I get an error.
03:60
So I'm going to need to cancel that and then just use
04:03
the Nudge command, the arrow keys to get it into place
04:06
without touching the connector.
04:12
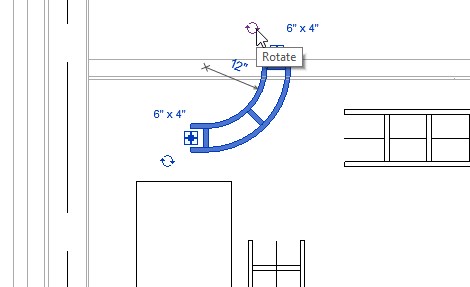
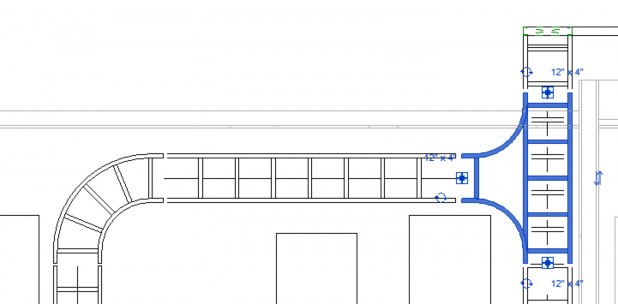
Now on the other end of the cable tray
04:14
I want a horizontal to a T coming into the vertical.
04:19
So in the Systems tab, I'm selecting cable tray,
04:22
and then I'm using the ladder horizontal T
04:26
at a 12 inch radius.
04:28
Once again, I can't put it into the cable tray automatically.
04:33
So I'm going to place it, click Modify, and then use
04:36
the rotate commands once again finding the right direction.
04:41
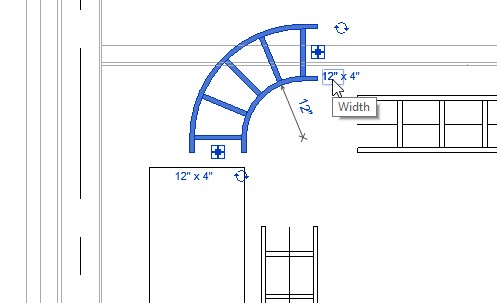
Still not quite right because it's not showing the ladder.
04:48
Now let's make sure the fitting is the right size on each end,
04:51
I'm making that 12 inches.
04:55
And then I'm going to drag it to the correct location.
04:58
Can use alignment lines, but again, remember
05:00
don't use controls to do this.
05:04
I'm going to nudge the cable tray,
05:05
the horizontal cable tray into place
05:09
so it's closer to the fitting.
05:12
Then I'm going to split the vertical cable tray.
05:15
So in Modify I click Split.
05:18
I'm selecting two points along the cable tray.
05:22
I do get a warning in this case.
05:24
So I am deleting the elements.
05:26
I'd want that deleted out anyway.
05:28
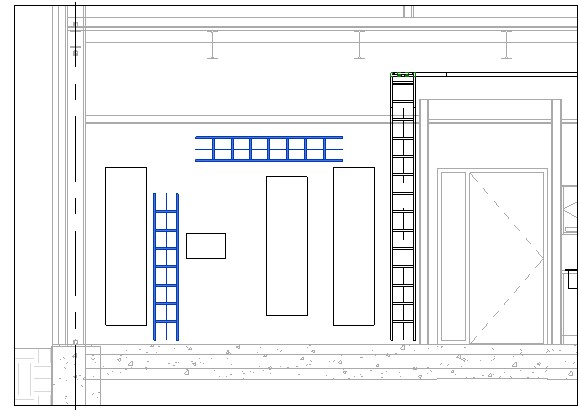
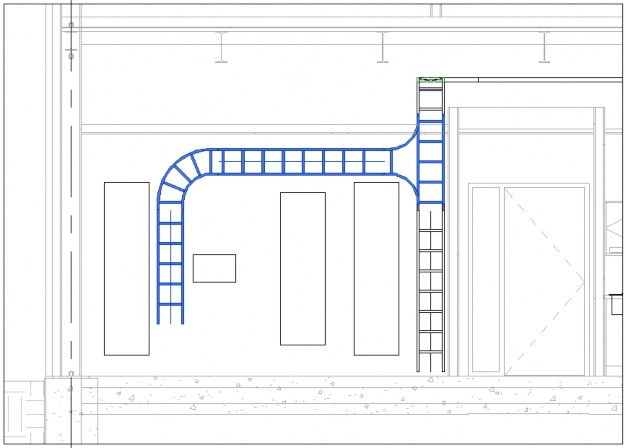
And now you can see I have my cable tray fittings,
05:32
they're all in the right location not quite exact.
05:36
So I'm going to make this a little bit longer.
05:38
I'm going to make the 6 foot
05:42
it fit a little bit better.
05:44
Now I have my individual pieces of cable tray
05:47
and the separate cable tray fittings.
05:49
I can move them around and resize
05:51
them using temporary dimensions to get them into place.
05:55
By doing this you get an accurate take off of cable tray
05:58
and fittings in your schedules.