Adding wires to electrical circuits - Exercise
In this practice, you will automatically add wires to existing circuits using both Arc Wires and Chamfered Wires. You will then modify the wires using controls and Properties. Finally, you will add wires to electrical devices without having a circuit selected.
Task 1: Add wiring automatically
- Open the Small Medical Center-Wires-2021.rvt project. The Ground Floor Electrical Devices Plan view displays.
- Zoom in on the exam rooms in the building.
- Hover over an outlet and select an electrical circuit, as shown below.
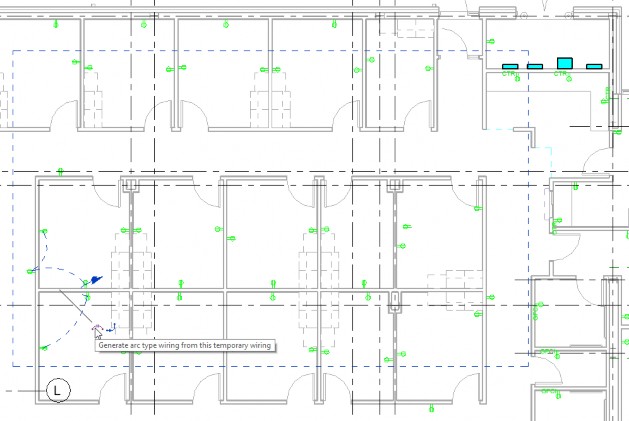
- Select the Generate arc type wiring from this temporary wiring icon.
- Select another circuit and use the chamfer style. The style you chose depends on your office standard.
- Select another circuit. In the Modify | Electrical Circuits > Convert to wire panel, select either Arc Wire or Chamfered Wire. Wires are placed on the circuit.
- Save the project.
Task 2: Add wiring manually
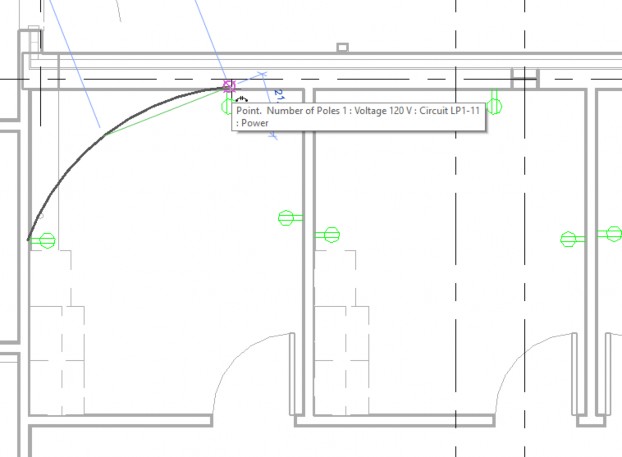
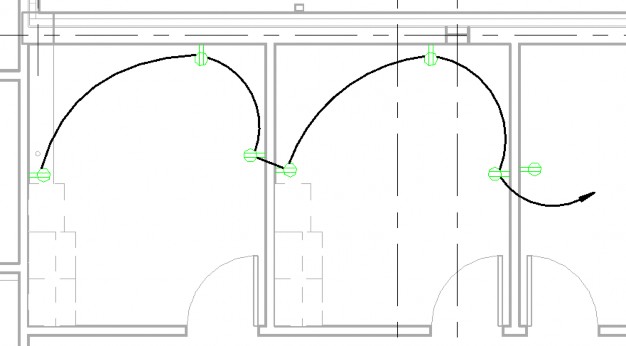
- In the Systems tab, Electrical panel, expand Wire and click Arc Wire.
- Select the connector point node of the outlet, a point for the curve of the arc, and then the connector of another outlet, as shown below.
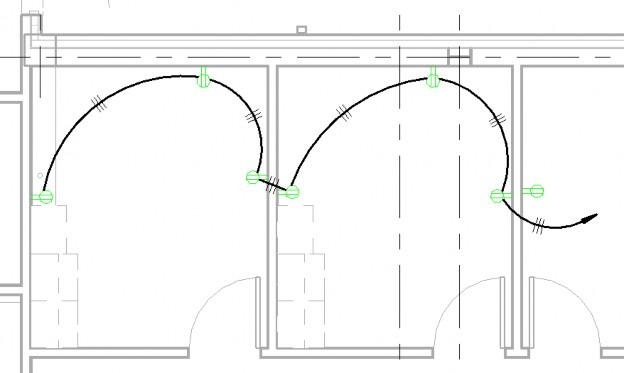
- Press <Spacebar> to enter Chain mode and continue to place the wires. When final pick is not on a connector, Revit knows it is a home run and puts the arrow on it. Point it in the general direction of the panel, as shown below.
- Continue working around the project adding the wiring to each circuit using which ever method it most useful.
- Save the project.
Task 3: Modify wiring
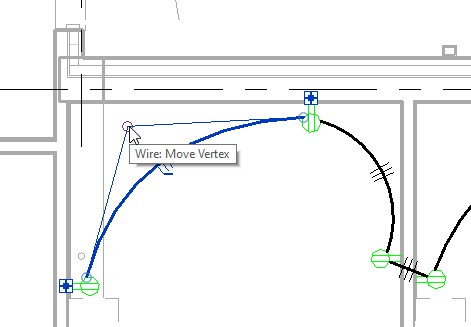
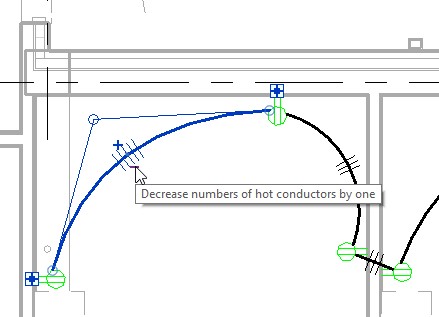
- Select one of the wires.
- Use the control to change the location of the vertex, as shown below.
- Click the Plus and Minus icons to increase or decrease the number of tick marks that display, as shown below.
- In Properties, in the Electrical – Loads group, expand the list beside tick mars and select Off. The tick marks are turned off for the individual wire.
- Select one wire, right-click and select Select All Instances > Visible in View. In Properties, turn off the tick marks. The tick marks are removed on all wires, as shown below.
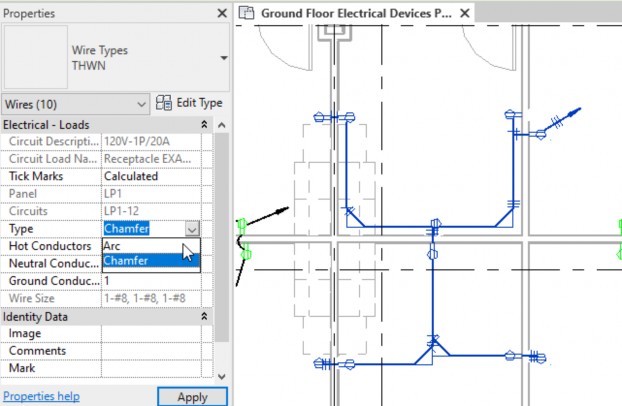
- Select chamfered wires, and in Properties change the Type to Arc, as shown below.
- Apply wires to the rest of the circuits in the project using your office standard.
- Save the project.


