Creating new lighting fixture families from a base file
Any referenced datasets can be downloaded from "Module downloads" in the module overview.
Creating new lighting fixture families from a base file - Exercise
Open the following family files and review them.
Lighting Fixture Template-Surface Mount.rfa – a base file that contains the light source, electrical connector and the necessary parameters
Circle Fixture.rfa – fixture geometry only
Square Fixture.fra – fixture geometry only
Make sure the template file is active. In the File tab, select Save As > Family. Save it in the datasets folder as Lighting Fixture-Circular Surface Mount.rfa.
Open the Ref. Level view.
Switch to the Circular Fixture Geometry view. In the Family Editor panel, click Load into Project.
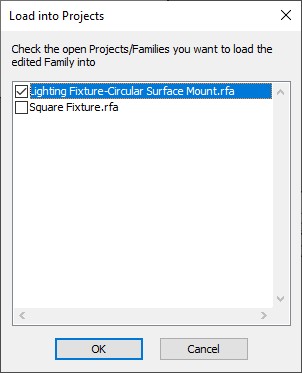
In the dialog box, select Lighting Fixture-Circular Surface Mount.rfa, as shown below, and click OK.
If needed, in the Create tab > Model panel, click Component.
In the Modify | Place Component tab > Placement panel, click Place on Work Plane.
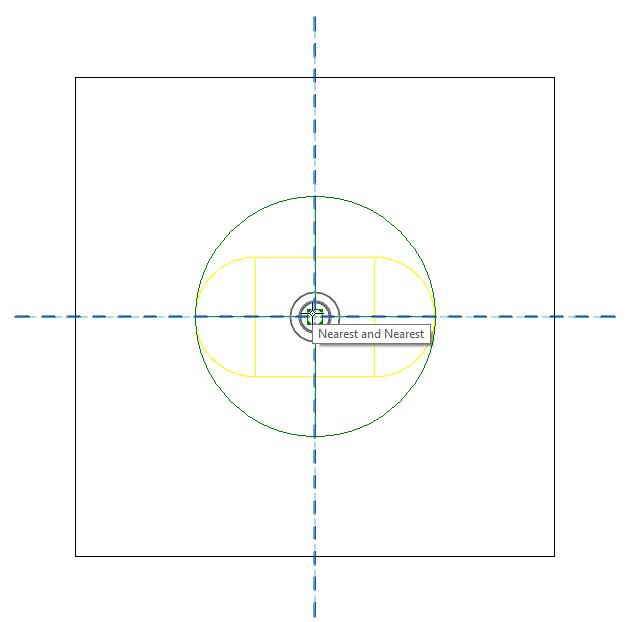
Put the nested family at the intersection of the main reference planes, as shown below.
Select the light source.
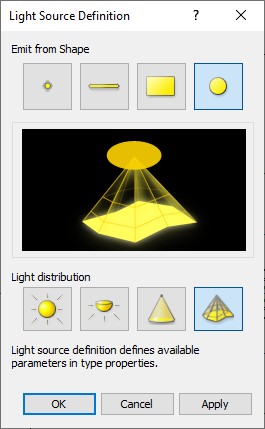
In the Modify | Light Source tab> Lighting panel, click Light Source Definition.
In the dialog box, set the Light distribution to Photometric Web, as shown below. Click OK.
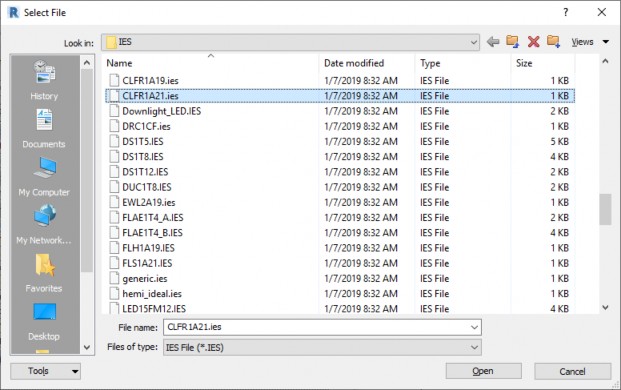
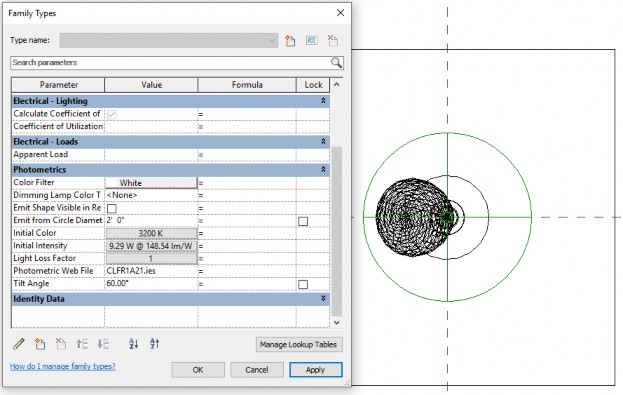
In the Family Types dialog box, in the Photometrics area, click the browse button beside generic. This opens the list of IES files that come with Revit.
IES files are typically provided by the lighting manufacturer to match the specific fixture you are creating. The IES file includes the intensity of the light source and the geometry of how the light comes out of the lighting fixture.
In the Select File dialog box, select CLFR1A21.ies, as shown below, and click Open.
In the Family Types dialog box, click Apply. The light source displays with the correct information but not the correct tilt angle, as shown below.
Change the Tilt Angle to (negative) -90 degrees and click Apply.
Click OK to close the dialog box.
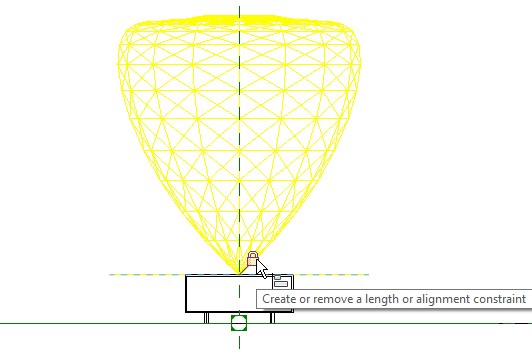
Open the Front view.
Align and lock the light source to the outer edge of the nested fixture, as shown below.
Save the family.
Click File > Save As > Family and name the copy of the family Lighting Fixture-Square Surface Mount.rfa.
Select the light source and unlock it from the nested light fixture.
Delete the nested light fixture.
Switch to the Square Light Fixture geometry family and load it into the new family file. Place it on the work plane at the intersection of the reference planes.
Open the Front view and align and lock the light source to the top of the light fixture.