& Construction

Integrated BIM tools, including Revit, AutoCAD, and Civil 3D
& Manufacturing

Professional CAD/CAM tools built on Inventor and AutoCAD

Integrated BIM tools, including Revit, AutoCAD, and Civil 3D

Professional CAD/CAM tools built on Inventor and AutoCAD
Use the GIS Gateway to compare and identify elements to be added or modified in a GIS exchange.
Type:
Tutorial
Length:
7 min.
Tutorial resources
These downloadable resources will be used to complete this tutorial:
Transcript
00:04
When you use the GIS gateway to create
00:06
new features or update changes to existing features,
00:09
you can compare and identify what model elements will be added or modified.
00:13
When the GIS exchanges are completed
00:15
to begin. Double click the desired project dot AP Rx file to open
00:20
Agis Pro.
00:22
Once the project starts,
00:23
click the info water pro tab to open the info water Pro ribbon
00:28
in the project panel, click initialize
00:31
before you open the GIS gateway.
00:33
However,
00:34
there are two settings you can change to help you see the differences more clearly
00:39
in the
00:40
Agis
00:40
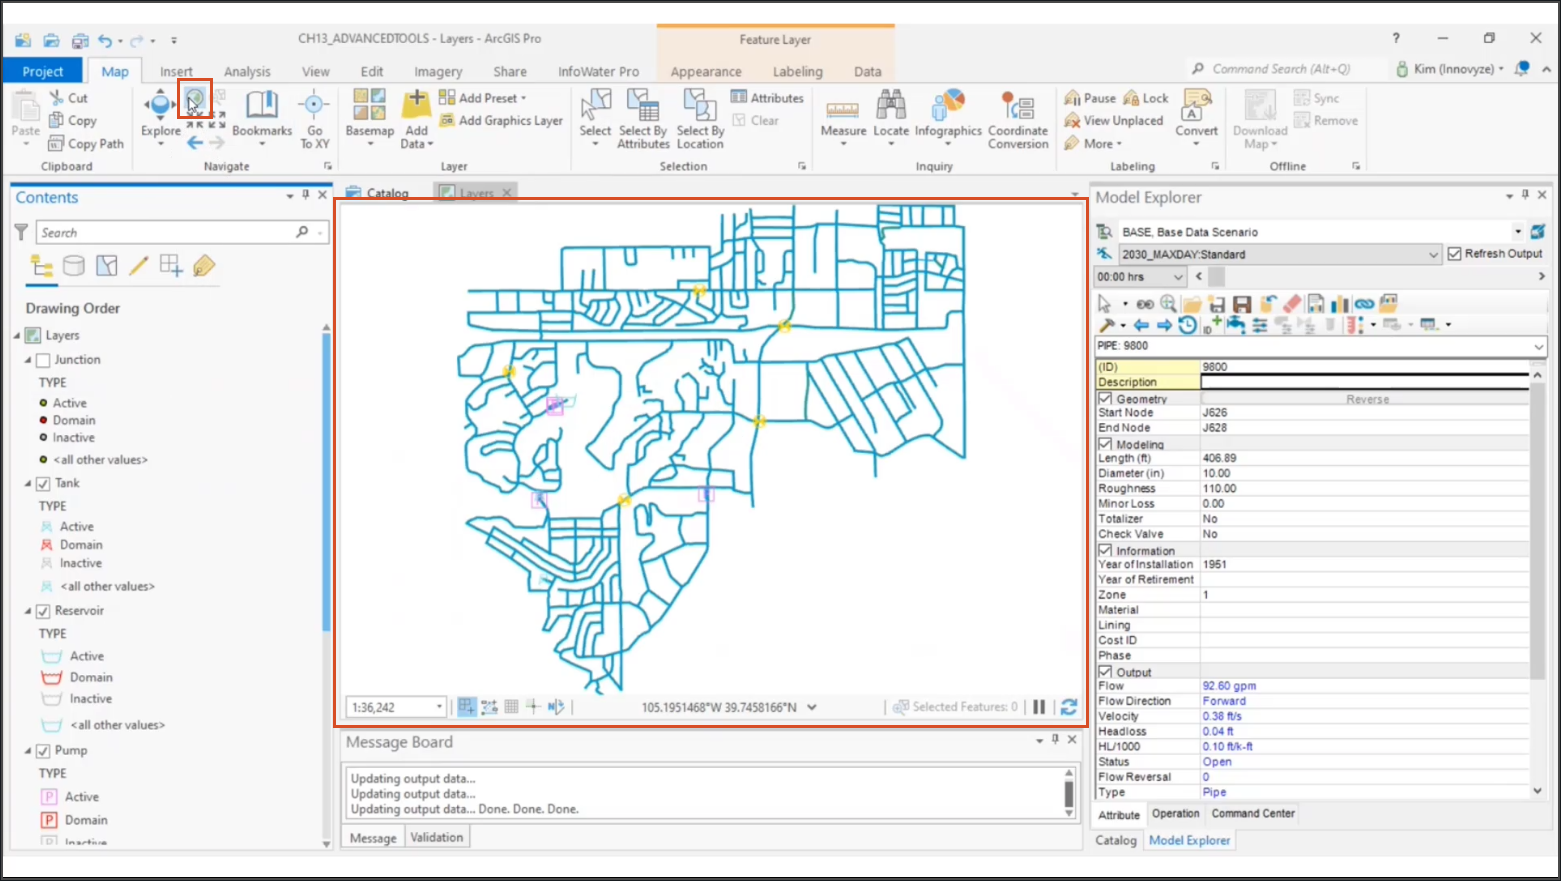
contents panel, deselect the junctions layer to get a better view of the pipe layer
00:45
in the
00:46
Agis
00:46
Pro ribbon on the map tab navigate panel,
00:49
click full extent to zoom the map view to the full extent of the model
00:54
on the info water pro ribbon in the edit panel, click GS gateway
00:60
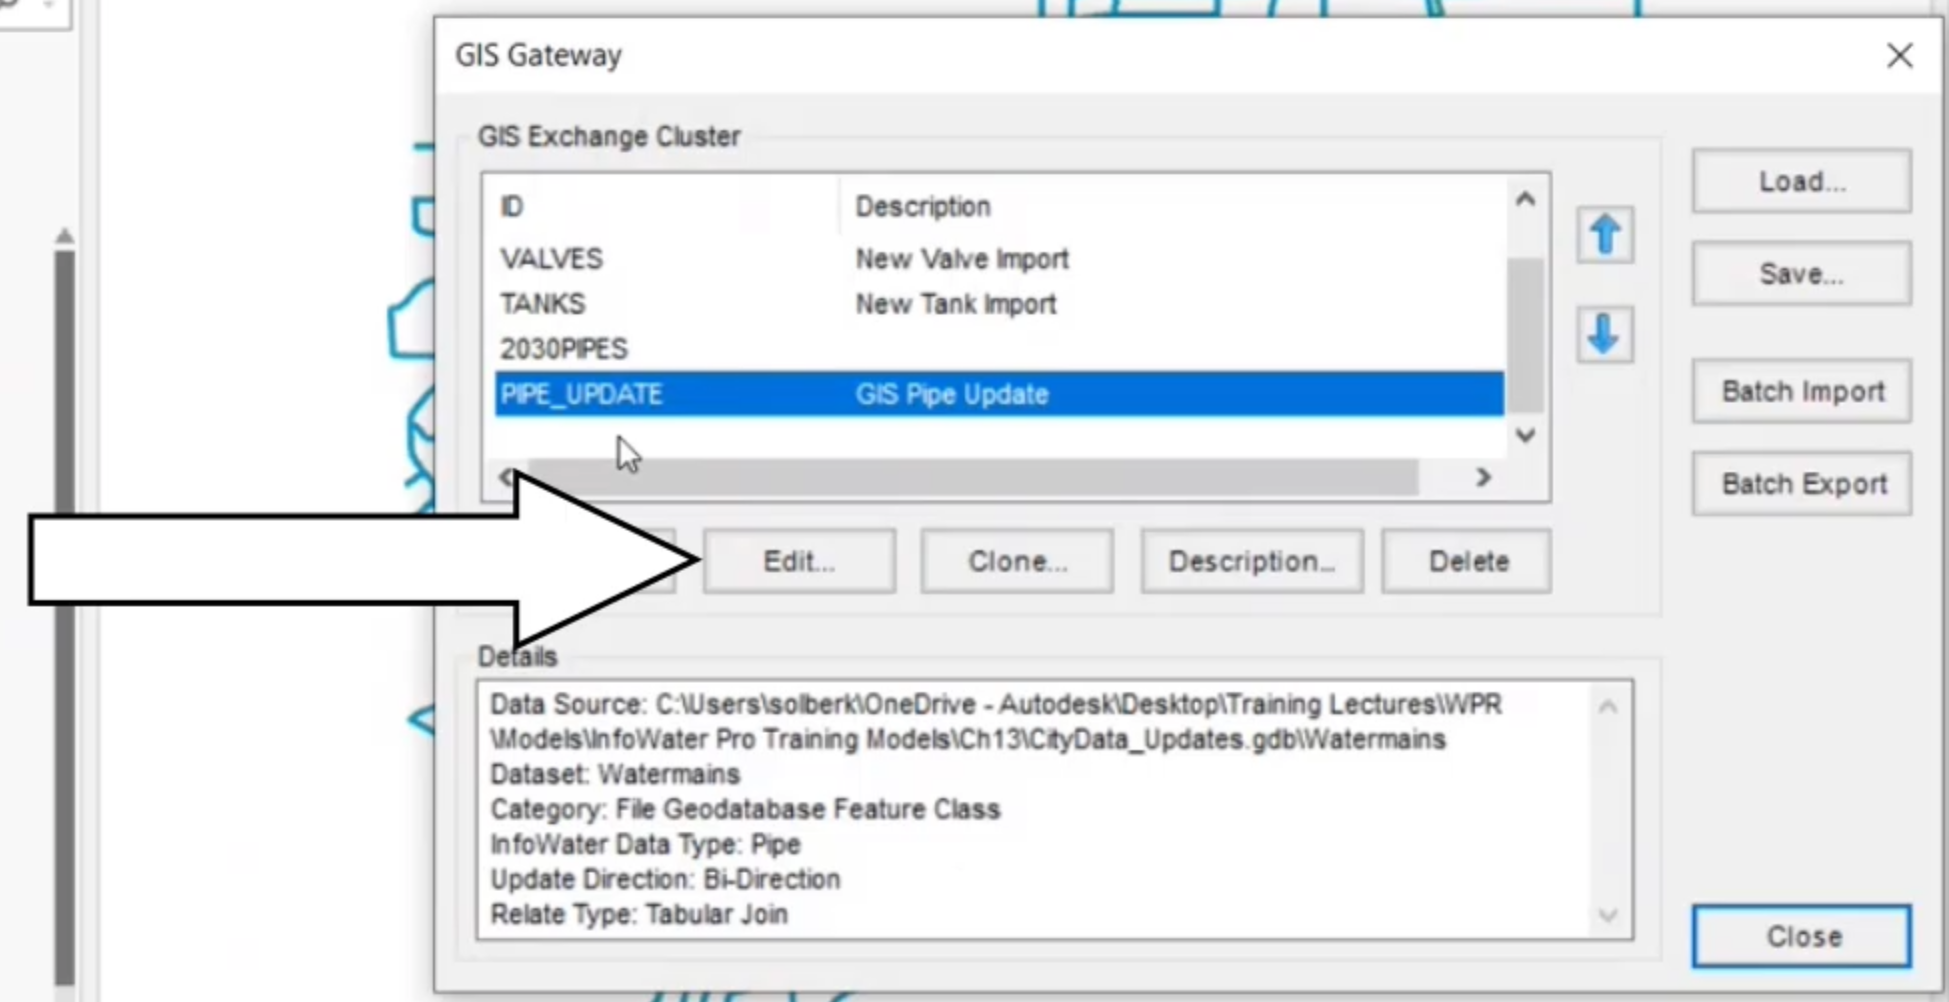
in the GIS exchange cluster group, select pipe update and then click edit
01:07
this cluster with changes from
01:09
GISS was recently added
01:12
on the field mapping tab in the network slash GIS data field mapping list,
01:16
select the pipe hide length field to highlight it.
01:22
Then click the remove arrow,
01:24
you are temporarily un mapping this field for the sake of comparison.
01:28
Otherwise all the pipes in the model will show us having a different length.
01:33
Click OK? To save the changes and return to the GIS
01:36
gateway dialogue,
01:39
drag the GIS gateway dialogue to the side to view the map of the entire pipe network.
01:45
Then click load to open the load data from GIS
01:48
layer or table dialogue and drag it to the side,
01:54
select the pipes, new pipe import cluster. So that only that layer is highlighted.
01:58
Then click compare to see the list of new pipes that will be added to the model.
02:04
Review the list of new pipes to be added
02:07
when you are finished, close the GIS data difference dialogue
02:12
back in the load data from G I S layer or table dialogue, select the pipe update G
02:17
pipe update cluster. So that only that layer is highlighted, then click compare
02:24
the GIS
02:24
data difference.
02:25
Dialogue appears with the list of pipe updates that will be done on the model.
02:30
This comparison table identifies field changes that
02:33
will be made by this exchange cluster.
02:36
The fields highlighted in red represent those
02:39
that are different between the two sources.
02:42
For example, you can see that several pipes have been upsized to 12 inches.
02:47
You can use the table to identify differences between the GIS and model to
02:52
determine which elements and fields will be updated when the exchange is run.
02:56
Once you have reviewed the table,
02:58
close the GIS data difference and load data from GIS layer or table dialogs.
03:05
You can now remap the pipe length field in the GIS gateway
03:09
in the GIS exchange cluster section, select pipe update and then click edit
03:16
on the field mapping tab,
03:17
click auto map to remap the length field you temporarily disabled,
03:22
click OK to save your changes to this exchange cluster
03:25
and then click close to exit the GIS gateway.
Video transcript
00:04
When you use the GIS gateway to create
00:06
new features or update changes to existing features,
00:09
you can compare and identify what model elements will be added or modified.
00:13
When the GIS exchanges are completed
00:15
to begin. Double click the desired project dot AP Rx file to open
00:20
Agis Pro.
00:22
Once the project starts,
00:23
click the info water pro tab to open the info water Pro ribbon
00:28
in the project panel, click initialize
00:31
before you open the GIS gateway.
00:33
However,
00:34
there are two settings you can change to help you see the differences more clearly
00:39
in the
00:40
Agis
00:40
contents panel, deselect the junctions layer to get a better view of the pipe layer
00:45
in the
00:46
Agis
00:46
Pro ribbon on the map tab navigate panel,
00:49
click full extent to zoom the map view to the full extent of the model
00:54
on the info water pro ribbon in the edit panel, click GS gateway
00:60
in the GIS exchange cluster group, select pipe update and then click edit
01:07
this cluster with changes from
01:09
GISS was recently added
01:12
on the field mapping tab in the network slash GIS data field mapping list,
01:16
select the pipe hide length field to highlight it.
01:22
Then click the remove arrow,
01:24
you are temporarily un mapping this field for the sake of comparison.
01:28
Otherwise all the pipes in the model will show us having a different length.
01:33
Click OK? To save the changes and return to the GIS
01:36
gateway dialogue,
01:39
drag the GIS gateway dialogue to the side to view the map of the entire pipe network.
01:45
Then click load to open the load data from GIS
01:48
layer or table dialogue and drag it to the side,
01:54
select the pipes, new pipe import cluster. So that only that layer is highlighted.
01:58
Then click compare to see the list of new pipes that will be added to the model.
02:04
Review the list of new pipes to be added
02:07
when you are finished, close the GIS data difference dialogue
02:12
back in the load data from G I S layer or table dialogue, select the pipe update G
02:17
pipe update cluster. So that only that layer is highlighted, then click compare
02:24
the GIS
02:24
data difference.
02:25
Dialogue appears with the list of pipe updates that will be done on the model.
02:30
This comparison table identifies field changes that
02:33
will be made by this exchange cluster.
02:36
The fields highlighted in red represent those
02:39
that are different between the two sources.
02:42
For example, you can see that several pipes have been upsized to 12 inches.
02:47
You can use the table to identify differences between the GIS and model to
02:52
determine which elements and fields will be updated when the exchange is run.
02:56
Once you have reviewed the table,
02:58
close the GIS data difference and load data from GIS layer or table dialogs.
03:05
You can now remap the pipe length field in the GIS gateway
03:09
in the GIS exchange cluster section, select pipe update and then click edit
03:16
on the field mapping tab,
03:17
click auto map to remap the length field you temporarily disabled,
03:22
click OK to save your changes to this exchange cluster
03:25
and then click close to exit the GIS gateway.
When you use the GIS Gateway to create new features or update changes to existing features, you can compare and identify what model elements will be added or modified when the GIS exchanges are completed.
To help see the differences more clearly in the comparison, hide the Junctions layer and temporarily un-map the PIPEHYD->LENGTH field:


Note: You are temporarily un-mapping this field for the sake of comparison; otherwise, all the pipes in the model will show as having a different length.


This comparison table identifies field changes that this exchange cluster will make. The fields highlighted in red represent those that are different between the two sources. For example, you can see that several pipes have been upsized to 12 inches.
Use the table to identify differences between the GIS and model to determine which elements and fields will be updated when the exchange is run.
To re-map the pipe length field:
How to buy
Privacy | Do not sell or share my personal information | Cookie preferences | Report noncompliance | Terms of use | Legal | © 2025 Autodesk Inc. All rights reserved
Sign in for the best experience
Save your progress
Get access to courses
Receive personalized recommendations
May we collect and use your data?
Learn more about the Third Party Services we use and our Privacy Statement.May we collect and use your data to tailor your experience?
Explore the benefits of a customized experience by managing your privacy settings for this site or visit our Privacy Statement to learn more about your options.