00:01
Hello, and welcome to using the Sheet Set Manager in Civil 3D.
00:04
My name is Sam Lucido, civil designer, CAD manager,
00:10
In this section, we will configure the properties
00:14
We will create custom properties for the DST file,
00:17
as well as custom properties for our company title block,
00:21
making it a DWT file, connecting the two together,
00:25
to create common data and perform a standard.
00:28
We are now at the configure the properties
00:30
of the templates in our workflow.
00:32
Let's flip over to Civil 3D and continue the process.
00:36
We are now in Civil 3D, and the first thing we are going to do
00:39
is open up the sheet set in our data set folder.
00:42
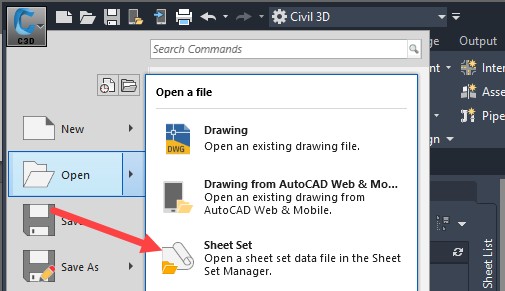
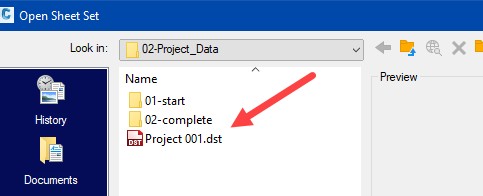
Click on the application menu, Open, Sheet Set, Project 001.
00:49
You'll notice that drawing
00:53
We are going to double-click to look at this.
00:56
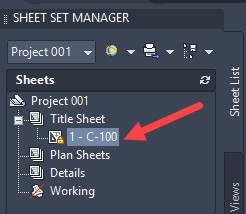
The first thing we want to do is configure our drawing template.
00:59
This is our drawing template.
01:01
This is our sheet set template.
01:04
So we're simply going to take a look
01:05
at the attributes in there.
01:07
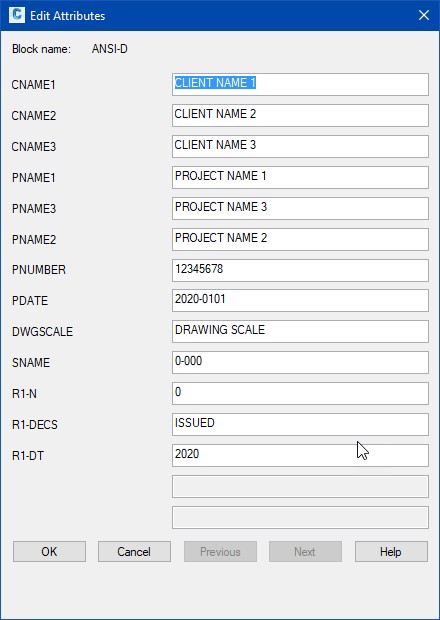
I'm going to type ATE at the command
01:09
prompt, select our drawing.
01:12
And you'll notice we have client name 1, 2, 3--
01:17
We have a project number.
01:18
This is where we can add additional attributes,
01:21
if necessary, to help configure.
01:23
We would simply select our title block,
01:25
right-click, go into the block editor,
01:28
and add our attributes as shown.
01:31
[INAUDIBLE] editor, save the changes,
01:35
and that is our double-check of our template.
01:37
You need to configure the text over here in your title block,
01:42
in order to connect the data.
01:44
Next up, we are going to save this, connect the data,
01:47
and then save the two.
01:48
Remembering the names of our title block--
01:51
I'm going to zoom in so we can see these here--
01:54
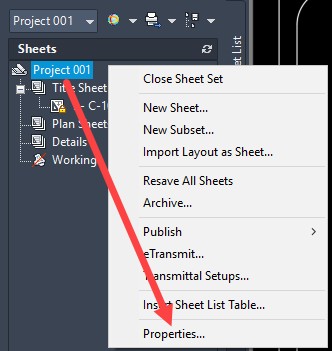
and we're going to right click project 001.
01:56
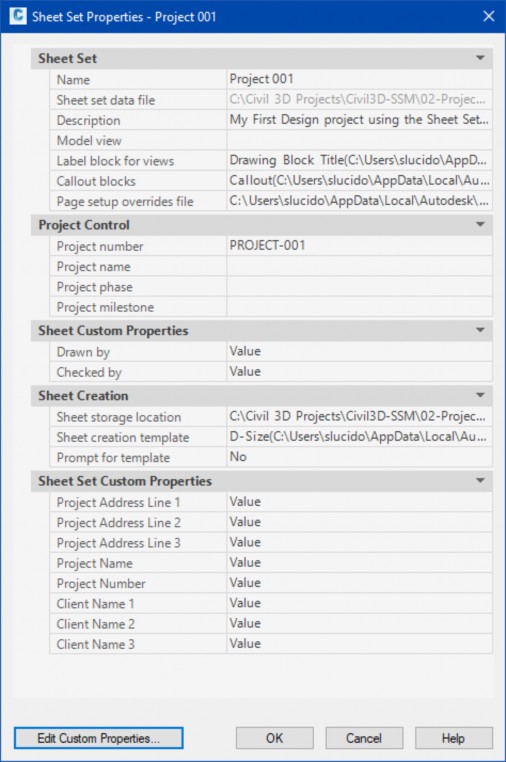
Now, we're going to configure the properties of our template,
01:60
aligning them with our title block.
02:03
We'll move this out.
02:04
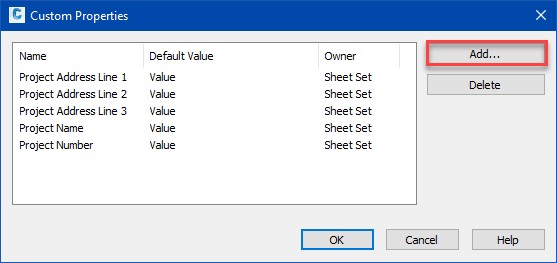
So we see we have a project address
02:06
line 1, 2 and 3, project name, project number and a client.
02:10
So let's add some sheet set values and sheet custom values.
02:14
I'm going to add custom properties,
02:16
and we're going to delete the client there.
02:19
And we are going to leave these as is for now.
02:22
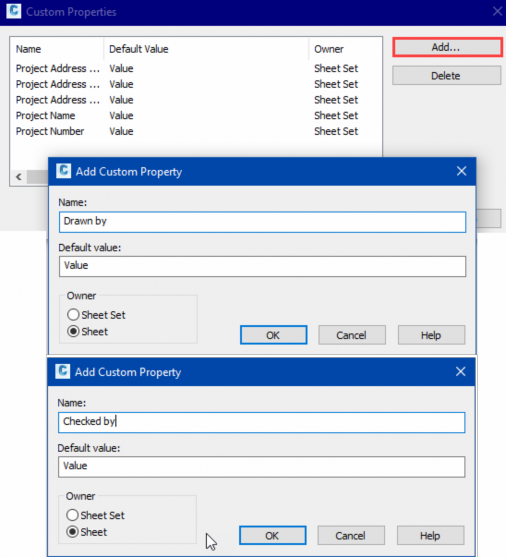
We are going to add a sheet custom property, which
02:25
would be called, Drawn by.
02:31
And the value is going to be just left blank for now.
02:35
And this is going to [? imply ?] to the sheet.
02:41
Going to add another sheet custom property,
02:43
and we're going to call it Checked by, leaving the value
02:53
We're going to leave these at value for now,
02:56
and then we'll populate those later.
02:57
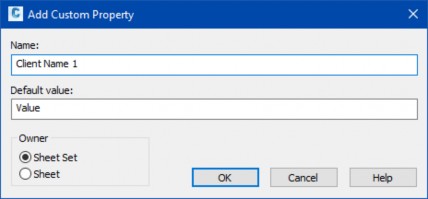
So now, we need client name 1, 2, and 3.
03:01
We're going to edit custom properties.
03:03
These are going to be sheet set custom properties.
03:06
So we're going to client name 1, sheet set.
03:12
Client name 2, and then client name 3.
03:26
Now, you can see we have some properties in here.
03:29
Our project numbers, project 001, our name,
03:31
these are project control data.
03:34
We have sheet custom data, and then our custom properties,
03:37
which will control our title block.
03:39
The only thing we do not have in here
03:40
are the revision ones, which you can complete on your own.
03:44
I'm going to select OK.
03:46
Now, we have configured both templates--
03:48
the drawing template and the sheet set template.
03:51
We must now configure those together,
03:53
linking them, connecting them to populate project data.
03:57
And then we will save our files.
03:59
Now that we have both templates, we
04:01
have a DST file and a DWG file with common data.
04:06
They are not connected yet.
04:08
But in the next lesson, we are going
04:09
to connect the two together, linking all that project
04:14
Then we will separate those into template folders
04:18
where you can connect the templates,
04:20
and then populate the common data, save to your files,
04:24
and use them on your current project.