& Construction

Integrated BIM tools, including Revit, AutoCAD, and Civil 3D
& Manufacturing

Professional CAD/CAM tools built on Inventor and AutoCAD

Integrated BIM tools, including Revit, AutoCAD, and Civil 3D

Professional CAD/CAM tools built on Inventor and AutoCAD
Any referenced datasets can be downloaded from "Module downloads" in the module overview.
Transcript
00:03
When working in InfoWater Pro UDF, you can run a simulation for a group of continuous sequences in the currently active flush zone.
00:13
Once you set hydrant and valve layers and select a zone, you can perform a batch run from the Flush Sequence Manager.
00:21
To begin, with InfoWater Pro initialized,
00:24
open a UDF model with a flush zone and at least one flush sequence already created within that zone.
00:31
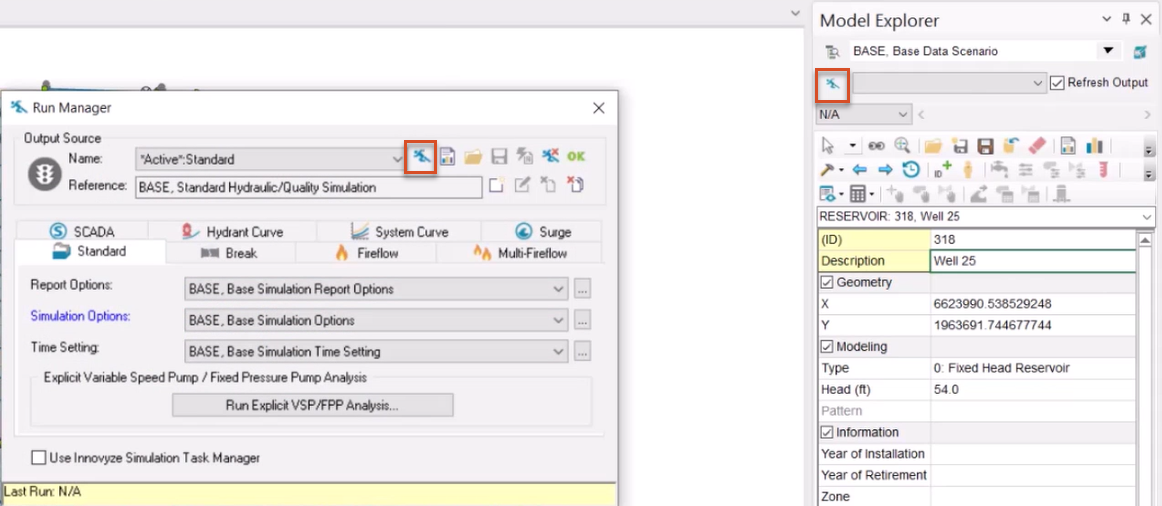
From the Model Explorer, click Run to open the Run Manager.
00:36
In the dialog, click Run to run a simulation and create output results for a base scenario.
00:43
When the simulation is complete, click OK to exit the Run Manager.
00:49
Now, check to make sure UDF layers are set.
00:52
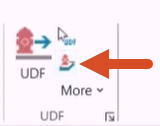
From the InfoWater Pro ribbon, UDF panel, click the Set UDF Layer button.
00:59
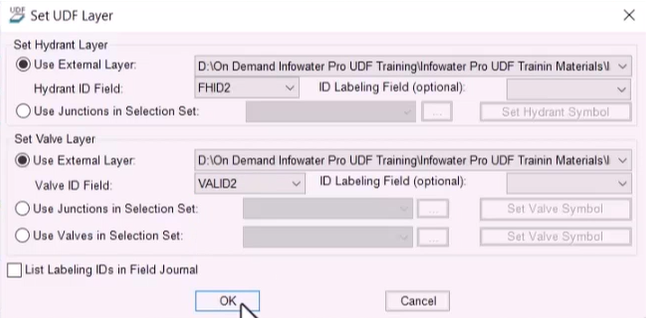
In the Set UDF Layer dialog, ensure that both the Set Hydrant Layer and Set Valve Layer group boxes
01:06
have the Use External Layer option enabled.
01:09
Also, make sure to select both a hydrant layer and a valve layer using the respective drop-downs.
01:16
From the InfoWater Pro ribbon, UDF panel, expand the More drop-down and pick Set Hydrant/Valve Symbols.
01:26
The map updates with hydrant and valve symbols.
01:30
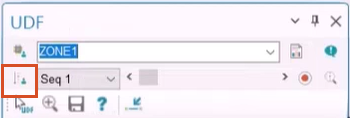
From the Model Explorer, open the UDF tab, expand the drop-down, and select a zone.
01:36
In this example, ZONE1 is selected.
01:40
Then, click Sequence Manager.
01:42
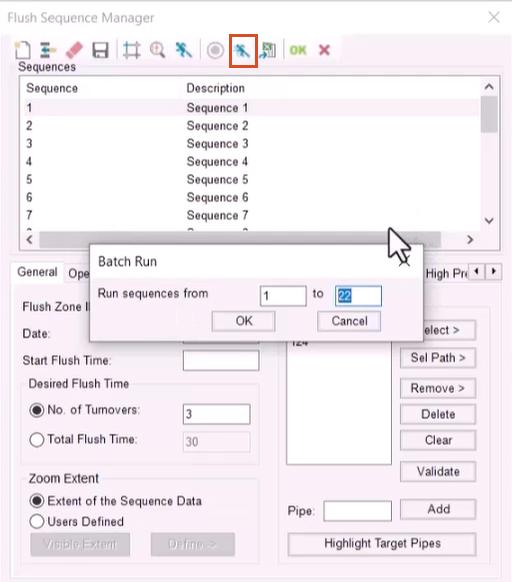
In the Flush Sequence Manager toolbar, click Batch Run.
01:47
In the Batch Run popup, enter the starting and ending sequence numbers for your batch run.
01:52
Here, sequences 1 to 22 are entered.
01:56
Click OK.
01:58
In the Message Board window, Message tab, status updates indicate which UDF sequence is being run.
02:06
When the batch run is complete, click OK to close the dialog.
Video transcript
00:03
When working in InfoWater Pro UDF, you can run a simulation for a group of continuous sequences in the currently active flush zone.
00:13
Once you set hydrant and valve layers and select a zone, you can perform a batch run from the Flush Sequence Manager.
00:21
To begin, with InfoWater Pro initialized,
00:24
open a UDF model with a flush zone and at least one flush sequence already created within that zone.
00:31
From the Model Explorer, click Run to open the Run Manager.
00:36
In the dialog, click Run to run a simulation and create output results for a base scenario.
00:43
When the simulation is complete, click OK to exit the Run Manager.
00:49
Now, check to make sure UDF layers are set.
00:52
From the InfoWater Pro ribbon, UDF panel, click the Set UDF Layer button.
00:59
In the Set UDF Layer dialog, ensure that both the Set Hydrant Layer and Set Valve Layer group boxes
01:06
have the Use External Layer option enabled.
01:09
Also, make sure to select both a hydrant layer and a valve layer using the respective drop-downs.
01:16
From the InfoWater Pro ribbon, UDF panel, expand the More drop-down and pick Set Hydrant/Valve Symbols.
01:26
The map updates with hydrant and valve symbols.
01:30
From the Model Explorer, open the UDF tab, expand the drop-down, and select a zone.
01:36
In this example, ZONE1 is selected.
01:40
Then, click Sequence Manager.
01:42
In the Flush Sequence Manager toolbar, click Batch Run.
01:47
In the Batch Run popup, enter the starting and ending sequence numbers for your batch run.
01:52
Here, sequences 1 to 22 are entered.
01:56
Click OK.
01:58
In the Message Board window, Message tab, status updates indicate which UDF sequence is being run.
02:06
When the batch run is complete, click OK to close the dialog.
When working in InfoWater Pro UDF, a simulation can be run for a group of continuous sequences in the currently active flush zone. Once hydrant and valve layers are set and a zone selected, a batch run can be performed from the Flush Sequence Manager.
Check to make sure UDF layers are set:
The map updates with hydrant and valve symbols.
Now, set up the batch run:
In the Message Board, status updates indicate which UDF sequence is being run.
How to buy
Privacy | Do not sell or share my personal information | Cookie preferences | Report noncompliance | Terms of use | Legal | © 2025 Autodesk Inc. All rights reserved
Sign in to start learning
Sign in for unlimited free access to all learning content.Save your progress
Take assessments
Receive personalized recommendations
May we collect and use your data?
Learn more about the Third Party Services we use and our Privacy Statement.May we collect and use your data to tailor your experience?
Explore the benefits of a customized experience by managing your privacy settings for this site or visit our Privacy Statement to learn more about your options.