Configuring hydrant testing using GMR
Configure a GMR for hydrant testing using the mapped CSV import function.
Tutorial resources
These downloadable resources will be used to complete this tutorial:
Step-by-step guide
In InfoWorks WS Pro, the Mapped CSV Import function can be used to populate a GMR configuration and simulate a hydrant testing exercise. In this tutorial, you create and configure a GMR to test hydrant flows of 5, 10, 15, 20, etc. l/s, at the time of day when the model predicts the minimum residual pressure. The goal is to ensure that each hydrant can provide the required fire flow when it is at the lowest pressure.
- In the Model Group, right-click the Run Group.
- Select New > Run.
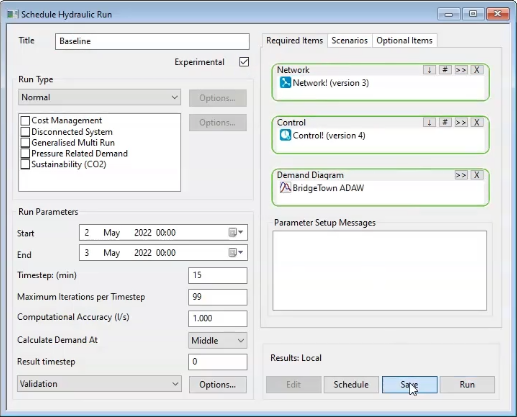
- In the Schedule Hydraulic Run dialog box, in the Title field, enter the name “Baseline”.
- Enable Experimental.
- From the Model Group, drag the Network into the Schedule Hydraulic Run dialog box and drop it into the Network group box. The Control and Demand Diagram boxes also populate.
- Click Run.
- In the Model Group, expand Baseline.
- Drag the Control simulation results and drop them into the GeoPlan.
- From the Model Group, double-click the Hydrant summary SQL.
- In the SQL: Hydrant summary window, select Run.
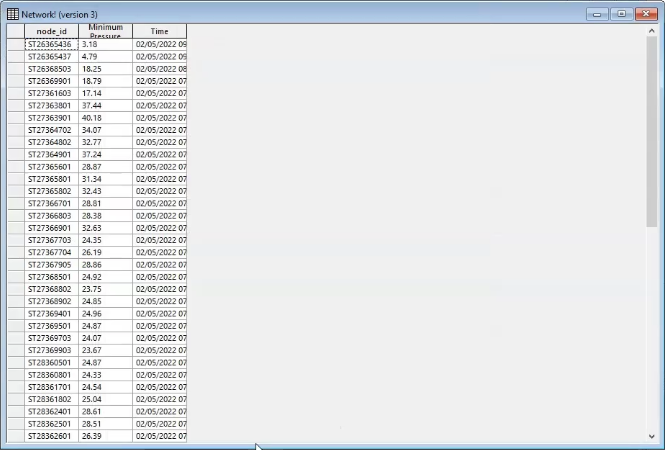
The SQL results open in a grid window, with a list of hydrants and the time at which each experiences the lowest pressure. Make sure this grid is kept open.
To create the new GMR Configuration:
- From the Model Group, right-click Generalised Multi Run Group.
- Select New > Generalised Multi Run Config.
- In the popup, enter the name “Hydrant Testing”.
- Click OK.
- In the Model Group, select Hydrant Testing to open the Generalised Multi Run Config dialog box, now renamed “Hydrant Testing”.
- Drag and drop the Hydrant selection list into the Hydrant Testing dialog box and drop it into the Selection List group box.
- Click Mapped CSV Import to upload the details from the SQL Results Grid.
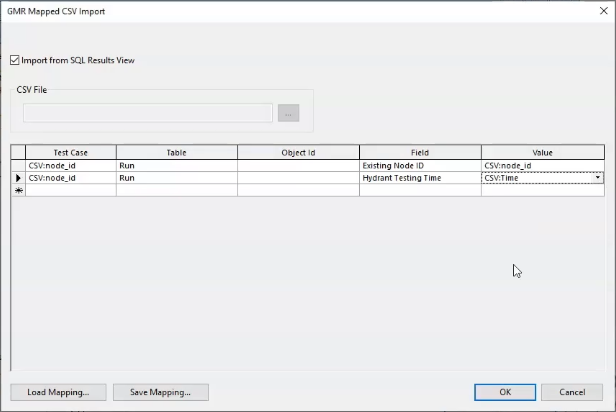
- In the GMR Mapped CSV Import dialog box, enable Import from SQL Results View.
- In the first row of the table, in the Test Case column, expand the drop-down and select CSV:node_id.
- In the Table column, select Run.
- In the Field column, select Existing Node ID.
- In the Value column, select CSV:node_id.
- In the second row of the table, in the Test Case column, select CSV:node_id.
- In the Table column, select Run.
- In the Field column, select Hydrant Testing Time.
- In the Value column, select CSV:Time.
- Click OK.
- Back in the Hydrant Testing dialog box, click the Results tab.
- For this example, select Keep summary report only.
- Click the Analysis tab.
- In the Results field list, select Available Fire Flow.
- Select Fully-open Hydrant Flow.
- Select Hydrant Testing Result.
- Select Maximum Fire Flow.
- Select Minimum Fire Flow.
- Select Pre-Test Demand.
- Select Pre-Test Pressure.
- Select Residual Pressure at Available Fire Flow.
- Select Residual Pressure at Fully-open Hydrant Flow.
- Select Residual Pressure at Maximum Fire Flow.
- Select Residual Pressure at Minimum Fire Flow.
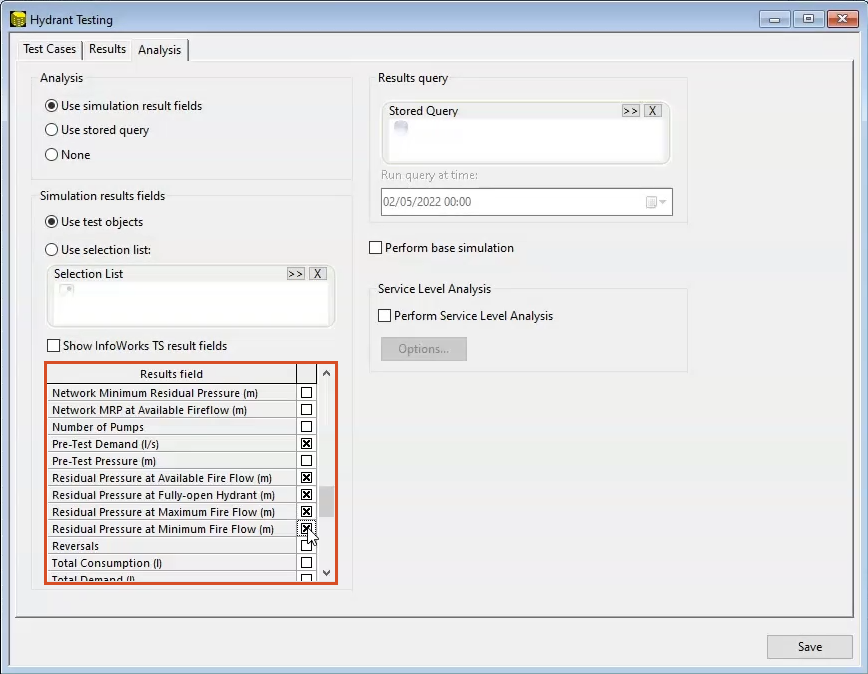
- Click Save to save the GMR Configuration.