00:03
In InfoWorks ICM, by default, commonly used toolbars are displayed and anchored at the top of the main window.
00:12
Based on the commands you use most, you can change which toolbars are visible, rearrange their locations,
00:19
and change their content.
00:21
You can even create a user-defined toolbar with the buttons you use most.
00:26
For example, if you frequently use the Grid windows drop-down to create new grid windows,
00:32
you can display the Modelling grid windows toolbar.
00:36
This allows you to create new grid windows with one click.
00:39
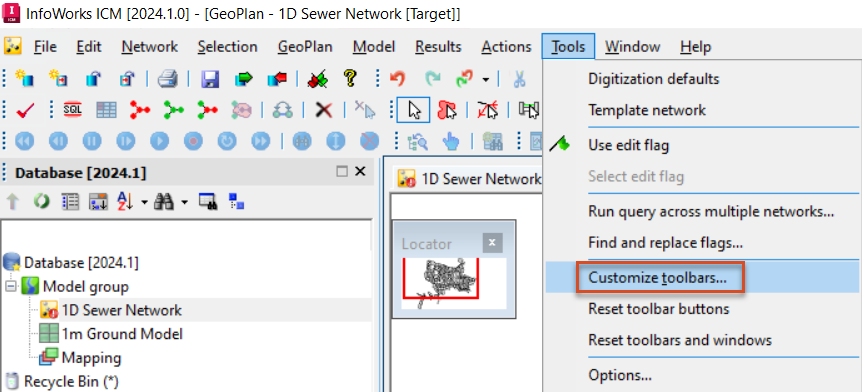
From the menu, select Tools > Customize toolbars.
00:45
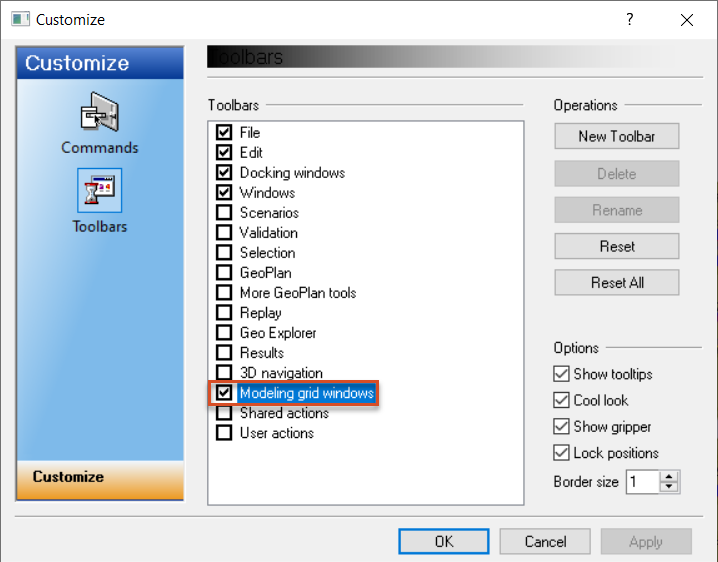
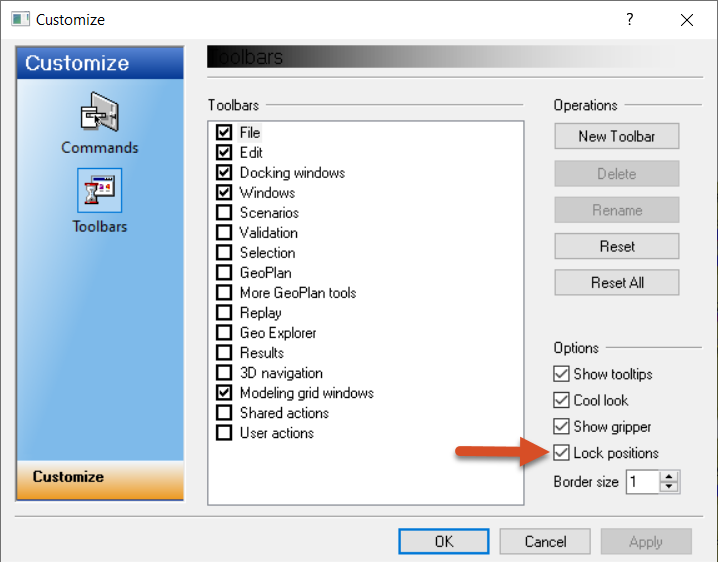
In the Customize dialog, on the Toolbars page, select Modelling grid windows, and then click OK.
00:53
Above the ICM window, the new toolbar appears, with separate buttons for each grid window type.
01:01
To quickly enable or disable a toolbar group, right click on anywhere on the toolbar and select the toolbar name.
01:11
To reposition this or any toolbar, click its gripper bar—the four “bullets” on the left edge—and drag the toolbar to a new position.
01:20
Dragging the toolbar to the center of the ICM window creates a floating toolbar,
01:26
while dragging a toolbar or floating toolbar to the side, bottom, or top of the ICM window docks it there.
01:34
You can customize any toolbar by adding or removing commands.
01:39
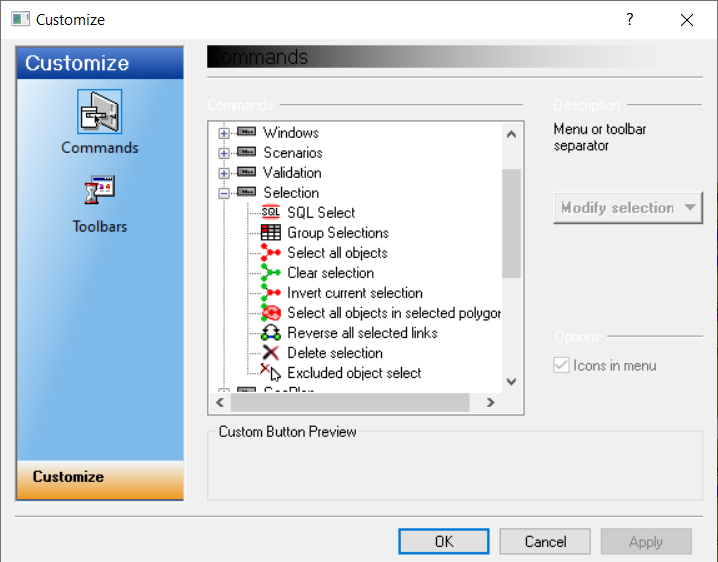
In the Customize dialog, select the Commands page.
01:43
To add a button to a toolbar, in the Commands box, locate the button.
01:48
If needed, click the plus (+) and minus (-) symbols to open and close toolbar groups until you find it.
01:56
Select the button, and then drag it out of the Customize dialog to the desired location on the toolbar.
02:03
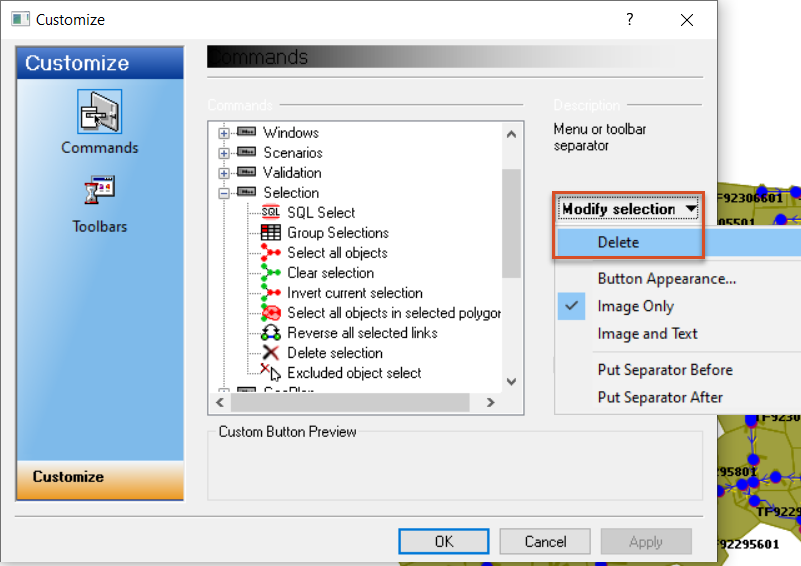
To remove a toolbar button, open the Customize dialog, and then, on the toolbar, select the unwanted button.
02:12
In the Customize dialog, click Modify Selection, select Delete, and then click OK.
02:20
You can also build a custom, user-defined toolbar.
02:25
In the Customize dialog, on the Toolbars page, click New Toolbar to create an empty floating toolbar.
02:34
Select the Commands page to add the buttons.
02:38
One at a time, from the Commands box, select a button, and then drag it from the dialog onto the new toolbar.
02:46
When you finish, either leave it floating or drag it to the top of the ICM main window to dock it there.
02:54
Once you are finished adjusting your toolbar it is a good idea to enable the Lock positions option to prevent them from moving.
03:02
InfoWorks ICM toolbars help you work smart by providing easy access to common commands.
03:09
Now, you can work even smarter by customizing these toolbars to match the commands you need and use most.