Creating selection lists with imported data
InfoWorks WS Pro accounts for the demand on water networks, which can vary over time. Learn how to calculate the water that is required by users, and how demand impacts the network both positively or negatively at a given point and time.
Tutorial resources
These downloadable resources will be used to complete this tutorial:
Step-by-step Guide
When using InfoWorks WS Pro, SQL is a flexible tool for importing and exporting data. In this example is a CSV containing a list of customers who have reported low water pressure. This example creates a selection list of these customers.
- In a file browser window, navigate to the folder containing the exercise data.
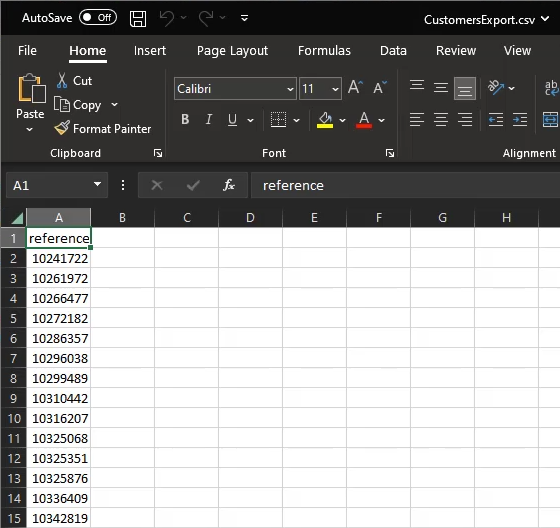
- In Notepad or a spreadsheet program like Microsoft Excel, open the Customers.csv file to check the structure.
The first value must be the name of the variable to be used; in this case, it is $customers. All values, or for this example, customer IDs, are separated by commas.

- Close the file.
To locate the full file path, which is necessary to load it in an SQL query:
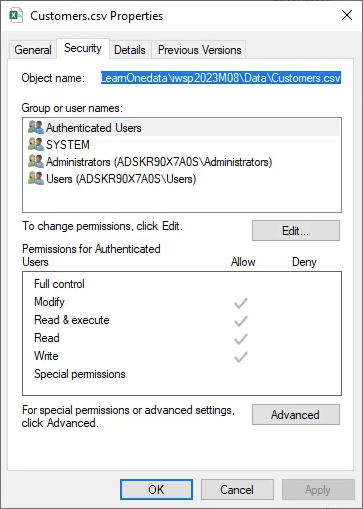
- In the file browser window, right-click Customers.csv and select Properties.
- On the Security tab, in the Object name field, select all the text.
- On your keyboard, press CTRL+C
- Click OK.
- From the Model Group window, drag-and-drop the BridgeNet network into the workspace to open the GeoPlan.
- In the Selection menu, pick SQL Select.

Your SQL query needs to load the list of customers, and then select any customers in that list.
- In the SQL dialog box, expand the Object Type drop-down and select Customer Point.
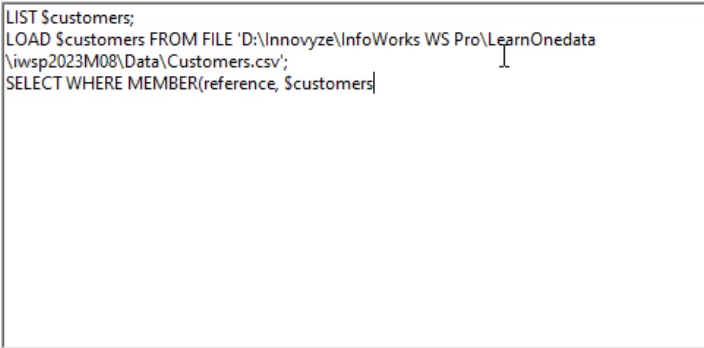
- In the text box, type: LIST $customers;
This defines the list variable you will load your CSV into. Remember that this must match the first value in your CSV.
- On your keyboard, press ENTER.
- Type: LOAD $customers FROM FILE ‘
- On your keyboard, press CTRL+V to paste the complete file path.
- Type another apostrophe (‘).
- Type a semicolon (;).
This loads your CSV into the list variable.
- Type: SELECT WHERE MEMBER(reference, $customers)
This will select any customer whose reference field is in your $customers list. Your syntax should match the image below:
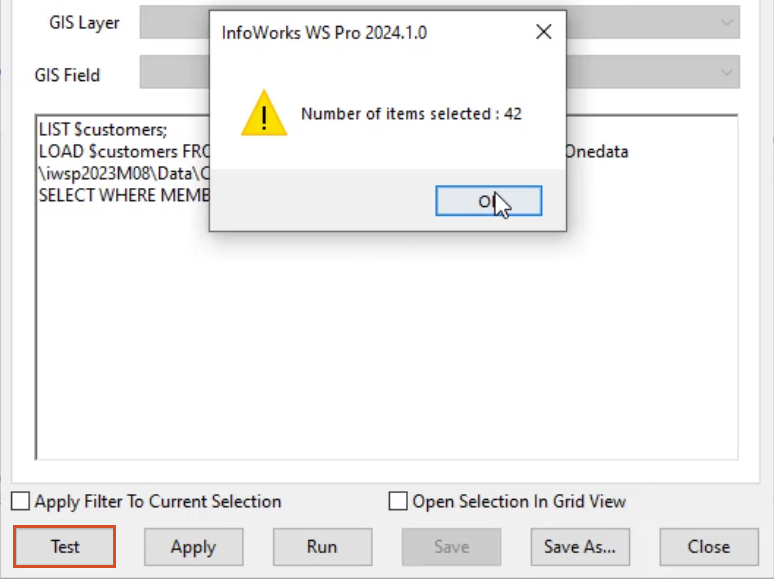
- Click Test to ensure the query syntax is correct.
- In the notification, click OK.
- Click Apply.
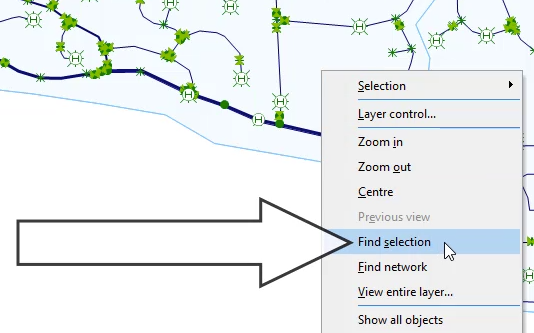
There should now be customers selected in the network. If the customers are not visible:
- Move the SQL dialog box to one side.
- Right click in the GeoPlan and select Find selection.
OR, to create a new one:
- Right-click the Selection Lists group.
- Select New > Selection List.
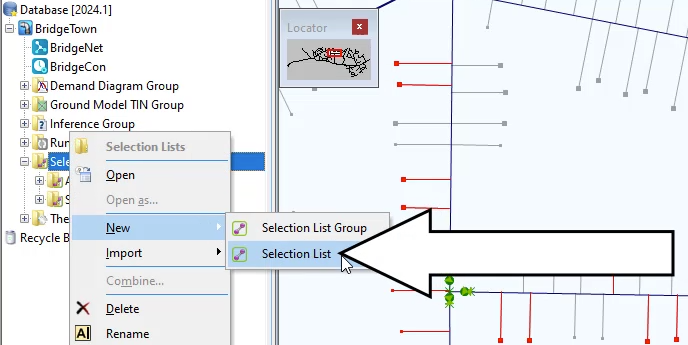
- Name the selection list “Customers”.
- Click OK.
To clear the current selection:
- On the Operations toolbar, click Clear Selection.
- From the Model Group window, drag-and-drop the Customers selection list into the GeoPlan to re-select the customers.

Now, repeat the process in reverse, and then export the affected customers:
- With the Customers still selected, in the Selection menu, pick SQL Select.
- In the SQL dialog box, expand the Object Type dropdown and select Customer Point.
- Enable Apply Filter to Current Selection.
- Type the following query: SELECT reference INTO FILE ‘
- On your keyboard, press CTRL+V to paste the file path to the CSV again.
Note: If needed, repeat Steps 4-7 to copy the full file path.
- Change the filename to CustomersExport.csv.
- At the end of the filename, type an apostrophe (‘).

- Click Test to make sure that the query syntax is correct.
- Click OK.
- Click Apply.
- Navigate to the data folder, where you will find a list of exported customer IDs.