00:03
The objective in transient control is to reduce the magnitude (and if possible, the frequency) of the pressure disturbance.
00:10
This means avoiding more sudden changes that will exacerbate the existing transient event.
00:16
Slowly opening and closing valves and slowly starting and stopping pumps can be effective in controlling transients.
00:23
Additionally, implementing certain devices in a network
00:27
can alleviate the effects of pressure waves by releasing and replenishing excess positive and negative pressure.
00:33
The optimal method to alleviate a surge varies depending on the situation.
00:37
In this example, a Closed Surge Tank is implemented.
00:41
To begin, open the network.
00:43
From the Model Group window, expand the TS Model group.
00:47
Open the TS Network and TS Control by double clicking TS Network, or by dragging it onto the main window.
00:54
Next, set the properties for the surge tank.
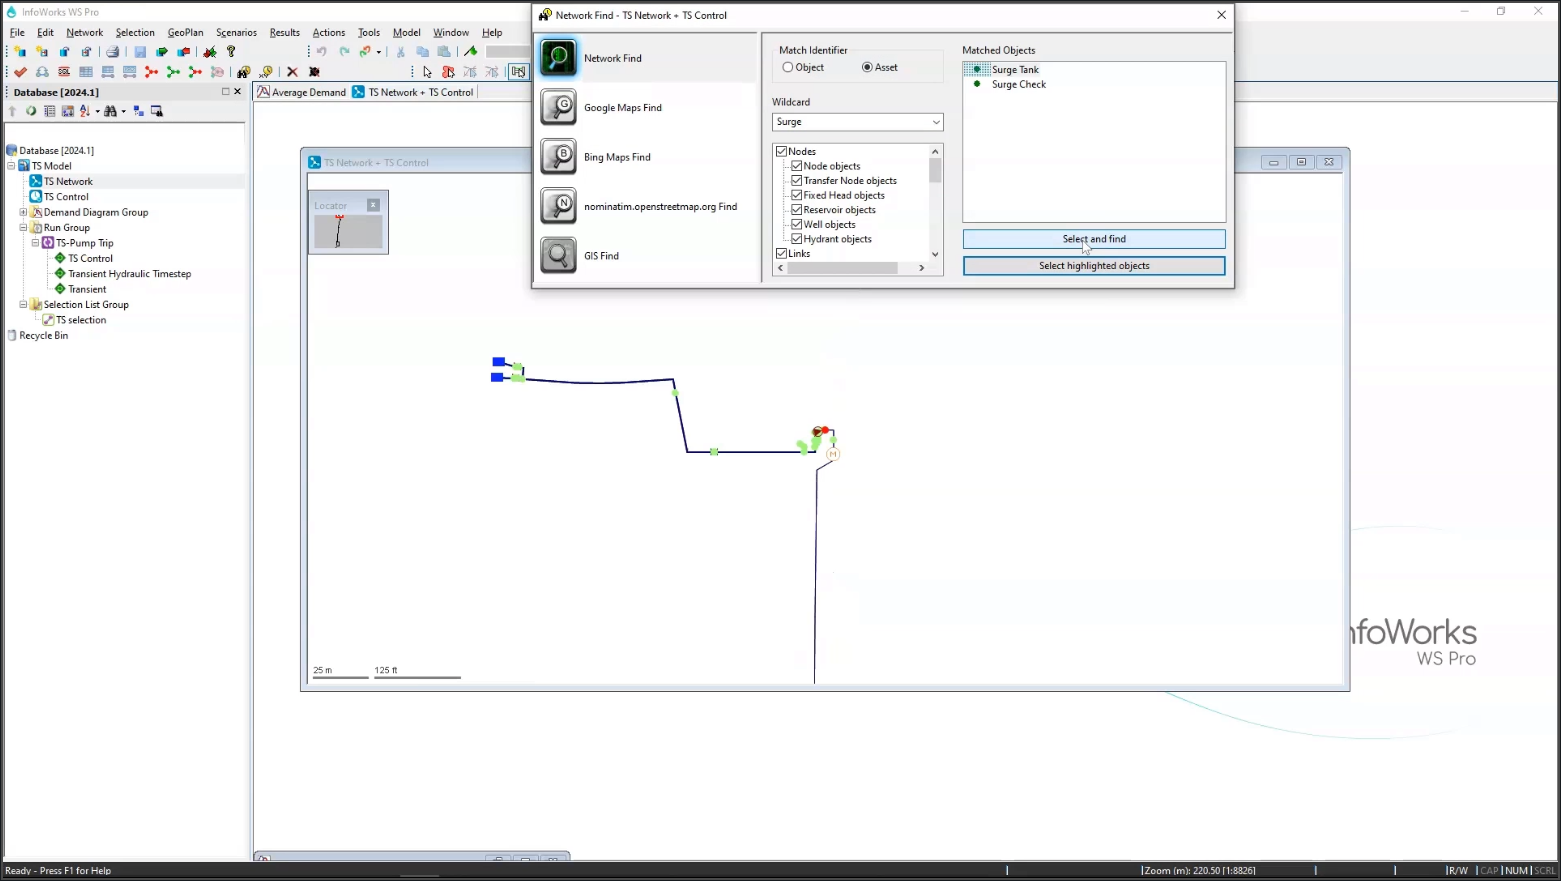
00:58
Use the Find Network Objects tool to locate the node with asset ID Surge Tank 1.
01:05
In the toolbar, click the Properties icon to open the Properties window for the node.
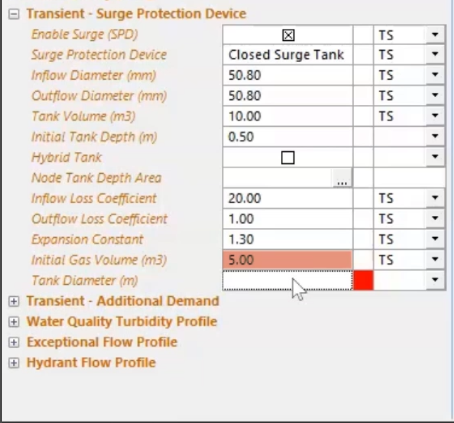
01:11
Scroll down to find Transient-Surge Protection Device
01:15
and click the plus sign (+) next to it to expand the Transient-Surge Protection Device Page.
01:20
Select the Enable Surge (SPD) checkbox.
01:23
InfoWorks TS allows for several different types of devices to be represented.
01:29
Expand the Surge Protection drop-down and select Closed Surge Tank.
01:34
Set the Inflow and Outflow Diameters to 50.8mm, set the Tank Volume to 10m3 and set the Initial Tank Depth to 0.5m.
01:45
To continue, set the Inflow Loss Coefficient to 20, the Outflow Loss Coefficient to 1, the Expansion Constant to 1.3,
01:54
the Initial Gas Volume to 5m, and the Tank Diameter to 1m.
01:59
Commit your changes to the database.
02:04
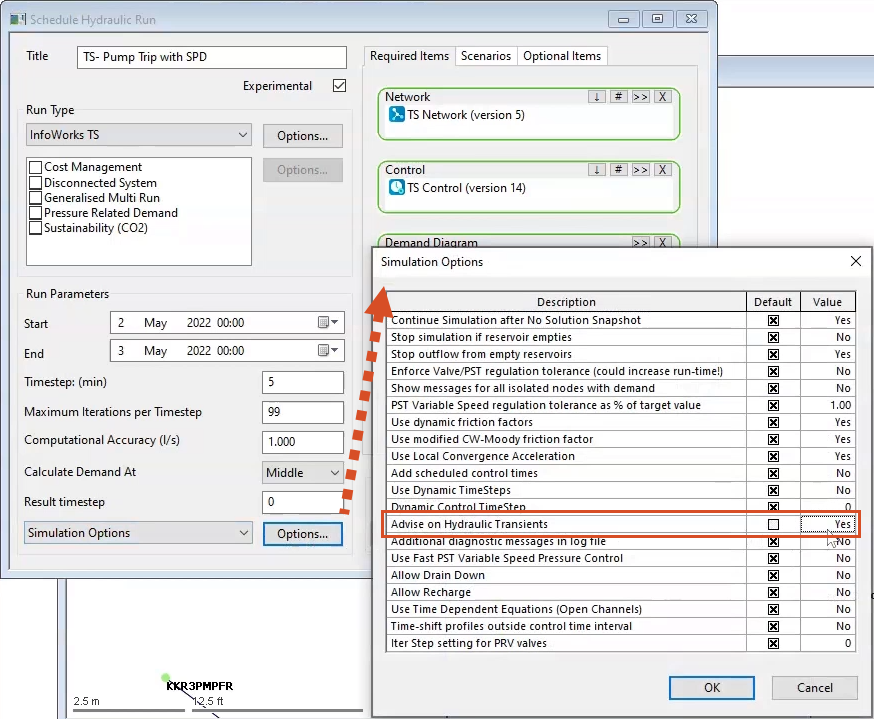
Now, create a new run.
02:06
In the Model Group, right-click Run Group and select New > Run.
02:11
In the Schedule Hydraulic Run dialog, in the Title field, name this run “TS-Pump Trip with SPD”.
02:21
From the Model Group window, drag InfoWorks TS Network, InfoWorks TS Control,
02:27
and Average Demand into the Network, Control, and Demand Diagram boxes.
02:33
Also, select the box next to Experimental.
02:37
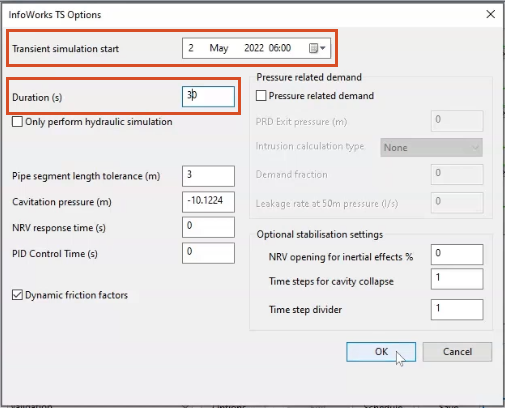
In the Run Type group box, expand the drop-down and select InfoWorks TS to open the InfoWorks TS Options dialog.
02:46
Change the Transient simulation start to 2 May 2022 at 06:00 and the Duration to 30 seconds.
02:54
Leave the remaining options as the defaults and click OK.
02:58
Back in the Schedule Hydraulic Run dialog, at the bottom of the Run Parameters group box,
03:04
expand the drop-down and select Simulation Options.
03:08
Click the Options button next to it to open the Simulation Options window.
03:14
In the Description column, locate the Advise on Hydraulic Transients option.
03:19
In the same row, in the Default column, deselect the checkbox so that the Value column says Yes.
03:26
Click OK to close the window.
03:29
Click Save, and then Run.
03:33
In the Model Group, double-click the TS-Pump Trip SPD Transient run to open it in the GeoPlan.
03:41
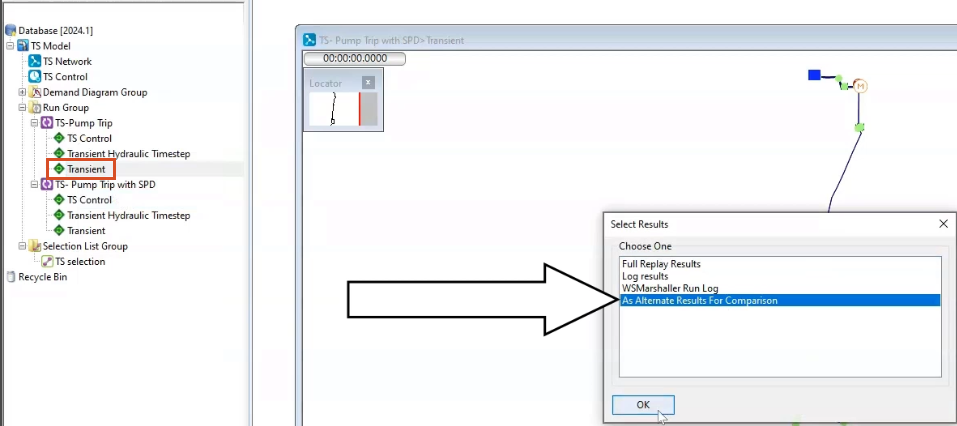
Right-click the TS-Pump Trip Transient run, and click Open As.
03:46
In the Select Results dialog, select Open as alternative results for comparison.
03:55
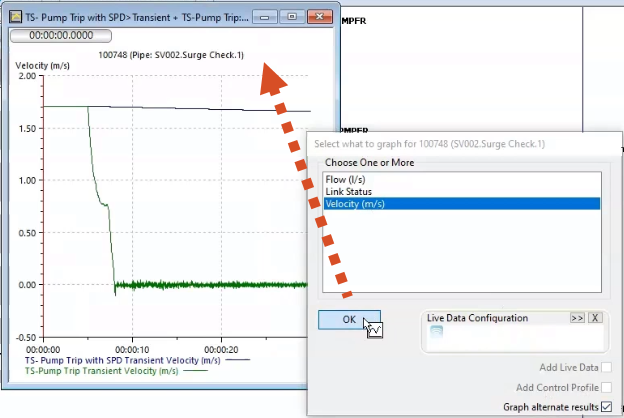
Use the Graph tool to graph the flow through pipe SV002.Surge Check.1,
04:00
and in the Select what to graph for dialog, enable Graph alternate results.
04:05
Although the flow is still flashy, there is still flow through this pipe when using the surge tank.
04:11
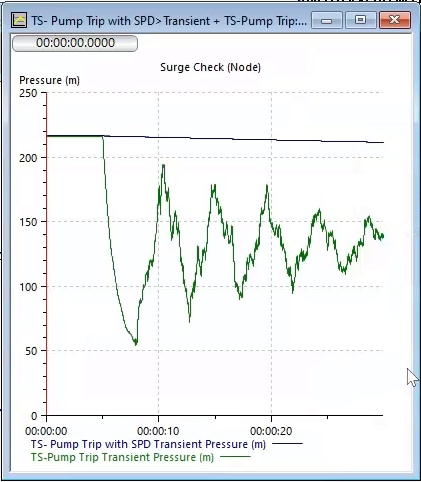
Now, graph the pressure through the Surge Check node.
04:14
Notice that the surge protection device significantly dampens the transient.